KinderGals: Search results for happy new year

Search This Blog

Showing posts sorted by date for query happy new year. Sort by relevance Show all posts

Monday, June 12, 2017

Math Games for the WHOLE Year!

Are you trying to figure out how to run math centers, pull small group, and keep everyone busy and happy all at the same time?  If you are, you aren't alone.  We are all seeking new ways and ideas to manage it all! One thing I do that I think helps is the way I develop the math games I use during centers. This post shares my thoughts and ideas about math games.
Here's the biggest problem, kids don't know how to play the games in the centers! That means they are interrupting your small group for guidance, or they are finding "creative" ways to entertain themselves---neither of which I want! So here's my plan...develop some math games that can easily be used ALL year simply by changing the dice, cards, and clip art! Then, once I have taught the game, the children can play it in centers and think they are playing a new game.
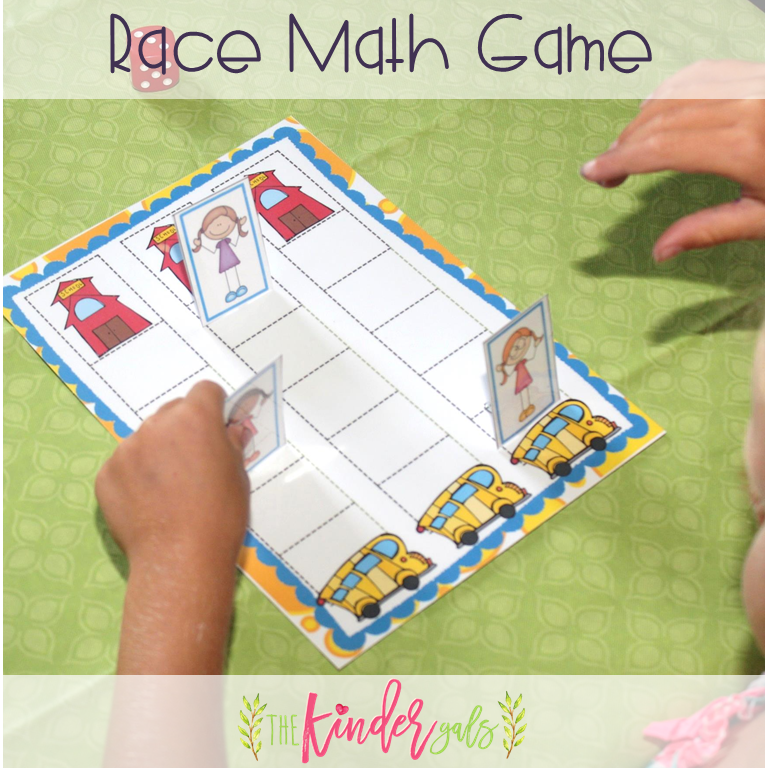
For example, this Racing Math Game is perfect! Here's how they play:
  • Create a game board with 3 columns.
  • Make 3 game pieces. I made mine stand up by creating a stand with a paper clip.
  • Invite the children to roll a dice.
  • They move the pieces towards the finish line.
  • The object is to get all three pieces to the end.
  • The children may move one piece all of the moves, or they may split the move between the pieces.
  • As the year progresses, invite the children to record the number sentences to represent their moves.
Once I teach the game during the first few weeks, the children can now play this game over and over using new game boards. All the time is spent practicing the standard, not learning the rules to yet another game!
Who has more is a perfect game to use with any deck of cards. I created this deck for my back to school unit.  Here's how you play:
  • Create a game board with a more and less spinner and a more and less section.
  • Put the cards in a pile, face down.
  • Invite two children to draw a card.
  • The children compare for more and less and place their card on the game board in either the more or less section.
  • The child with less, spins the spinner.
  • If it lands on less, they get both of the cards.
  • If it lands on more, their partner gets both of the cards.
  • This teaches kids that more isn't always the winner!
As the year progresses, the rules for playing the game stays the same.  However, you could have kids turn over two cards, add them together, and compare the sum. You could also have the kids write the numerals to represent the sets. The game stays the same, only the standard is changing!
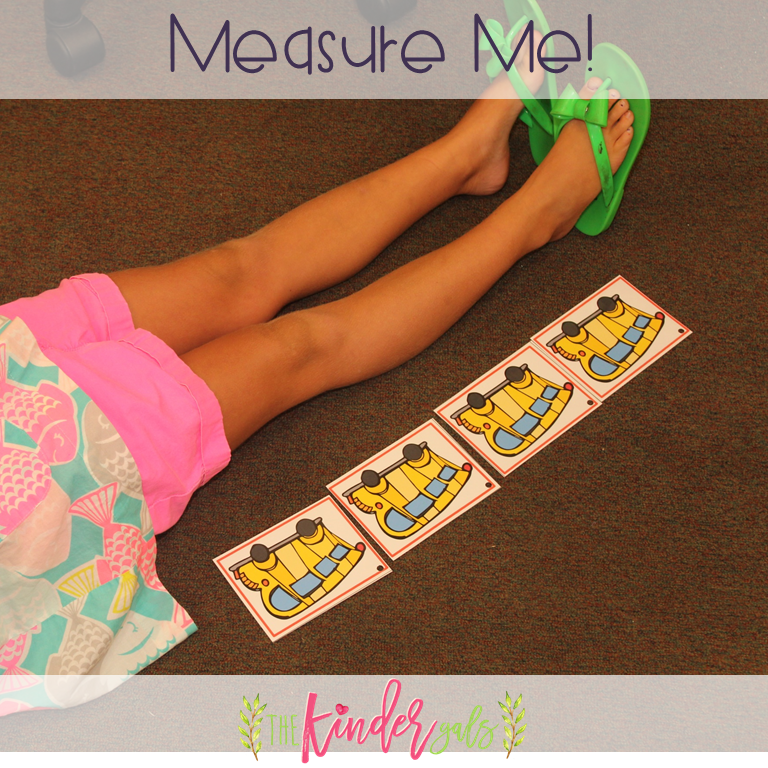
Children love this measurement game! Here's how they play:
Each child needs a partner.
One child uses the clip art pictures to measure how tall their partner is.
Then, they swap.
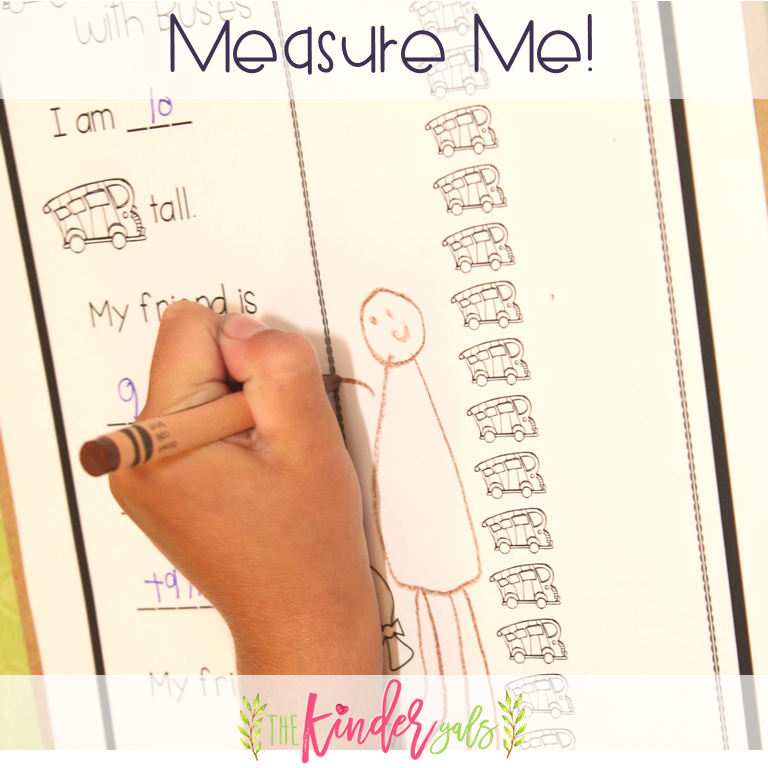
On the recording page, they draw a picture of themselves and their partner to show how many buses it took to measure each of them. Then, they fill in the sentences to answer the questions.
As the year progresses, the rules---once again--stay the same. I only change the sizes of the clip art nonstandard measurement!
This game is so simple, the kids catch on really quickly. Here's how you play:
  • Create a game board by making one long strip of clip art.
  • Make a game piece. I made mine stand up with a paper clip.
  • One child sits at each end of the long strip.
  • The first child rolls the dice.
  • He move the game piece that many spaces towards himself.
  • The second child rolls the dice.
  • He moves the SAME game piece that many spaces towards himself.
  • It is the same game piece that is moving back and forth on the game board.
Throughout the year, not only do I change the clip art, I change the dice (or what they do with the dice.) I could give them a numeral dice, and they recognize the numeral and move that many spaces. I could give them a dot dice, they either subitize or count the dots and move that many spaces. I could give them two dice, they roll the dice, add them together and move that many spaces.  Just by changing the dice you are changing the standard, BUT no more time is wasted teaching yet another game!
This game is a crowd pleaser! Here's how you play:
  • Create a number line. Mine is 1-20, but you can make it 1-10 or 1-30! (Or really whatever you want!)
  • Collect little trinkets to place on each of the numerals. I use clip art pictures.
  • Make a game piece. I made mine stand up with a paper clip.
  • Invite the children to roll the dice.
  • They move that many spaces down the number line and remove the trinket on the number where they land.
  • Next, they roll again.  Starting from where they are, they can either move forward (add) or backwards (subtract) on the number line.
  • The object of  the game is to remove all of the trinkets from the number line.
Here's the cool thing---as they play this game throughout the year, they become much more strategic with their moves! A great hands on experience with probability and statistics! Scroll to the bottom to snag up a Back to School Number Line Mystery Game for Free.
https://www.teacherspayteachers.com/Product/Math-Games-Mega-Bundle-LIMITED-TIME-3198121
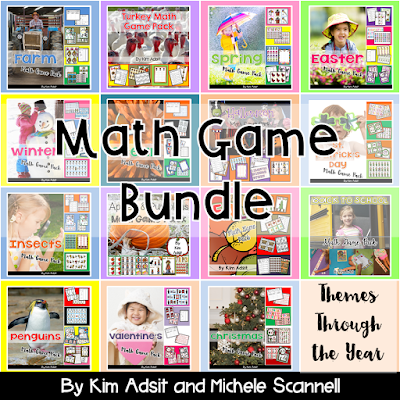
Here is a bundle of all of the Math Game Packs.  Not every game is in every pack, but the games are repeated throughout the year. For two days, and two days only, this bundle is GREATLY reduced! It is normally $75, but  is on sale for $35 for 2 days. This is a better bargain than you will get  with a tpt site wide sale! 


Pin It!

Tuesday, May 30, 2017

Developing STEM and Literacy in the Block Center

How long have you been teaching? Have you been teaching long enough to see things "cycle"?  When I first started teaching, kindergarten revolved around play, recess, and snack. Over the years we have moved to the much more academic side of kindergarten. But isn't there a happy medium? Isn't there a way that we can validate learning through play?  With the new emphasis on STEM, many kindergarten classes are once again pulling out the blocks! Yeah for them!  This post shares ideas on how to make block play meaningful as we develop a generation of critical thinkers!
Here are 4 different ways to develop literacy and STEM in the block center.

Word Cards

 During the year, we change the theme in our block center depending on what we are learning in our science and social studies curriculum. For example, if we are doing a unit on animals, than I want to "prop up" my block center with plastic animals, animal supplies, habitat materials, etc.  During a recent unit on transportation, we stocked up the block center with all things vehicles!  The kids loved building roads, creating maps, etc. To develop that literacy connection, I make a set of word cards to match common vehicles. The kids can use the cards for labeling, sorting, or for other ideas they generate themselves.
Be sure and read to the bottom where you can snag this file of word cards for free.

STEM Task Cards

Another fun way to develop critical thinkers in the block center, is through STEM challenge cards. We created a variety of cards that would require the kids to use to blocks to solve a problem. In this case, the children used the magnetic blocks to build a barn. They chose the magnetic blocks because one child said it would be easy to build a door to keep the animals in!
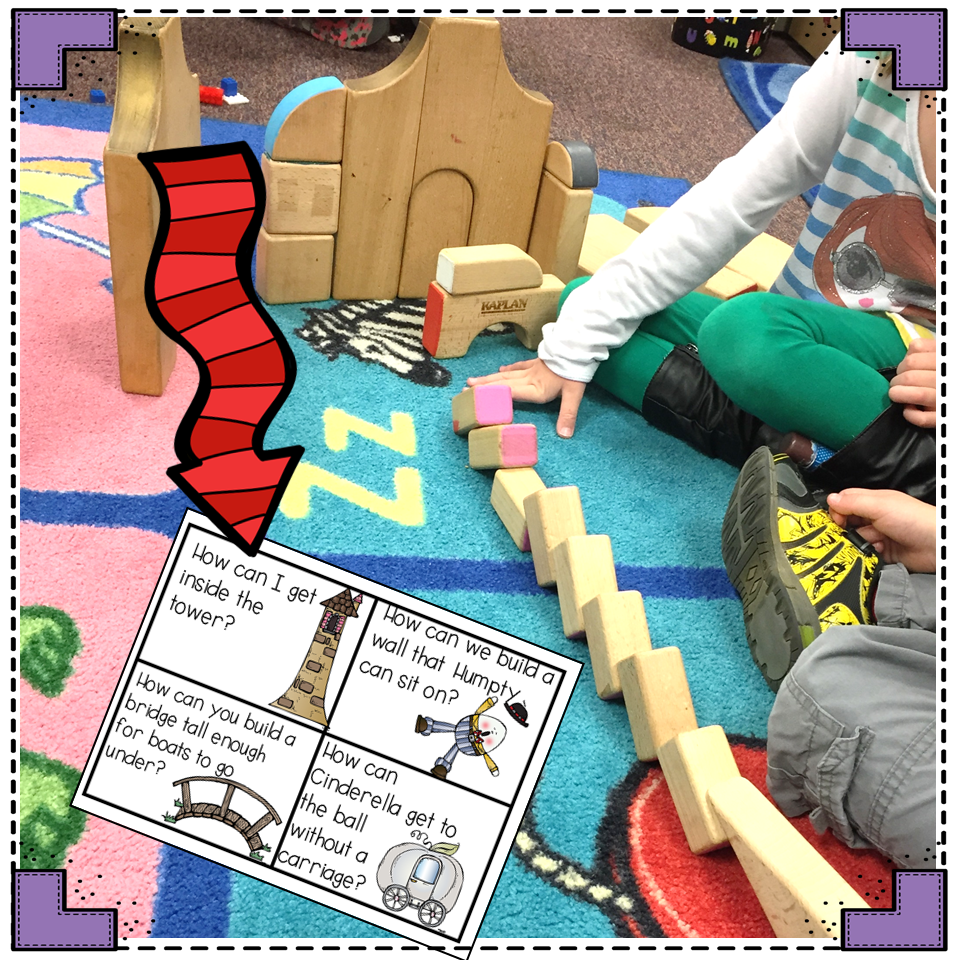
During a unit on transportation, we added this task card that required the children to build a bridge for the boat to travel under. The next week, we left the same card, but added a larger boat. This required the kids to rethink their engineering plan!
During our fairy tale unit, we added this card. It requires the children to figure out how to get inside the tower.  As you can see, the children's plan failed.  That's perfect! Children need to see that not every idea is going to give them the results they expected. They learn to redesign and rethink their plan.  Don't jump in! True understanding is just past frustration. It's okay for them to struggle!
Be sure and scroll to the bottom where you can snag these task cards for free!

Brainstorming Card

Sometimes children struggle with "what can I build?" Do you ever see the blocks just scattered around on the floor? Or children using the blocks in an undesirable manner? Ever ask yourself why? I think part of it was my fault. This kids didn't know what to do with the blocks. We MUST spend time conducting mini lessons and small group lessons on ways to use the blocks.  One thing we did was to make a list of all the things we could build with our blocks. Feel free to make more lists as the year goes on!
These boys are building a veterinarian office with spaces for the different sizes of pets!
This guy is building an insect habitat following our recent trip to the Atlanta Zoo.
These girls are using the blocks to build a robot!
To snag this brainstorming card, scroll to the bottom for the free file.

Procedural Writing

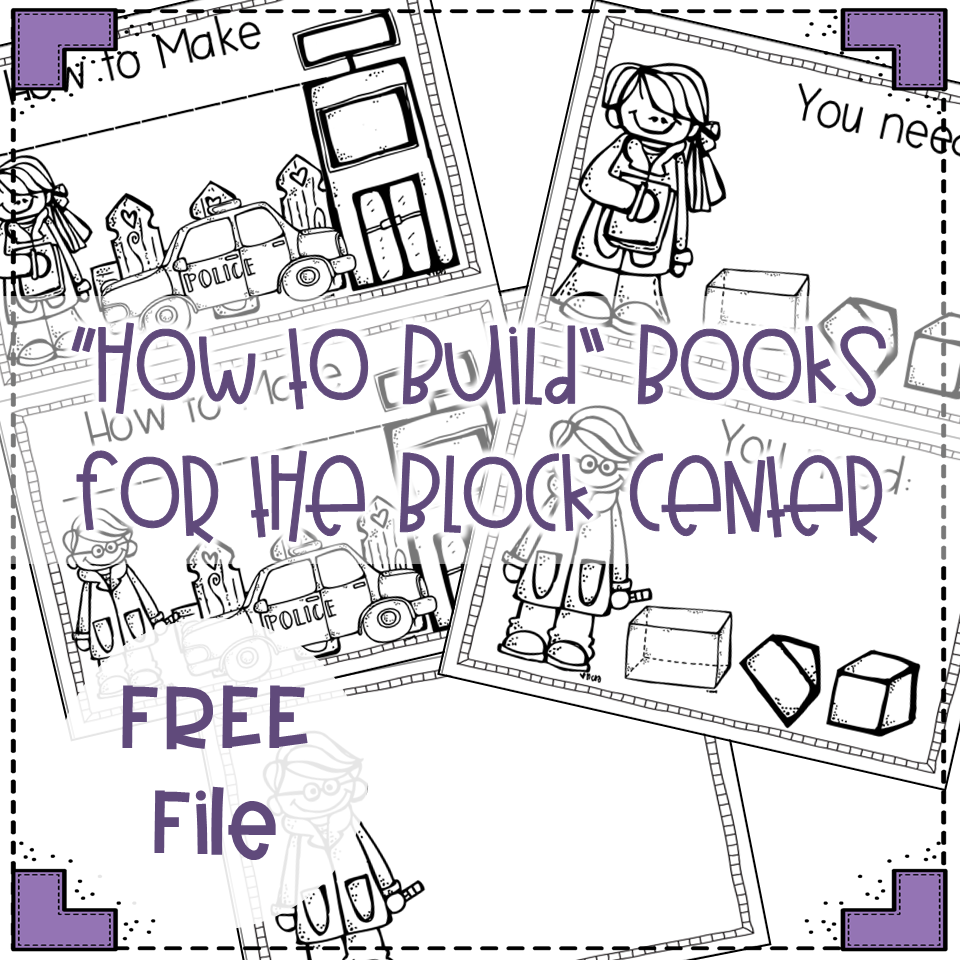
The block center is also a great place to develop procedural writing!  This guy built a tower. Then, we worked together to get his steps in writing. This was early in the year, so I was taking dictation.  As the children progress as writers, they become more independent in this task and tackle the writing independently.  After I took his dictation, he drew pictures to match each step.
This How To Booklet is also included in the free file below!  Be sure and grab this freebee to "prop up" your block center! Can't wait to hear how it goes for you!


Pin It!

Wednesday, August 31, 2016

Writer's Workshop: All Kids Can Write

When I am at a conference and I ask teachers, "Can ALL kids write?", I get some who say 'yes' and some who say 'no'. Which is the right answer? The way we answer the question depends on our own schema--what do we think writing IS? If we think writing is putting letters, words or even sentences down on paper, then no, most young children can not write. But, if we say writing is  the way we convey meaning on a piece of paper, then yes, all kids can write!
Here is my thinking:
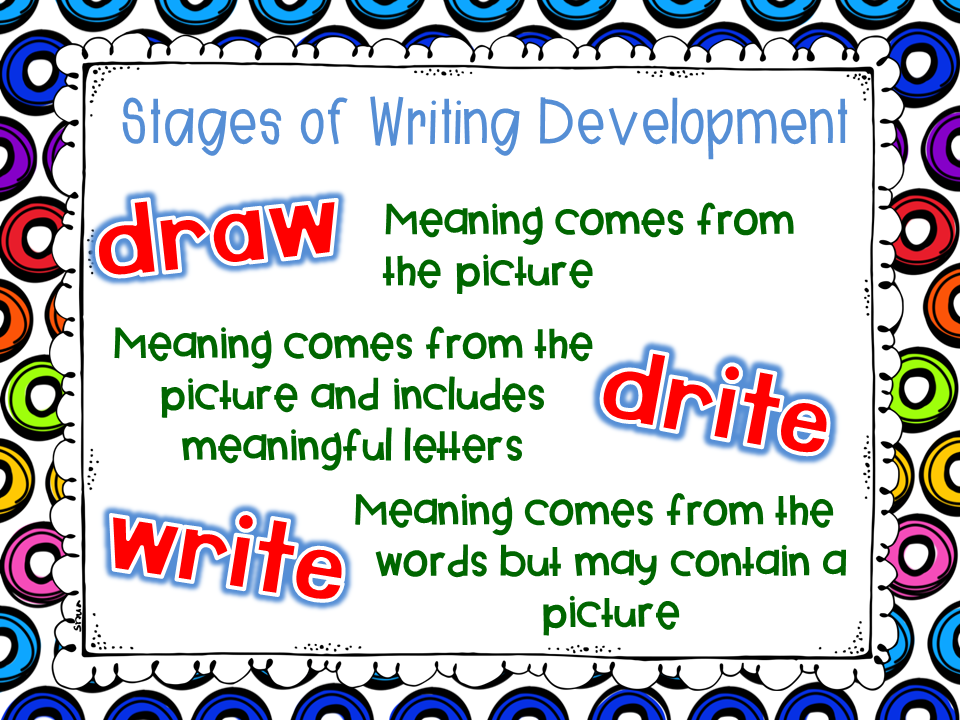
Children convey meaning in one of three ways:
  • They can draw a picture and all of the meaning comes from the picture. This includes the scribbles that the child says, this is my house!
  • They can draw a picture and use meaningful letters to label things in their picture. This is when the child puts an H by their house.
  • They can draw a picture and convey a complete thought their text.  (Non-kindergarten teachers probably couldn't read this! haha) This is when the child writes, ILMIHOS. (I love my house.)
We teach writing through writer's workshop. Writer's workshop is when we teach kids the craft of writing. You could say it like this, "In writer's workshop kids learn to write. At other times of the day (math, centers, science, social studies), kids write to learn! Writer's Workshop is the time we teach kids what writer's do, what it looks like to be a writer.
The structure of the workshop is: mini lesson, application, and share.  During the 10 minute mini lesson, the teacher uses this format:
  • Connect: "Remember yesterday when we..." This is where you remind the children what you did yesterday.
  • Teach: "Today I am going to show you...  Let me show you what I mean." This is where you tell the children the new thing you are going to teach them. Then, you model by sharing your thinking and showing the children what it looks like when a writer does this new thing.
  • Active Engagement: "Now, let me see you try." This is where, right there on the rug, the children practice this new thing writer's do.
  • Link: "Remember boys and girls, today and everyday, good writers..." This is where we remind them of what we just learned.
This is the anchor chart that we use to teach kids that ALL kids can write.  To use this as an anchor chart, cover it with black paper. As you teach each lesson, lower the black paper to reveal that part of the chart.
This is my friend Amanda. She taught 5th grade for LOTS of years before finally making that move to kindergarten! This is her first year in K, and she is fabulous! I taught her daughter in kindergarten, so, when Amanda made the move to K, she called me and invite me to come to her room. Yesterday, she tackled the lesson on "Writer's can tell their story by drawing a picture." She modeled drawing a picture from her daughter's birthday party that had taken place over the weekend. She then had children share ideas (active engagement) of stories they could write by drawing a picture.
Now it was time to send the kids out to write.  During application time, each child is working. As the year progresses and you do  mini lessons, some children will be able to apply the mini lesson while others may not have reached that point and others are beyond that point. It is the easiest way to differentiate your instruction!
Here are some examples of writing from her kids yesterday.  As I was walking around, I asked them, "What is your story?"  That seemed to get a better response than if I said, "Tell me about your picture." I should have written down what they said, but I didn't. I can't remember their exact words, but they each told me great stories.

As I approached this boy, he had not started working. I asked him what story was he going to tell with his picture, to which he replied, "I don't have a story."  When I asked him about his weekend, he told me all about going to his grandma's. I said, "I think you have a great story." He got right to work! We want kids to see that their stories are the everyday things that happen in their lives. Sometimes they are big things like parties, but sometimes they are simple things like riding a bike or playing a game with siblings.
Instead of moving on to "Writers can write letters.", we begin teaching kids just how to brainstorm all of those everyday simple things.  While we are doing this series of lessons, the kids will continue to draw pictures to tell their stories.  You may have some who are ready to label pictures before you get to that mini lessons. Feel free to conference with those children about labeling during this application time.
On the yellow anchor chart above, you brainstorm your ideas and write them on post it notes and add them to your chart. Or, you can do like Megan is doing and write them right onto a piece of chart paper.  It takes us 6 days to cover this chart!!!!  Here's the sequence:
Day one talk about favorite people.
Day two make a list of favorite people.
Day three talk about favorite things.
Day four...
During the active engagement part of the mini lesson what are the children doing? They do what ever you modeled. On the days that you talk about your favorite people, they can turn and talk to their partner about their favorite people. On the days that you make a list of your favorite people, they make a list of their favorite people.
These three samples were all from the same day in my kindergarten class.  I love how different they are. Each child is at a different stage in their ability to deal with actual text, but they ALL mastered the concept of making a list of favorites. (Can you read it?) 
In Megan's room, she places sheet protectors in the prongs of the writing folder. Then, the children can place their brainstorming charts right inside of those protectors. I love this. When she moves to another genre of writing, she can invite the children to remove those brainstorming charts and add new charts to match the new genre! Genius!
After finishing that sequence of lessons, we learn that good writers are always adding to their list of ideas.  I made these simple charts that we can use to help us generate new ideas we might add to our lists. You may wan to copy the charts in color and place just a few in each area.
 Or, like Megan, you can photocopy them in black and white and have the children add them to their page protectors.
So what is the answer to the question, "Can all kids write?"  ABSOLUTELY! Happy Writing!
The anchor charts, list papers, and charts of favorites are in this unit.
https://www.teacherspayteachers.com/Product/Writers-Workshop-Units-1-3-I-Can-Write-by-Kim-Adsit-aligned-with-Common-Core-865250
Or in this bundle:
https://www.teacherspayteachers.com/Product/Writers-Workshop-Building-Writers-by-Kim-Adsit-aligned-with-Common-Core-1306556


Pin It!

Sunday, August 21, 2016

Tackling Transitions: Five Easy Steps to Tame Your Transitions

While many teachers have already started school, the rest are just a few weeks behind those ever important first few weeks of school. As we start a new year, one question we need to ask is, "What is important about those first few weeks?" My principal once told me, "Get them here, get them fed, and get them home!"
But, in the classroom establishing routines and procedures becomes our number one important task! As my friend Donna says, "You can't teach a class you can't manage!" Here are 5 Easy Steps that we use to Tame Our Transitions!
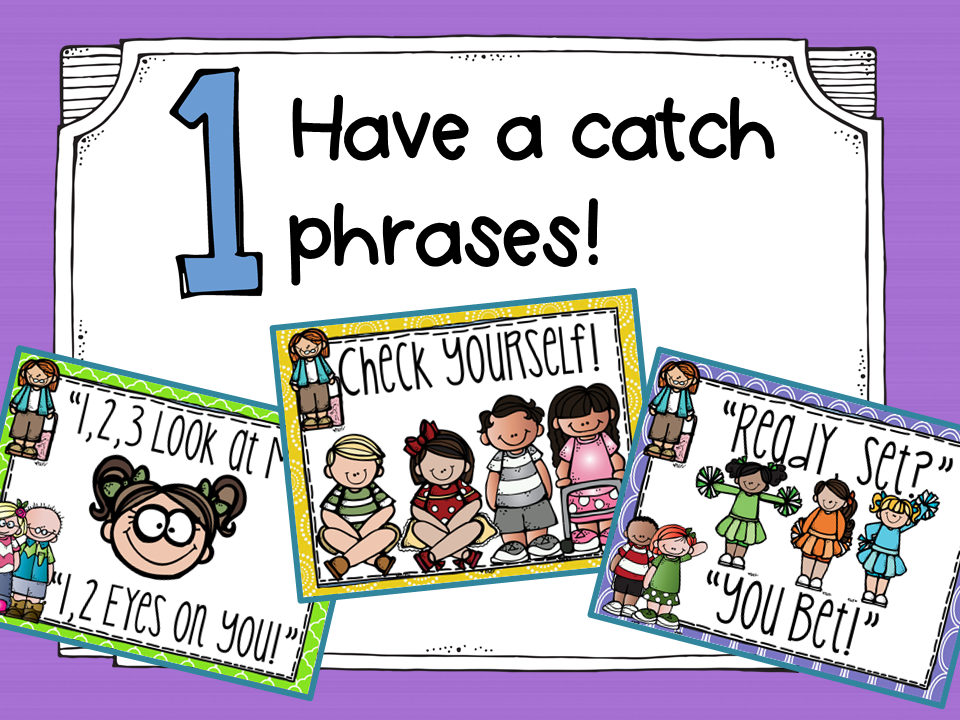
The first thing is to develop catch phrases. These are phrases that you use when you want a certain reaction. ***These phrases are most successful with repeated practice during those first few weeks. Practice using them at random times, reminding the children at each time the expectation. Notice children who are doing the right thing and tell the other children what they are doing correctly!

Attention Getting Phrases:

Whenever I say "1,2,3 Look at me!", my children respond with "1,2 Eyes on you." This is my signal for getting their attention regardless as to where we are or what we are doing.  It is important to be consistent and to stick to one phrase. Using many attention getting phrases will confuse your children and not get you the results you want!

Reminder Phrases:

Reminder Phrases are a great way to remind the children in a non-confrontational way of the expected behavior. I learned this one from my friend Mary, a first grade teacher. One day in the hall, I heard her tell her children "Check Yourself." All of a sudden they all returned to the line and assumed the correct posture for moving down the hall.  Wow! I am so stealing that idea!  I use it for more than hallway behavior. If I am reading a story and I see kids moving around, I can just say "check yourself."  During those first few weeks of school we have practiced what it looks like to sit on the carpet during story time, so  when I say those magic words, the children quickly get back on their square with their hands and feet in the proper places. 

Get Ready Phrases:

I wanted to have a way to get the children ready to move to the hallway. Catch phrases trigger the brain in a much quicker fashion than when we are nagging or telling the children over and over what we want.  To get ready for the hall, I say "ready set" and they say back "you bet".  They know this means to get their bodies and mouths ready for the hallway.
Another way to Tame Your Transitions is to use non-verbal reminders.  Ever catch yourself nagging? Sounding like Charlie Brown's teacher? I'm sure we have all found ourselves in that trap.  How can we get the behavior we want without saying ANYTHING? Here are a few of my favorite:

Target Rule:

Whenever there is a certain rule that the children are having a difficult time with, I make it a target rule.  Collect several small toys, clip art images, magnets, etc. Display the items. (I usually start with about 5-6, but if it is a real problem, you may need more. You don't want to run out!) If I am working on them not yelling out the answers when I ask a question, I write that as my target rule. Then, when someone "breaks" the target rule, instead of lecturing the children, I simply remove one of the clip art images.  I don't need to say anything--they get it! The clip art acts as a visual remind of a behavior!

Clean Up:

Another non-verbal reminder is for cleaning up.  When it is time to clean up, I simply turn on music. The kids know, when music comes on, clean up! If they get cleaned up before the music is off, they earn a piece of the Mr. Potato Head (or whatever we are building at that time of year).
You may be asking, "What do the kids 'get' if they make the Mr. Potato Head or if they keep the magnets on the cookie sheet?" A huge part of Taming Transitions is to get your "team" to work together!
Have you ever used a treasure chest? A place where kids visit if they are doing the right thing? I know I did at one time.  Here's what I noticed...the kids that went, would have behaved even if there wasn't a treasure chest. The children who didn't go, were not motivated or were unable to control their behaviors to get to go! Think of it like this...what if the principal had donuts. When you walked into the faculty meeting, he had a list of teachers who had turned in their plans on time. Only those teachers were given donuts.  Would that develop team spirit? How would you feel if you did get a donut? Would it motivate you if you didn't, or would it embarrass you or humiliate you? Instead, a dynamic leader, knows to develop a team...to get the teachers to work together and support and help each other.
In our class we work together to earn marbles for a class jar. We call them happy rocks...because they make the teacher happy!  At the beginning of the year, we earn marbles quickly, filling up the jar in the first few days.  If we keep the magnets on the cookie sheet, we get marbles. If we help  each other, we get marbles. If we clean up, we get marbles. If we get compliments, we get marbles.  We are working as a team! 
You might be asking, what is the reward for filling up that jar or making the Mr. Potato Head? Here's what I am not going to do...I'm not going to give them candy. I'm not going to go to the dollar store and buy them something. Instead, I want them to learn the REASON for good behavior--we get to do cool things! Once we fill the jar, I simply look at my plans and see something really fun that I ALREADY had planned (they don't know that!). That becomes the Marble Jar Party or the Mr. Potato Head Party! It sounds like this, "Oh my goodness. Look we filled our jar! Today after recess we are going to stay outside and use sidewalk chalk. You can write your names, letters, words, or numbers. Show me what you can write! Won't that be fun?"  That's right! It was something I was going to do already! 
One of the best ways to tame transitions is with music. I have my favorites, I am sure you do too.  I love anything that Jack Hartmann does. He has a utube channel! You can get his music for FREE!  Here is his channel https://www.youtube.com/user/JackHartmann.  Another favorite of mine is Shari Sloane.  She is a kindergarten teacher in Minnesota, presenter, and musician!  You can order her cds from her website www.kidscount1234.com or on iTunes.
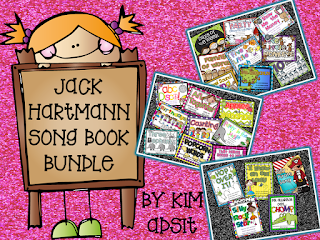
I made power point presentations to go with my favorite songs by these two amazing talented people! Here's how I use them:
  •  I saved them as a pdf.
  • The pdf can be converted to smart board slides and I can use them on my smart board while we are cleaning up.  I play the song from my ipod as I flip through the slides.
  • I can also print them as little books.
  • I took a blank cd and burned each one song onto the cd.
  • Then, I put a sticky cd pocket  to the back of the book to hold the cd.
  • If you want to read more about music in the classroom, here is a blog post I did about it. 
Make the most of your transitions by making them count!  Ever play the quiet game? I know I did! I did it because I didn't know what else to do! But, there are so many other things we can do that also build concepts at the same time! Think about those activities you use during math and literacy that came become a transition activity. Here are a few examples:

Five Little Chefs:

First Get Ready!
  • I made the puppet faces using splatter guards. The kids LOVE them!
  • I made an interactive chart where the chefs and the numerals are removable.
  • I made a flap book so that as I sang the song, I could flap down one of the chefs.
  • I found a placemat with chefs that I cut out and put magnets on the back of each chef.
  • The tune for this song is "Five Little Ducks".
  • I made a poetry card and pages for the children to manipulate the chefs as we sang.
  • I put the poetry cards in our poetry center for the children to visit again.
Here's how you can use them:
  • During Math, we used the flap book, placemat magnets, and the student reproducible to develop a conceptual understanding of adding one more. As I manipulate the magnets, the children manipulate their paper chefs. Then, we record the number sentences on the recording pages.
  • During Literacy, we used the interactive chart and chef puppets, to develop concepts of print and oral prosody.  Developing prosody is essential to becoming a fluent reader. I talked about this more on the music post referenced above.
  • Now we are ready to use these items as transitions. As the kids are cleaning up, use any of the props to engage the children as they gather on the rug.
I love to use cookie sheets! Here is a example for the Five Little Snowmen chant.
  • This is great for teaching combinations of 5 or the concept of one less.
  • As we say the chant, we remove the snowmen from the cookie sheet. 
  • Be sure and put your words on the back of the cookie sheet! It's amazing how easily we forget them! I put the words on the back of the cookie sheet with magnets. That way, when we are singing, I can display the text. Then, just return it to the back of the cookie sheet for storage.
  • Once again, the kids are manipulating the snowmen as we sing to develop those number concepts at the conceptual level. 
  • After using the snowmen in a math lesson, I invite the children to store them in a snack size baggie. They keep the baggie in their carpet bag. Then, whenever we are singing the song, they can pull out their snowmen for 100% engagement! 
https://www.teacherspayteachers.com/Product/Transitions-Tackling-Transitions-by-Kim-Adsit-947178
If you are looking for these resources, all of the phrases, non-verbal engagement, team building sign, Five Little Chefs chart and book, Five Little Snowmen, and many other resources are from the unit Tackling Transitions.
https://www.teacherspayteachers.com/Product/Number-Combinations-and-Poems-Poetry-Plus-103520
The poetry/song cards and the student reproducibles for the Five Chefs as well as many other songs/poems are from the unit Poetry Plus.
https://www.teacherspayteachers.com/Product/Shari-Sloane-School-is-Cool-Music-Books-Bundle-by-Kim-Adsit-1741500
https://www.teacherspayteachers.com/Product/Shari-Sloane-Get-Ready-Music-Books-Bundle-by-Kim-Adsit-1741496
The music books/pdfs for the smart board are in these units. You will need to purchase the music from Shari and Jack.
https://www.teacherspayteachers.com/Product/Jack-Hartmann-Fun-Music-Book-Mega-Bundle-2437898
Pin It!
 
Pin It button on image hover

Receive All Free Updates Via Facebook.