There are 4 things that every teacher needs to begin the year. This post shares those 4 things!
A Teaching Buddy
The first thing, and sometimes the most important thing, a teacher needs is to find a teaching buddy. What is a teaching buddy?
A teaching buddy is someone who supports you and lifts you up.
A teaching buddy listens when you need to vent and when you want to celebrate.
A teaching buddy shares the same teaching philosophy. That doesn't mean that you necessarily do all of the same things. It means you have a mutual understanding about best practices and how children learn.
Any teachers come to mind yet? I have a few in mind for myself!
Routines and Procedures
The next thing that teachers need at the beginning of a school year is effective routines and procedures. More classroom disruptions come from lack of procedures than from misbehavior. Here are a few of our favorite routines and procedures:
Establish ways to get their attention quickly. These are a few of my favorite. Effective use comes from repeated practice. That first few days of school, I'm a little obnoxious! I will use one of the catch phrases right in the middle of an activity. At that time, I can talk about what I see and what I want to see. By the end of the first week, they have them down pat!
Kids get tired of hearing our voice. Sometimes nonverbal reminders are best. I use the Mr. Potato Head, the Snowman, and other such things to encourage children to clean up. When it is clean up time, I turn on the music. The kids know that means to clean up. If they get cleaned up before the music is over, they earn a piece. We are trying to build the Mr. Potato Head, etc.
Another nonverbal reminder I use is our Target Rule Reminder. When I am working with kids on the carpet, there are several rules that I want to establish, one of them being not to yell out answers. If a child yells out an answer to a question that I asked, instead of giving a lecture, I simply remove one of the clip art bugs. Remove a bug the first time and EVERY time someone yells out an answer. No need to say anything, just remove the clip art picture, they get it! This quickly changes that behavior! Be sure to have plenty of pictures. You don't want to run out! Slowly reduce the number of pictures you are using as your class interrupts less.

Developing a team attitude is the best way to develop a community of learners. Instead of children working to achieve trips to a treasure chest, we work together for special rewards. When we are doing the right thing, whatever you want "the right thing" to be, we earn happy rocks. When the jar is full, we celebrate with a special activity. The good thing is that we do plenty of special activities anyways! Let's say you were going to go outside and practice writing letters with sidewalk chalk as one of your PLANNED activities. The jar is full. Guess what just became the reward? "Hey guys, you are working so hard and helping each other! We filled our jar! Today we are going to get to go outside and write with chalk! Won't that be fun!?" See how easy it is to reward little ones! No need to sugar them up or make countless trips to the dollar store.
Assessment to Collect Data
My principal once said during our preplanning, "The main goal for the first day of school is to get them here, get them fed, and get them home safely!" So true! I'm always a little anxious that they are going home to the right place!
During that first week of school we are also getting to know our kids as both people and learners. We are establishing relationships with and between the children.
But, shortly after that first week, we begin to think more deeply about what we need to be teaching--to the whole class, to our small groups, and to individual children. To do this we must use effective formative assessments. We must decide where the children ARE and where we need to take them. There are many ways to collect this data, but I love ESGI. It not only makes assessments easy, it also makes building my instructional groups a snap! Here are some of my favorite features:
There are tons of tests already available. But, I can also make your own assessments and share them with my team!
The assessments can be easily conducted right from an ipad. As the children are working in centers, I can walk around and ask the children the letters. As they respond, I click "yes" or "no".
Once the assessment is completed, it lets me know how the child performed.
By conducting these assessments during the first weeks of school, I can establish a baseline. This helps me measure growth instead of proficiency.
My favorite feature...the bar graph. This graph easily shows me which children have mastered a standard and which have not. I can now use this to help me form my small groups for instruction.
Did you know that you can try ESGI for FREE for two months! What a great way to get your formative assessments going! If you decide to buy, you can get $40 off of the yearly cost simply by using my code, "ADSIT". Click on this link to get started on your free trial!
A Research Based Curriculum
Now that we have a teaching buddy, have established effective routines and procedures, and have collected our data...we are finally ready to teach! Deciding what and how to teach can be very confusing. Social media has changed the way that teachers collect curriculum. We find things on Pinterest, on Teachers Pay Teachers, on blogs, and on Facebook & Instagram.
Be a discerning shopper of ideas. Just because it is on social media doesn't mean that it fits in with your philosophy of teaching. It also doesn't mean that it is based on sound practices. When you find someone who shares your philosophy, follow them on all of their social media accounts.
When it comes to resources that are provided by your school--use them! Why not? You have them, they are paid for, and they are pretty easy to implement. However, be cautious! Use your resources to support the standard you are teaching. Become a resource based not resource driven teacher. Think standards first, then resources. Also, ask yourself, "Do my kids NEED that activity?" Use your formative assessments to determine if an activity needs to be shared with the whole class, or would it be more effective to use the activity with a small group of children who are experiencing difficulty with the standard.
The workshop model of teaching is an effective way to deliver instruction. I have discussed that in many posts. You can read one of those posts
here.
Developing an anchor chart during your mini lesson helps remind the kids what we they are learning. It helps them make connections to prior learning. It helps children see the big picture with all of the related concepts collected onto one chart. The charts are used as a reference tool by both the teacher and the children. These charts are from our
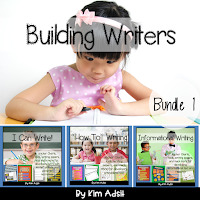
Reader's Workshop and our
Writer's Workshop units.
The goal for literacy and math centers is to be able to pull small groups! The big question? What are the other children doing while you are with a small group? The beginning of the year is a time to develop independence in centers. We spend time introducing "how to do centers." What are the routines and procedures for this part of the day? We establish anchor charts that we display around the room to remind the children of the expectations. One mistake I made...pulling a small group before I had developed independence! Don't worry about pulling a small group for 6 weeks! It may even take 8! During that time, spend time moving around the room. This is the time to develop that independence. When you can stand back the WHOLE center time, then you are ready to start pulling small group. These charts are from the
Literacy Center Units that I wrote with my friend Deanna.
Kids love to play games. Keep the games simple! If you are spending more time teaching the game than teaching the standard, the game is no effective. Introduce the games in your small groups. Play WITH the children until they are able to complete the activity independently. Then, move the activity to centers for repeated practice.
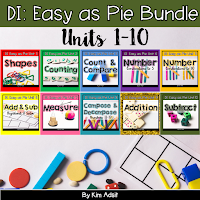
Don't spend all of your time developing tons of games so that you can differentiate. Plan activities that are easily differentiated! For example, in this game the child is making combinations for the number 4. She is hiding some bears under the cave and placing some bears in front of the cave. Then, she records the combination on the recording page. Other groups can use this same game! Simply change the number of bears to match the number combinations they are learning. These games are from the
DI Easy as Pie Math Units I wrote with my friend Michele.