KinderGals

Search This Blog

Tuesday, March 25, 2014

How To Use Dual Monitors with Your Computer

Do you use a dual monitor? I am LOVING mine. It took me a while to join the team, even though my husband has always used one. As I was watching him work it sure looked easier to click and drag from one screen to the next than opening and closing windows like I was doing. So you might ask, “What took you so long to get that second monitor?” WEEEELLLLLL, as you know if you read my blog, it comes at no surprise that I am not the most tech savvy person…and that’s saying it lightly!!!   I hate not knowing how to do things for myself, but  I finally sucked it up and asked him if I could do that using the tv that sits on my desk. He said, YES!
If I can do it, you can too! So here’s what you have to know…
Slide1First of all your monitor either has a RGB (red, green, blue) plug or a HDMI plug depending on the monitor you are using. You second monitor has to have the same plug. Since mine was HDMI, I purchased a HDMI cable from Best Buy. The cable plugs into the HDMI plug on the computer and on the second monitor. It really is that easy.  If you have RGB you will buy an RGB cable. (HMMMM I only know these things because I am married to the biggest tech nerd! Smile )
And what do I reeeaaaallllyyyy love? If you look at the picture, right there on the remote control there is an HDMI button and a TV button. So I can change back and forth from tv to second monitor just what a push of a button.
Here are some of the ways I have used the second monitor already…Slide2
1. I love having two power point presentations open at the same time. It makes it easy to compare, cut and paste….
Slide3
2. I love being able to keep the power point open and open up my documents folder in the other window. I can select from that window if I want to open another document without closing the first power point.
Slide4
3. I am able to keep my clip art folder open while I am working to see what clip art I have available. So if I am making something with a “camping theme” I can see all of my camping clip art without going to insert or opening another window on top of the power point.
Slide5
4. I am able to open my email in one window and a power point in the other window. Then, I can click and drag the photos that are attached in the email over to the power point.
I am sure there are tons of more ways to use the dual monitor. How about you? Share away….How are you using a dual monitor?
Pin It!

Sunday, March 16, 2014

Spring PEEK at my WEEK-FREE Writing Anchor Chart

Even though today has been rainy and cold, what a beautiful spring day we had yesterday! Spent the day at a mountain bike race with my son and visiting with my daughter in law and her mom. I asked on facebook how others were spending their day. I wasn’t surprised when a lot of teachers were taking care of household chores, chauffeuring kids, or working on lesson plans. I was most jealous of the teacher on a great beach vacation and most amused by the teacher who was helping her husband catch frogs for a research project! It was most exciting to hear so many of y’all make reference to working on something we had done in a workshop.
I have to admit I really wanted to come home from church and curl up and take a nap. It was raining, dark and I wasn’t on baby duty! Instead I found myself sitting in front of the computer. 
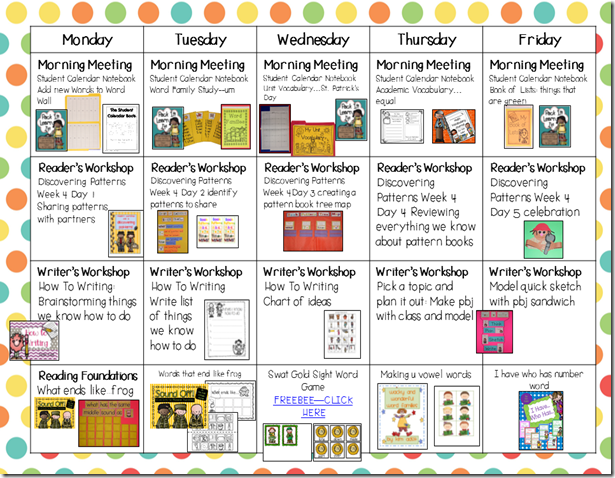
I finished up the Peek at My Week for Megan’s class.  Soooo glad that we are talking about Spring. Maybe that will help keep winter at bay. Also really excited to be starting a new unit in Reader’s Workshop!
In Reader's Workshop we are "Revving Up!"
During this unit of study you will teach your students to “rev up” to read. The unit begins with lessons that teach students the importance of getting ready to read a book before actually starting to read the words. After students understand how to get ready to read, you will teach them lessons about using letter sounds to figure out words.
In Writer' Workshop we are moving on to "How to..." Writing. You can grab this free anchor chart at the bottom of this post.
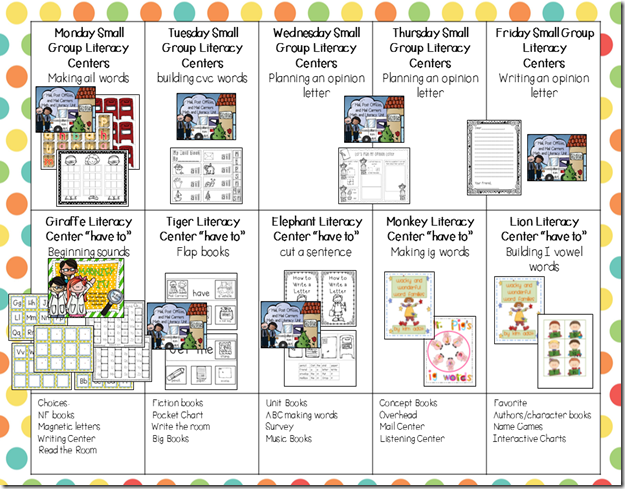
Many of our literacy centers are based on our Spring Theme.  But, a few of the activities, Magnify It; Cut, Stack, Staple, Read; and Cut a Sentences are repeat favorite. I love it when I can repeat the same familiar activities. This keeps the instructions to a minimum.
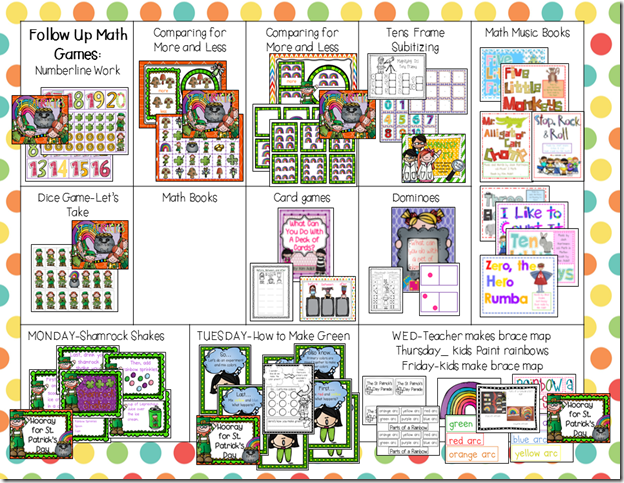
 Math Activities continue with our Spring theme.

If  you want to enlarge these plans, go (here) to print them out.

Pin It!

Sunday, March 9, 2014

Five Fun Activities for Saint Patrick's Day and a FREE Game

Ever feel like you teach from one holiday to another? I love celebrating all.the.holidays! This post has 5 fun activities that we do to celebrate Saint Patrick's Day!
Slide1
Once again on a Sunday night I find myself in a hotel room…this time in Charlotte, NC.  To say the least, last week was a whirlwind of a week. I started off the week in Grand Rapids, Michigan for the two day Common Core Seminar. Can I just say, I don’t think I have ever seen that much snow. It was so deep that I actually looked into a snow bank outside of the hotel room window. I was able to catch up with my good SDE friend, Kim, and I also met a new friend Jill from ABC’s and Polkadots.  Tuesday night Andy flew into Grand Rapids and Wednesday morning we headed out to Chicago…more cold and snow! 
The ASCD Early Childhood Conference in Chicago is a HUGE conference…1,500 teachers!  Good Golly! This is AN EVENT to say the least….Lots of teachers, great sessions, and super nice location, PLUS….. I get to see some of my favorite people! There’s Kim Jordano from KinderbyKim, Kathy Griffin from Kathy Griffin’s Teaching Strategies, Shari Sloane from kidscount1234.com, Deanna Jump from Mrs. Jump’s Class, Deedee Wills from Mrs. Will’s Kindergarten, and Linnea that keeps us all straight! Of course Andy was there, too. Someone had to take the picture!
Saint Patrick's Day Fun
Do You Believe in Leprechauns?
This is a fun center for math. Invite the children to take a survey from their friends by asking them if they believe in Leprechauns. As they ask their friends, they should make a tally mark in the yes or no column. Once they have asked several friends (no more than 8 for either column), they color the graph to match their tally marks. Now they are ready to analyze their data. This is great practice for teaching ways to compare data! The favorite part, walking around and asking their friends!
Sharing the Gold
This is another fun math center. You need a game board with 4 sections, a dice with multiples of 4, and some counting pieces. Invite the children to roll the dice and count that many pieces of gold. Invite the children to try strategies to determine how many pieces of gold belong in each pot. Once they have a "fair share", they record the share on the recording page.
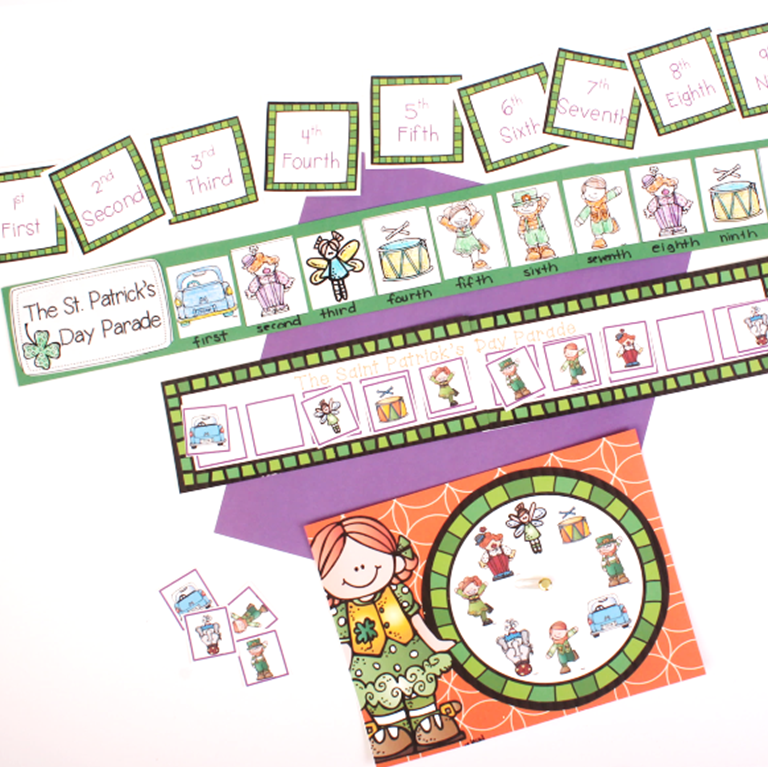
Spin a Parade
One more math game...Saint Patrick's Day is often celebrated with many parades. For this activity, the children will create a parade and indicate the ordinal position of each thing in the parade. First, invite the children to spin the spinner.  Select a clip art picture of whatever the spinner lands on and place it on the parade game board.  Continue until the game board is full. (They many have several of the same thing depending on where the spinner lands.) Glue paper versions of the parade. Sequence the ordinal position cards and record the ordinal position for each thing in the parade.
Where is the Gold?

This fun cut a sentence book is perfect for Saint Patrick's Day and teaching sentence structure. Make each child a pot of gold book. Invite them to cut off the first sentence. We are working on phrases such as "said the girl." The children put that phrase at the end of the first line. Manipulate the remaining words to complete the sentence.  Find the picture to match the sentence and glue it under the flap. Repeat with all 4 sentences.
The Shamrock _ock Book

This is a fun, easy literacy center. Make a book for each child.  Invite the children to cut apart the pictures. Glue one picture on each page. Now, decide what the "onset" needs to be added to "ock".
These ideas are from this Hooray for Saint Patrick's Day unit.
https://www.teacherspayteachers.com/Product/St-Patricks-Day-117689
Sight Word St. Patrick's Day Game
You can grab this fun St. Patrick's Day Game at the bottom of this blog post. Here's how to play:
Spread the gold coin cards out on the floor.
Pick two children and give each one of them a fly swatter with a leprechaun picture.
Say a sight word.
Invite the two children to find the coin with the sight word.
"Swat" the gold coin with the fly swatter.
Peek at My Week
Here are my St. Patrick’s Peek at my Week Plans. You can download them for free by clicking on the image.
Slide2Slide3
Slide4Slide5
Pin It!

Sunday, February 16, 2014

Using Number Bonds

Do you use number bonds?  Here are a few ideas on how to use them to teach number sense.
Ever done this:
Line up 10 beans. Line up 10 more beans below the first 10. As you point to each row, say, "Does this row have the same number of beans as this row?" Usually children will quickly say yes. Now spread out the beans in the first row. Ask again, "Does this row have the same number of beans as this row?" And then...they say....no. As they point to the top row, they add, "this row has more."
This is an example of conservation of number. According to Piaget, children develop this concept at  developmental age 7. When children have conservation, they realize that just by spreading out the beans, you don't get more.
Now lets think about addition. Isn't that what we are doing? We take a set, divide it into 2 sets and put an equal sign in the middle.  Here's the problem...When we divide the group into 2 sets, we are "spreading" out the counters.  Children without conservation now see it as more!!!!! So when they read 3+2=5, in their mind they see...3+2 is more than 5! This leads to great confusion about the concept of equal.
So what do we do....? We have addition in our standards. Here's a great way to develop conservation using Number Bonds. Be sure and read all the way to the bottom of this post to grab the FREE number bond mats and the numeral cards!
Number Bonds Conceptual Level
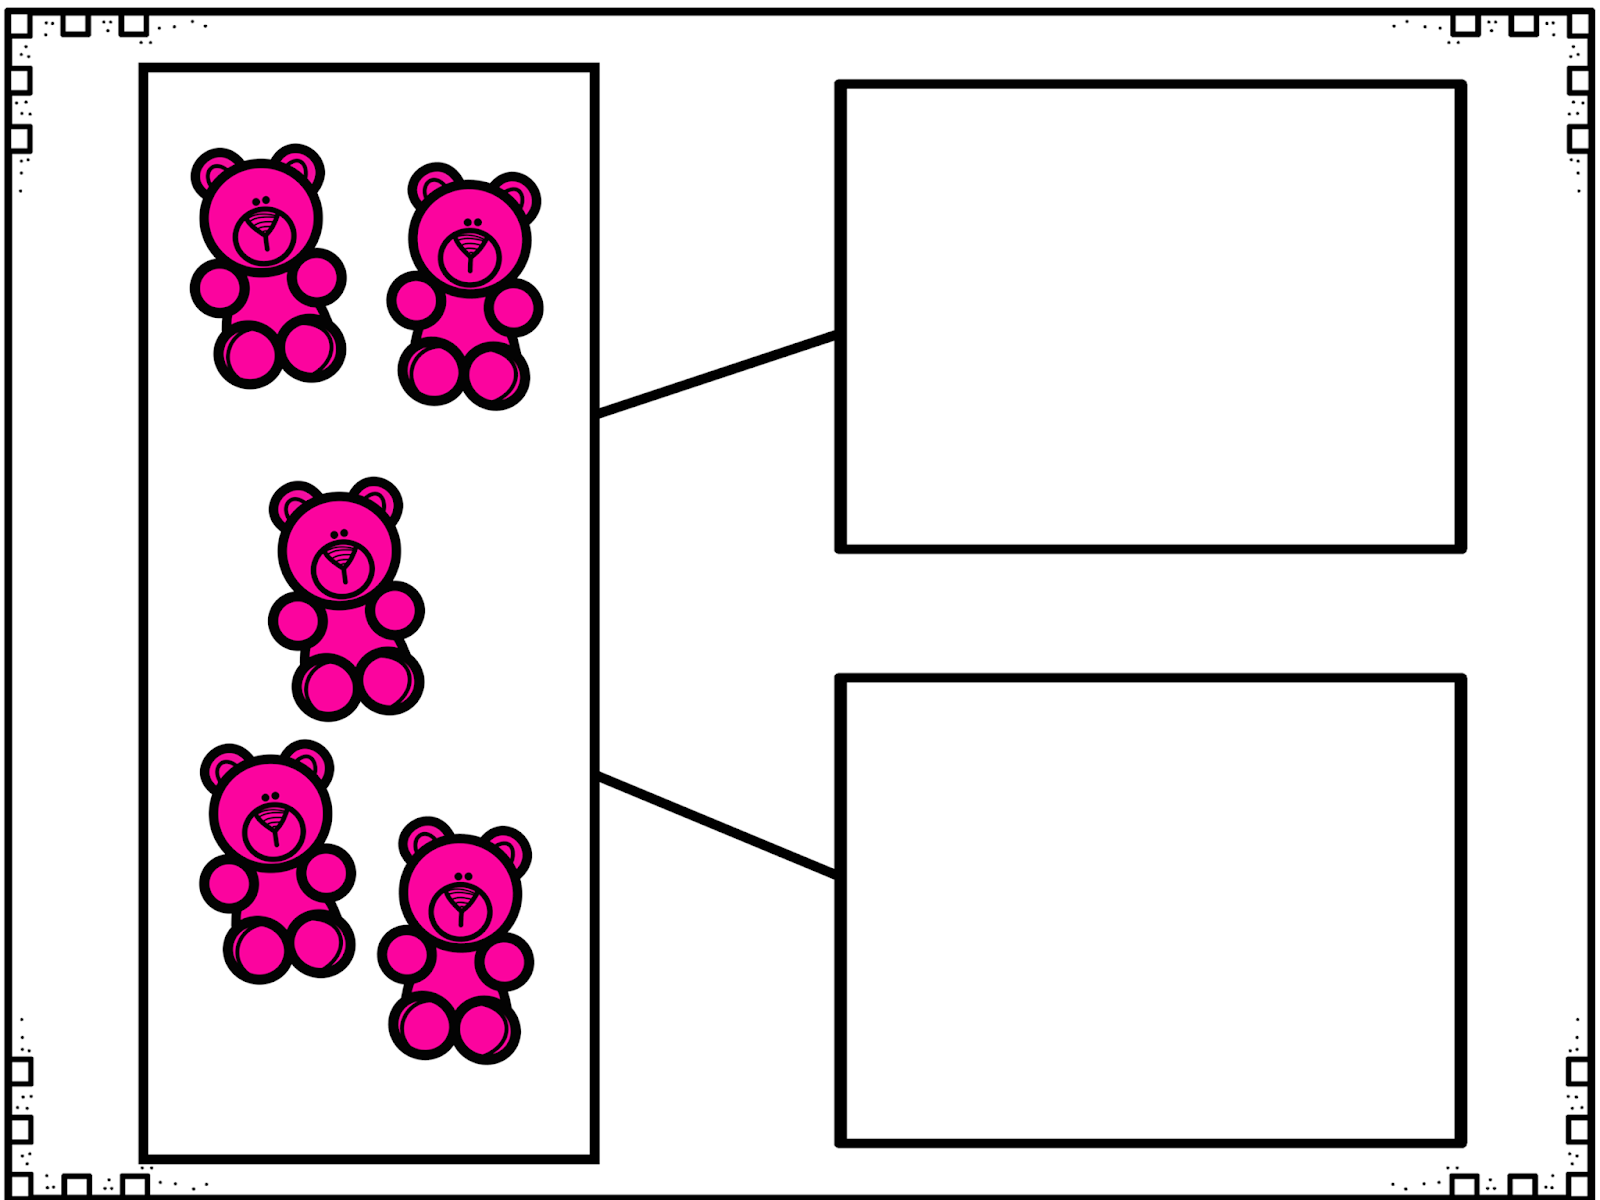
To begin the lesson invite the children to place a given number of counters in the large rectangle. Say, "I have 5 bears." Have the children repeat it back to you.
Now, using the same 5 bears, divide the bears into 2 groups. Say, "I have 2 bears, I have 3 bears." 
Again, have the children repeat it back to you.
Last, move all of the bears back to the rectangle and say, "I have 5 bears." Children repeat.  By moving the bears back to the original location, the children see that the number of bears doesn't change just by spreading them out. Repeat with various ways to make 5.
Transitioning to Abstract Level
Once the children are fluent with dividing sets and have developed the understanding that they don't have more just by spreading them out, they are ready to transition to abstract. (This could be several months, more or less, for the children.) Invite the children to place a given number of counters on the new number bond mat. Say, "I have 5 bears." Invite the children to repeat after you.
Divide the bears into 2 sets using the circles. Say, "I have 2 bears, I have 3 bears." Again, the children repeat.
Demonstrate adding the "2" and "3" to show how many bears are in each circle.  Ask, "How many are there all together?" Since the children have developed fluency with dividing sets and have conservation of number, they should know that there are 5 altogether. Model your thinking as you show how you add the "5".  Repeat with other combination for 5. 
Once the children become fluent with this step. Transition to writing the number sentence on dry erase boards.
Be sure and grab these FREE number bonds and numeral cards below!
Here are the Peek at My Week-Mail plans.  I think I have shared how I lay them out in the past few peek at my week posts, so I am not going to do that. If this is your first time reading these plans, look back at other peek at my week plans to see how they are organized.
Slide2Slide3Slide4
Slide5
Presenting on the road can be very lonely. I love people! But, when I am traveling I often find myself alone. I’m not telling you this so that you will somehow feel sorry for me, but so that you will know just how excited I get when I realize I am NOT going to be alone! So you can only imagine how super excited I was when I received a message from Katie of Little Warriors, that I was going to be working in her school district on Friday! When she went to sign up for her sessions on Thursday night, she saw my name in the listings! I didn’t know that she worked in the district where I was presenting! Now, if we had put two and two together, we could have planned to get a cup of coffee (or a diet coke!) or something together, but it was still fun to see her on Friday!
Pin It!

Wednesday, February 12, 2014

Hooray for President’s Day

That was quick! While we are still planning our Valentine’s Day Party we have to shift gears and think about President’s Day. Now, many of you may have that day off.  If so,celebrate on the 18th with your kids! I posted last year about some of our activities. You can read about those (here). Here are a few others that we are doing.
Slide7Slide21
We gave the kids the letters to spell the word president. Then, we sat them in front of the word wall. They had to look at the words on the wall and see if they could make any of them with the letters that they had. We made a President’s Day place value book. Each page has a significant number and how it relates to President’s Day. The kids used the bingo dotters to stamp the number using the tens frames.
Slide20Slide19
We took important vocabulary words for President’s Day. Then, the kids wrote their name in the boxes under the word. Finally, they had to decide if the word was longer, shorter or the same length as their name. We talked about characteristics of each of the presidents. Then, the children recorded their connections to that president.
Slide2Slide14
We gave the kids a piece of brown bulletin board paper. They drew a map of their bedroom and made a key. Then, we wadded it up and spread it back out to give it that leather look of old maps. We made a stove pipe hat using a toilet paper roll. Then, the kids wrote a letter. We rolled up the letters and placed them inside the toilet paper roll.
image
These ideas are from the Hooray for President’s Day unit.
Pin It!

Sunday, February 9, 2014

Peek at my week Valentines! And a look back at what we did this week….

Each week, I post weekly plans of the things we are doing in our class. These plans can easily be downloaded and printed to make your planning easier.
Slide1
If you have looked at the last few Peek at my Weeks that we have posted, you probably can tell that the first line on this page keeps the same basic frame each week. This makes for easy planning, a predictable pattern for the kids, and a few less gray hairs for me! We are moving right along, after a slow start in our Reader’s Workshop, just starting unit 4. I love this unit on patterns.
Slide2
This page is for centers… on the top row what we are doing during centers,  middle row shows what the kids are doing during centers, and the bottom row shows their “can dos” when they are finished.  Like I mentioned in the other peek at my weeks, you can find more about how we manage our centers (here).
Slide3
This page is our math time: Our mini lesson, what we are doing at our table, and the have to centers for the week.
Slide4
This page is what the kids do when they finish up their math have to. The last row is what we are doing during our large group time.
Now what were we doing this past week? Here are a few pictures!
Slide1
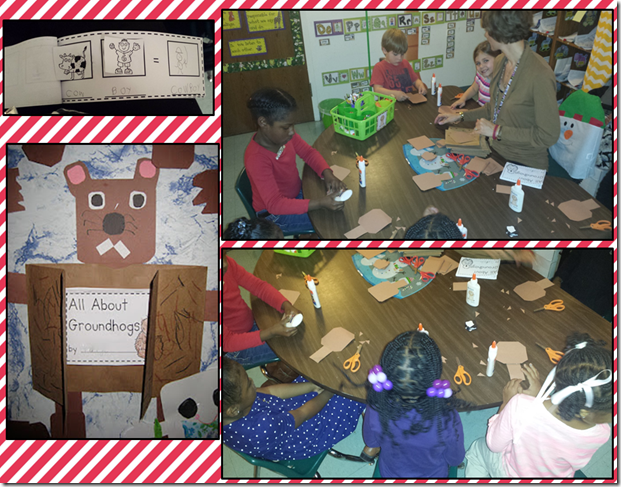
Fun with Groundhog’s Day It was a huge success! The kids loved making their paper bag groundhogs and writing their new learning in an All About Groundhogs book.
Slide2
In Reader's Workshop we were practicing unknown words and reading smoothly. During this lesson we were apply all that we know about what good readers do....good readers look at pictures, good readers reread, good readers know some words fast. This is a lesson from  Unit 3 in Reader’s Workshop.
Slide3
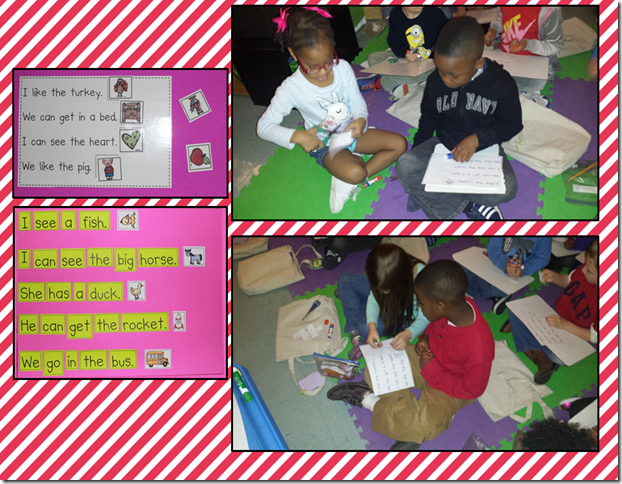
Playing our new Magnify It! Game…success!!! The kids loved this new game. They used their magnifying glass to look closely at each small picture. After naming the picture, they look for the card with the beginning letter! They loved it!
Pin It!
 
Pin It button on image hover

Receive All Free Updates Via Facebook.