KinderGals: April 2012

Search This Blog

Sunday, April 29, 2012

Watch Out! Spring Fever has hit the kiddos! Someone help me keep them under control!!!!

Well, it's that time of year. The kids energy starts to go up and the teacher energy starts to go down.  At the beginning of the year, we are all on our toes making sure that we keep their behavior in check. But, this time of year is equally important--if we are going to keep our sanity.
There are many behavior systems just like there are many teachers and many kinds of kids. Finding the system that works for you and your kids is key. My focus is to maintain the child's dignity and to find a system that build's intrinsic motivation to display appropriate behavior.
Here's the behavior system that we use in Megan's room.
The Clip Chart
Slide3
My concern, when Megan was telling me about his system, was what incentive did they have to display acceptable behavior in the morning if they could just move back up the chart in the afternoon? But, it really does work! I think the difference is that it is build in from the very beginning as part of the system and not just some random decision to let them move back up based on some emotional response by me.
The kids are parents learned that as long as they were on "Right On Rhino", everything was good. It was hard at first because all of those over achieving parents wanted their child to be on Marvelous Monkey EVERY day!
Here's what I love about it...
  • When a child is off task at my table, I can give them a verbal reminder of what is expected.
  • If the child decides to not meet that expectation, they clip down. No second reminders!
  • Once they come back to the table, I remind them again of the expectations.
  • It is amazing how quickly they get on task!
  • As they are working, I can easily invite the child to go move his clip up because he is working so hard! I don't mention that he moved his clip down, just reward for acceptable, on task behavior.
Parent Communication
Slide7
The Oops Note
Slide8
This form is essential to me being consistent with sending home notes. Since notes were written at the end of the day, I often found myself without the time to write them. This sent mixed messages to the kids---is she or isn't she really going to send home a note.
Classroom Behavior Letter
Slide10
At the beginning of the year I send home a discipline letter to each parent. This informs the parents of the classroom rules and the clip chart.
Click on each link to download:
Oops note
parent letter
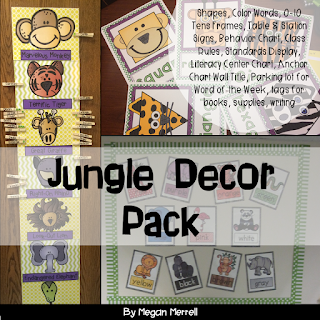
The behavior chart and grid are in this unit:
https://www.teacherspayteachers.com/Product/Classroom-Decor-Jungle-Theme-by-Megan-Merrell-1367053
Pin It!

Thursday, April 26, 2012

Persuasive Writing Freebee

Teaching persuasive writing can seem like a challenge, but one thing all kids know how to do is to beg! They plead and beg their parents, teacher, and siblings to get the things they want.  Megan and I are teaching persuasive writing to her kinders. It is a fun unit. There are some great selections of children's literature to help us with these! In these books, the characters write letters to ask for something from someone else. The character always promises to do something for then if they do! Kinders know all about this...it's called BEGGING!
We followed these three steps to write a persuasive piece:
Ask Yourself:
What is something you really want?
Who can you ask for it?
What will you do it they give it to you or do it for you?
We started with this anchor chart.  We asked our kids what they REALLY wanted for our classroom...they picked a pet. Then, I asked them who could we ask for the pet. After identifying possible people, we thought about what we could do to persuade them to purchase that pet. We used this chart to help us think of things we could do. (This took 3 days of mini lessons.) You can grab these chart pieces as a FREE file.  Check the bottom of this post for the link.
 
As I was filling in our large chart, each of the kids had their own chart to fill in. This makes sure that they all stay busy the whole time!
We made this fun fish craft to save our "promises" to get a class pet. This is also part of the FREE file.  Just scroll to the bottom of this post.
Now that we have worked through a persuasive piece together, I wanted the kids to develop the skill set to generate their own topic and produce their own piece a writing.   We talked more about the things the kids would want to ask someone for.  Here is the list the kids made of possible things they would want to persuade someone to give them or do for them. I "listened in" while they talked to their partner. I wrote the ideas I heard on the chart. When we came back together, I shared the ideas with the group. Now it's their turn, they each made their own lists. (This took 2 days.)
 Now they are ready to produce their own pieces of writing. During application time, the kids wrote letters to  persuade someone for something!
After a few days we talked about the connection between writing a persuasive piece and writing an opinion. In an opinion piece, you are trying to persuade someone to believe what you are telling them.
We used this chart to help you think about the reasons you would write an opinion piece. We spent an entire week on this chart!
Once we understood the why behind writing an opinion piece, we talked about how a writer must support his opinion by giving reasons and examples.
I used this anchor chart to help us work through the process.
The kids used this piece of paper. We each decided which was best, a bee or a ladybug. The kids circled their choices. Then, they wrote reasons why they thing their insect is the best.  There is also a blank version of this form, one without the bee and the ladybug.
I made these cards so that the kids would have possible ideas of things to choose from. When they are selecting their topic, they are always free to choose their own, but this is a great way to scaffold your struggling writers. The remaining items are from the unit, Writing An Opinion.
https://www.teacherspayteachers.com/Product/Writers-Workshop-Writing-an-Opinion-by-Kim-Adsit-aligned-with-Common-Core-1204787
Pin It!

Wednesday, April 25, 2012

Teaching Reading, Writing and Art With "House for a Hermit Crab"

Are you trying to incorporate reading, writing and art into one lesson? That is just what this post is about. In this post I share how my friend Kim Jordano uses "House for a Hermit Crab" to teach comprehension through writing and art.
I am sure most of you know Kimberly Jordano. She is a presenter and kindergarten teacher from California She is the cute, little spunky girl that is tons of fun. I have known her for many years. We met at a conference and became instant friends. I love to go and visit her in Southern California and have enjoyed having here in my "southern" home. While I was visiting Kim, she did an interactive writing lesson using House for a Hermit Crab.  She took the pictures from my Ocean unit and enlarged them 130%.  Now she had large pictures to create a class mural. 
https://www.teacherspayteachers.com/Product/Ocean-Animals-Math-and-Literacy-Activities-for-the-Common-Core-236239
For the first lesson, the children used the text to sequence the pictures to retell the story. *We always want to have children go back to the text. It is not important that they memorize the story, but that they know that good readers go back to the text.  Also, by sequencing the characters we are giving children a comprehension strategy..."If we sequence the pictures, we can use that to help us retell the story."
The kids used tempra paint and sponges to paint the mural. Then, before the paint was dry, they sprinkled glitter!
In another lesson, Kim used interactive writing to record the text.  During the lesson, each of the children had a dry erase board and were writing along as she called individual children to help on the sentence strips. NOTE: On interactive writing, all words are spelled correctly. As you are stretching words, record the sounds the kids hear and you supply the letters for the sounds that they don't hear.
The following day, each child was given a flow map to record the sequence themselves. Provide copies of the text and the interactive writing mural as resources. 
Next, the children created text using the flow map as a resource.
Pin It!

Tuesday, April 24, 2012

Easy Steps to Solve Story Problems

Story problems are used across the grade levels to teach many math concepts.  How can we go to a deeper level of understanding? How can we make them more challenging and stay with the grade level standard? This post shares how Megan and I use Bloom's Taxonomy to help us do that.

Bloom's Taxonomy
A.  Kim caught some butterflies in a net. Some were red and some were yellow? What did Kim catch?
OR
B. Kim caught some butterflies in a net. She caught 3 red butterflies and 3 yellow butterflies. What did Kim catch?
Which do you think is a more challenging story problem? A is more challenging. Why? In the A problem, the children are working at the synthesis or create level of Bloom's taxonomy. Here the children have to create an equation to plug into the story problem. In the B problem, the children are working at the application level of  Bloom's taxonomy. They have to apply what they know about operations to the story problem to make the number sentence.  Create is a higher level than Application.

Here is a story problem that we used with Megan's kids last week. She gave them each an index card to glue their butterflies on. Then, they used the recording sheet to share their thinking through pictures and words.
Want to make it even more challenging? Here's how...provide a story problem where the children create the problem, like above. BUT, add the sum. Then, the children need to create a story problem that equals the given sum.
Conceptual, Pictorial or Abstract
Another way to think about story problems--Are the children working at the conceptual, pictorial, or abstract level of understanding.  ALL math learning, regardless of grade level, should occur at the conceptual level. Working at this level ensures that children develop a deep understanding of the mathematical concept.
Conceptual means manipulate. When children can move, or manipulate 3D or 2D objects, they are working at the conceptual level. Here the children are manipulating plastic teeth to solve the problem.
How about this one? Is it conceptual. Often, teachers think it is pictorial, because they see pictures of cows and pigs. However, these are 2D representations of the real object that kids can manipulate. Clip art, small dye cut outs, erasers, or real objects are all at the conceptual level. 
In this story problem the kids are sharing cookies. I bought some of the cookie cereal. This is the easiest, when kids use the "real" objects.
But this is conceptual understanding as well. Here the kids are using 2D versions of the cookies to solve the problem. Just remember, using the 3D is the easiest way for kids to develop true, deeper level understanding.
Where is the transition to pictorial level? This is where we either ask kids to draw a picture to show their understanding or we ask them to solve a problem by looking at a picture. In this problem, the kids are drawing pictures to show their understanding, this is the pictorial level.
Are you looking for some story problems? Here is a resource, Solve it! Bundle,  to find these, and other, problems.
https://www.teacherspayteachers.com/Product/Math-Journal-Story-Problems-Solve-It-Bundle-638907
Pin It!

Monday, April 16, 2012

Managing Math Centers

When it comes to math centers, most teachers have PLENTY of ideas. BUT, managing all of those centers often is a different story! There is always another idea book, a picture on pinterest, or a product on teacherspayteaches. Such great ideas! Then we try it and say, never again! The fabulous idea just didn't translate once you involved children! It often isn't the activity, it's the management of the activity that cause stress to both us and the kids! This post shares how Megan and I manage our centers.
Developing Groups
First, we develop our groups. We put our kids into groups that we call "families". A family includes a group of heterogeneous kids, all personalities, a mixture of boys and girls. We are trying to establish a group of kids that will work together, not play together. It is best to not put "friends" in the same group! We want 5 families.
Developing Center Areas
Then, we divide our room into 5 work zones. Each zone is clearly marked with a tag. This lets the children know the location of each work zone or center area. In Megan's room, she uses a jungle theme. Each of the 5 signs is a different jungle animal.
Management Board
The management board contains the 5 jungle animals and blue cards that list each family. When it is time to go to math centers, the children located their name, look to see which animal is above their name, locate that sign in the room, and move to that center. Each day, we move the groups to the next area. By Friday, they have been to all 5 areas.
Center Storage
In each center that is a "have-to" center.  These are stored in plastic shoe box tubs on a small shelf. There are two sets in this picture. The green tubs are for math and the yellow tubs are for literacy. These items change each week.
There are also "can do" centers. Instead of children rotation to another center area when they finish the "have-to" cdenter, the children stay in the same area the entire math block. Once they finish their "have-to" center, they look in the storage unit in their area to find a "can-do" activity. These can be games, puzzles, anything math related. I change these about once a month. I have 5 of these storage units, one in each area.
I'm Done!
Since we have "can-do" centers for early finishers, we never hear "I'm done."  Our have to centers are product based.
Another have to center....
When they finish their have to centers, they place the work in this yellow tray. No bringing it to use as we are pulling our small groups. We can check the work at another time.
I hope this post helps give you some ideas on managing math centers.


Pin It!

Monday, April 9, 2012

Rainbow Brace Map

Rainbows are fun to explore during St. Patrick's Day. We had fun this week making Rainbow Brace Maps. Here is how we made them:
Painting the Rainbows
  • I gave them each a large piece of finger painting paper.
  • They folded the paper in half.
  • Unfold the paper so that you can see the crease.
  • Using foam paint brushes, paint a rainbow above the crease and another rainbow below the crease.
  • Let it dry.
Slide4
Making the Large Rainbow Brace Map
  • Cut out the title and the rainbow.
  • Glue them on the left side of the paper.
  • Next, glue the brace to the right of the rainbow.
  • Cut a second rainbow into the different arcs.
  • Glue each arc onto the right side of the paper.
  • Label each arc with the color.
When making the brace map, be sure and explain how the brace map shows the "whole" on the left side of the paper. On the right side of the brace map are the "parts."
Slide6
Making the Student Brace Maps
  • Once the rainbows are dry, invite the children to cut out one of their rainbows and glue it to the left side of their paper.
  • Now, cut out the second rainbow, cutting each arc separately.
Slide7
  • Glue each of the separate arcs on the right side of the paper.
Slide8Slide9
  • Add the labels for each of the arcs.
Slide10
The Brace Map is in this unit:
https://www.teacherspayteachers.com/Product/St-Patricks-Day-v40-117689


Pin It!
 
Pin It button on image hover

Receive All Free Updates Via Facebook.