KinderGals

Search This Blog

Monday, August 17, 2015

Mad Scientists: Set the Stage to Engage!


Slide2
So what do you do when one of your dearest, best friends, who just happens to be a teacher, comes to your house for a week? YOU MAKE THINGS! It all started on the way home from the airport when I told her I wanted to make some lab coats for Megan’s kids. Next thing you know, she is on pinterest! We didn’t use a coat that we found, but looked at several different styles and then created the style you see.   Here’s how we did it:
  • We purchased men’s small (and a few medium) tshirts, black ribbon, black and gray buttons, spray adhesive, and hot glue.
  • We cut the ribbon and used spray adhesive to stick it to the shirt. (I got the easy job, I cut!) We didn’t want to cut the tshirts. Mainly because that would have been more work, but also because then the fabric might be in the way when they are actually doing experiments.
  • Then, we hot glued the buttons along the ribbon.
Slide3
   We found the gloves at Dollar General and the goggles at the Dollar Tree. Now I should make those both plural! I think we went to 5 different Dollar Trees to get enough goggles,  even sending a friend of mine to look in her town. AND we went to 3 different Dollar Generals to find enough gloves! We spent 2 full days shopping and making! (We also made sailor hats for Ginny’s room. I’ll share those another time!) Oh, and earlier in the week while Kathleen was working in Megan’s room, she snapped pictures of all the kids wearing a mad scientist wig! I used the pictures to make nametags for each of the kids.
Slide4
Then, the big day had arrived. We kept it a secret all week! Thursday morning, we packaged everything in a brown box so that it would look like it came in the mail. We packed up the SUV, (with 2 babies in tow), and headed to Megan’s room. To say she was surprised, would not hardly do it justice. (And yes, that’s Matthew! The boys were really good!)
Slide5
  The kids LOVED them! They were so excited and so thankful.
Slide6
Who can have a mad scientist party without some mad scientist food? We found some shallow plates at the party store. Kathleen made jello and we filled them up. We added the worm right before we went.  I found some of the containers for making popsicles at the Dollar Tree. My son cut them out for me to make test tubes. We served up some science potion!
Slide7
Slide1
And then, just like that, I had to take her back to the airport. We laughed and joked that if we lived close it would be crazy, but soooo much fun! Miss you bunches, Kathleen.
So now what? Each week I am packaging up a Mad Scientist kit for Megan and Ginny. Each kit will have all the things they need to do an experiment that week. Want to know what is inside? Check back tomorrow and you will see what was in the first Mad Scientist Kit!
Slide8
Thanks to my sweet friend Hope Wheeler King who coined the term, “Set the Stage to Engage!”
Pin It!

Sunday, August 16, 2015

Peek at My Week—Back to School & Printing Booklets

Let's say you find this cute little book on-line that you want to print and make into books to use with your kids. The first thing you do is print, you might have to cut the pages in half, then get all of the pages in order, and finally you bind it together! Wow! That takes FOREVER!
It's great to have smart friends. My friend, Kathleen, taught me how to use the booklet feature to make this process so much easier! After reading about our week, I will tell you how we did it!
Slide1


We are just finishing up our first week of school. I’m excited to be working with Megan’s former teaching partner to share a peek at my week. Week 1-Procedures, Procedures, Procedures! We worked on establishing our rules and procedures. We also got our reader’s and writer’s workshop going! These are simple lessons! The kids “worktime” was only about 5 minutes. During reader’s workshop, we spent time exploring books in the various areas of the room. Each day they went to a different area. If you want to read about how we organize our book area, you can find that post here.  During writer’s workshop, the kids were mainly drawing pictures, some were scribbles. Some were using random letters, and a few were using some letters purposefully to label their pictures.  Woo Hoo!
Slide2
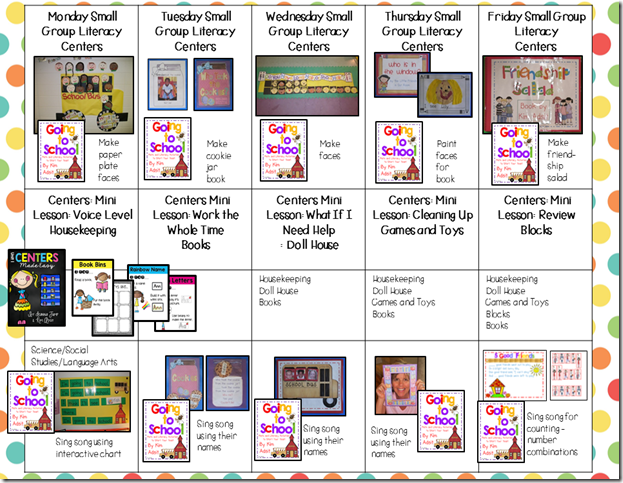
With the extra time in our day, due to shorter workshop times as we develop stamina, we did a few crafty type items. The kids love this and it helps to keep them busy! We are doing our centers a little differently this year. One of the big changes is that we are doing a mini lesson using the workshop framework.  It was amazing to watch the kids really “get it” as we practice each procedure.  I’m excited to be pairing up with Deanna Jump to write a series for centers with mini lessons, have to activities and can do activities! I love working on projects with others! It is great to brainstorm, discuss, and plan together.
Slide3
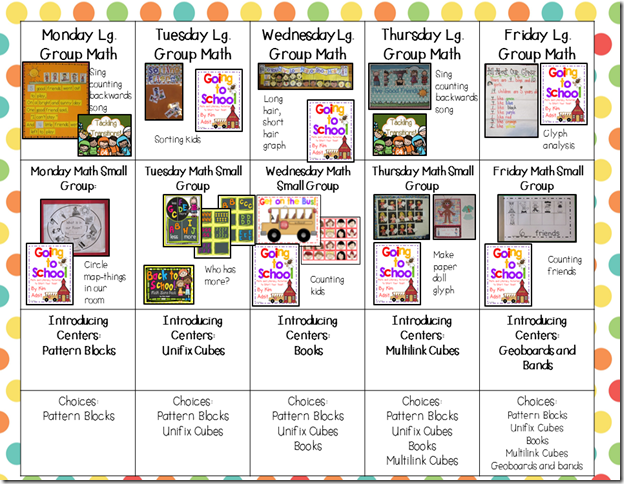
During Math, we taught a few games, but we spent most of the time introducing all the manipulatives. We want to give them time to “play” so that when we get ready to use them in a lesson, they will be ready!
This coming up week we are going to do some assessment to see how they are doing.  I will share those with you next week.
You can download the plans here!
Slide4
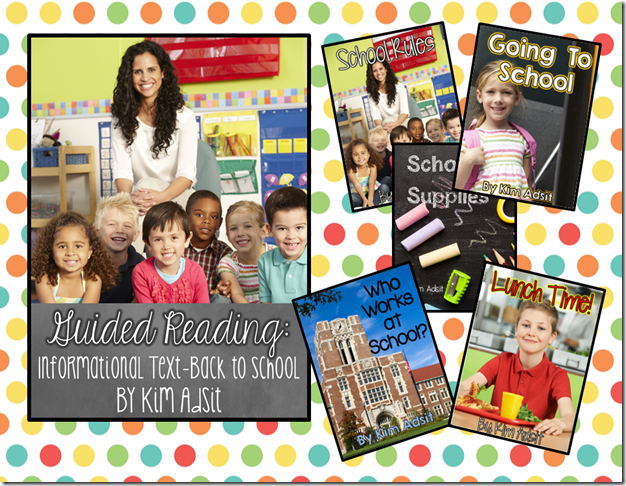
This past week while my friend Kathleen was down to visit, I was finishing up the Back to School guided reading unit. How excited was I when she shared how she has organized the units to use in her classroom.
Slide5
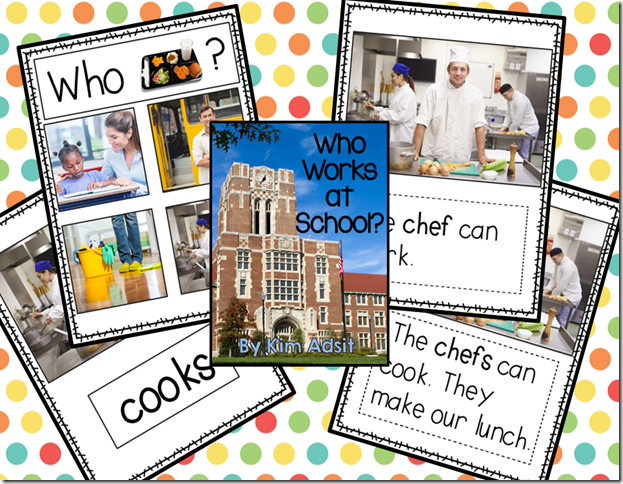
If you’ve seen these units, you know that there are 5 different nonfiction books and each title is written at 3 different levels. Kathleen showed me a great way to print them! Here’s what we did:
Slide6
  1. First, select the pages for one of the books. You will need to print one book at a time.
  2. Then, click on booklet.
  3. It will print 2 pages per piece of paper.
  4. When the printer stops, you will turn the pages over and feed them back through the printer again.
  5. This will print two pages on the back of the paper.
  6. We only laminated the page with the cover.
  7. The other pages are white copy paper, just like a real book.
  8. Lay the pages flat and, use a along neck stapler to staple along the bind.
  9. And look! You have a real book!
  10. Less paper, less ink, less time!
Slide7
Kathleen has been printing her books and organizing them into notebooks along with the lesson plan and the practices pages for each book.
Slide8
You can get the slips for the binds here. https://drive.google.com/file/d/0B7ubnOnZF__xQUd2a2FrZUVkRDA/view?usp=sharing
Thanks Kathleen for sharing those with everyone! This makes it easy to find the units quickly.
Here are the resources I used to plan for this week:
imageimageimageimageimageimageimageimageimage
peek at my weekbutton 2015
Now, jump over to DeeDee’s blog to see what others are doing this week!
Pin It!

Saturday, July 18, 2015

Classroom Library: Level, Organize, Sort and Shop

How organized is your classroom library? It's one of those things that we MEAN to get around to, but it always seems to get pushed to the back of the list.  This blog post gives you some easy tips to organize your library. It shares apps and free files that will help you out!
Yep! That’s what my kitchen has looked like for most of the summer. (Wondering how I cook? Well, no problem there….I NEVER cook! Either I eat cereal, my son cooks, or I eat out! Not the best health plan, right?) So why did it look like that? Megan and Ginnny (my daughter in law) BOTH have new libraries to organize.
Slide1
Megan changed schools AND grade level and Ginny changed grade level. I think we sorted, leveled, labeled and taped over 8,000 books!  (On Friday I did a periscope in Megan’s room about her library, hope you caught it.)
Here’s what we did…
  1. First, we found these two apps in our app store. Now the Level It app did cost, $3.99, but it’s a pretty good app, We were able to find levels on over half of our books by using these two apps. After downloading the apps, you just scan the barcode on the back of the books. It’s really pretty simple, just takes time.
Slide2
2 As we found the levels, we stacked the books into piles…all the A’s together, all the B’s together, etc. Any book without a level--we put them in a separate stack.
3. We took all of the Level A books and sorted them, fiction and nonfiction.  We did that for each level.
Slide4
3. Then, we organized all of our fiction books in these storage containers--by their level. You can get these free leveled tags in this blog post.
Slide34. Then, we did the same for our nonfiction books. Note to self: Look for more nonfiction leveled text! Each of the leveled books has a label that indicates the level.
Slide65. Then, we tackled that pile of books that we were unable to find the  level using either app. We sorted these books by their topic. We want our kids to be able to shop for books that are good fit because they are high interest, not just level! I always think about my little boys. They want so badly to read a book about dinosaurs or sharks or trains. But, there aren’t really any good non-fiction low level books on these topics. They can read these books by gaining information through the photographs, diagrams, and other illustrations.
Slide5
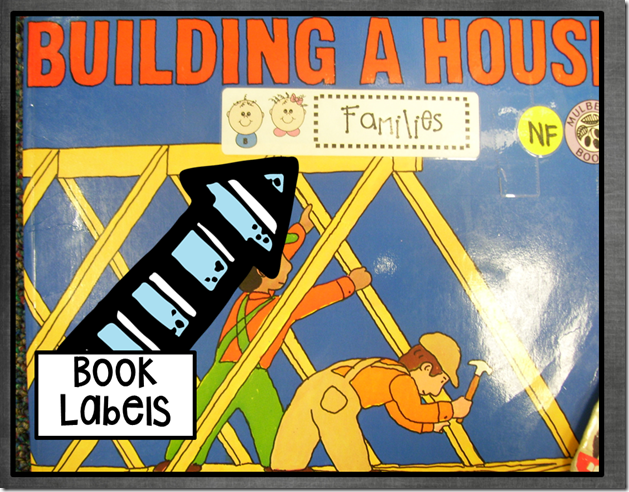
6. Then we took each topic stack and sorted them by fiction and nonfiction. On each book we put a label to match the hanging tag. This makes it super easy to put the books away! On the nonfiction books we added a yellow dot and wrote “NF”. This will help the kids know to which area they should return their books.
Slide7
Here’s what those labels look like. You can find the labels and tags here.
Slide8
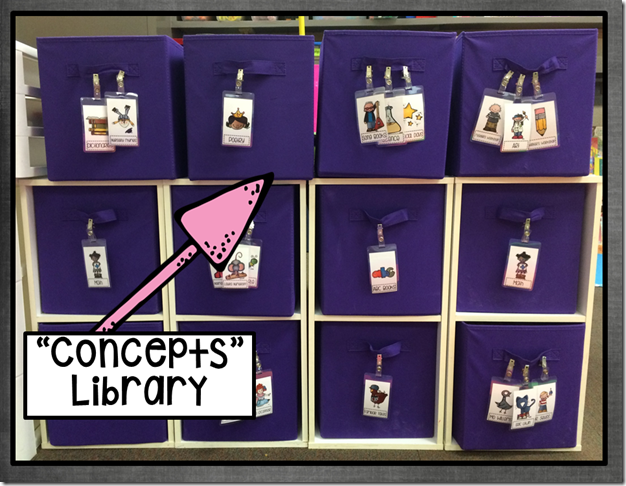
7. Then we took the books that fit into categories like Nursery Rhymes, Math Books, Rhyming, Science, Art, etc and organized them into this section. Now, this section is still under construction. We have moved the favorite characters and authors out. We are resorting the math books by standards to make them easier to use. You can get the math labels here as a free download.
Slide9
8. This is the section where we organized our favorite characters and authors. Now, we know that this will probably change during the year as we get to know our kids. When we find someone that they are crazy about reading, we will move that collection into a tub and label them for ease.
Slide10
9. Our last section is the books that are related to what we will be teaching right NOW. So as we come to a new unit, we go to the fiction and nonfiction topic areas and bring those books to display on this shelf. After teaching the topic, we return the books back in the bins and return them to their shelf.
Slide11
Yes, we know….we are lucky to have SOOOOOO many books! I have collect books for 30 years and Megan has been collecting for 7! That’s a lot of books. On top of that, her school actually has a pretty good library for each room. As a matter of fact, we had more books than would fit. So we took the levels that we are thinking will be too easy or too hard and moved them to this hidden storage shelf. After the year begins and we complete our running records we will move books out as needed.
Slide12
How Do Our Kids Know What, How, Where, When to Shop?
  • Book shopping is part of our morning routine.
  • Each day 1/5 of our class shops.
  • When it is their day to shop, I put this “shopping” list on the spot where they find their other morning work.
  • The kids look at the list to determine which book areas to visit, how many books in each area they should find, and when applicable which level.
  • I’ve made several different tags so that I can determine how many books I am going to let them shop for.
  • Early on, I might select some books for them and let them shop for a few. This will greatly reduce the amount of time they spend shopping. It about drove me crazy when after 20 minutes they only had 2 books in their bag. So I start them with the “shopping” list with fewer selections. I can also adjust the number of books in each area by changing the numeral I write.
Slide13
You can grab the free shopping list below.
Pin It!

Friday, July 17, 2015

Easy Interventions: What Do You Do When They Still Don’t Get It!

We all have them….kids we have tried every trick we know and yet they STILL don’t get it! So, what can we do? Here are some things that I think about:
  • First…we have to do formative assessments! How else are we even going to know who knows what they need. I’m not talking about those tests on Friday. I’m talking about ongoing, day in and day out, assessments.
  • Next…we need to think about how we have already taught the standard. Have we taught it in large group and small group? Have we thought about interests and learning styles? Have we engaged the kids? Are we using research based best practices?
  • Then, lastly….we have to think about who to use the intervention with. Do you ever call kids to your table and think, “Oh, this isn’t going to be good.”? Sometimes I think we use interventions on kids who aren’t even ready for it! So we need to think…do kids have the pre-requisites? Use interventions on the kids who will benefit most!
Here are a few interventions you might find helpful at the beginning of the year:
What do we do when they don’t know the alphabet?
Slide15Slide17
  • First, run copies to make this book and the clip art pictures. These are a free download. Scroll to the bottom of this post to grab this FREE download.
Slide18
  • Staple the pages together to make a book and put the clip art pieces in a baggie.
Slide19
  • Now, glue the pictures in for all the letters they know, capital or lower case.
  • Then, invite them to read the book to you by saying each letter and naming the picture. They only do the pages with a picture.
  • Add 3 new pictures for them to work on. As they learn these, add more.
Detailed directions are also on the download.
Here’s one more….What do we do when they are the ONLY one who still doesn’t have a skill?Slide61
I made a bag for each of my kids and these simple task cards.
Simply drop the card in their bag if they haven’t mastered the skill. Now, if you have 4 or more kids who haven’t mastered a skill you wouldn’t want to put those cards in a bag. That is enough kids to still call for small group. 
Slide60
I have a parent volunteer who helps me with this. In the morning she just stays for about 15-20 minutes and goes through the bags with one kid at a time.


Pin It!

Thursday, July 16, 2015

Throwback Thursday…Setting Up Your Math Centers (A New Freebee)

Here’s a post I did last year on setting up your Math Centers! I did add a freebee…so keep reading!
Slide1
It seems that we all give our language arts block lots of attention and time and it seems that often math is something that happens very quickly in a large group setting.
So what if we gave math the same degree of attention in planning and time as we do reading, writing, centers….?
The biggest hurdle seems to be in the setting it up and managing the workshop time.
So here are some of our tips to manage and operate Math Workshop:
Slide2
WORKSHOP STRUCTURE
1. Start off with a mini lesson.
*The lesson follows a predictable pattern.
*Connect
*Teach
*Active Engagement
*Link
*Repeat the same words for each part of the workshop every day.
*Keep it short and sweet, like 10 minutes sweet.
Slide3
2. After the mini lesson we move to our math centers. I run 5 centers:
*Data
*Measurement
*Number and Algebraic Thinking
*Number and Operations
*Geometry
Each week we plan a “Have-To” activity for each of these 5 areas.
What is a “Have-To”?
*Something that everyone has to do.
*A review of previously taught standards.
*An activity that they have done something similar in the past.
*It is NEVER a new teach, only a review.
Slide11
Here’s how they rotate with their “family” or group. One area each day. We use plastic shoe box tube 6o store the “have to” centers—one set for literacy and one set for math.
Slide8When they are done with the “have-to” then, they chose from the “can-dos”.
What is a “can-do”?
*Songs Books. (I have made a lot of Shari Sloane’s School is Cool songs and Get Ready into little music books.) I put a cd pocket on the back and burn just that song onto the cd. So it’s like a listening center of math music.
*Manipuatives
*Math Books. I pull all the math books out of my collection and divide it into 5 tubs. That makes a tub for each of the 5 areas.
Scroll to the bottom to grab this FREE Library Label download.
Slide1
*Games that have been taught.
Slide10
We store the “can-dos” in these 3 drawer stacks. There is one of them in each of the 5 areas to hold the choices.
While the kids are working in their centers, I pull small group.
*I pull children from each of the center areas to come to my table.
*I look at what standard I am teaching, then group the children according to where they are on that particular standard.
*So…these groups are fluid…constantly changing depending on what standard I am teaching.
*This is where the new learning occurs.
*It may reinforce what you did in your mini lesson or be an activity for a different standard in the same strand.
Slide33
My friend Michele and I decided to write units for each month to help us with our small groups. We wanted to  be sure that we could do one activity and just modify it to meet the needs of all of our kids. LESS WORK! We finished two units this summer because we knew that we would be busy with the beginning of the year.
UPDATE: We did finish all of the units this year!
3. Share Time. Here is where we come back to the carpet to review what we did that day during math. It is also the time when I build my anchor charts to review what we did in our mini lesson.

Pin It!
 
Pin It button on image hover

Receive All Free Updates Via Facebook.