


Last year I teamed up with my friend Deanna Jump to create a series of units that would make center time planning simple!
Here are the 5 Simple Steps for Successful INDEPENDENT Literacy Centers
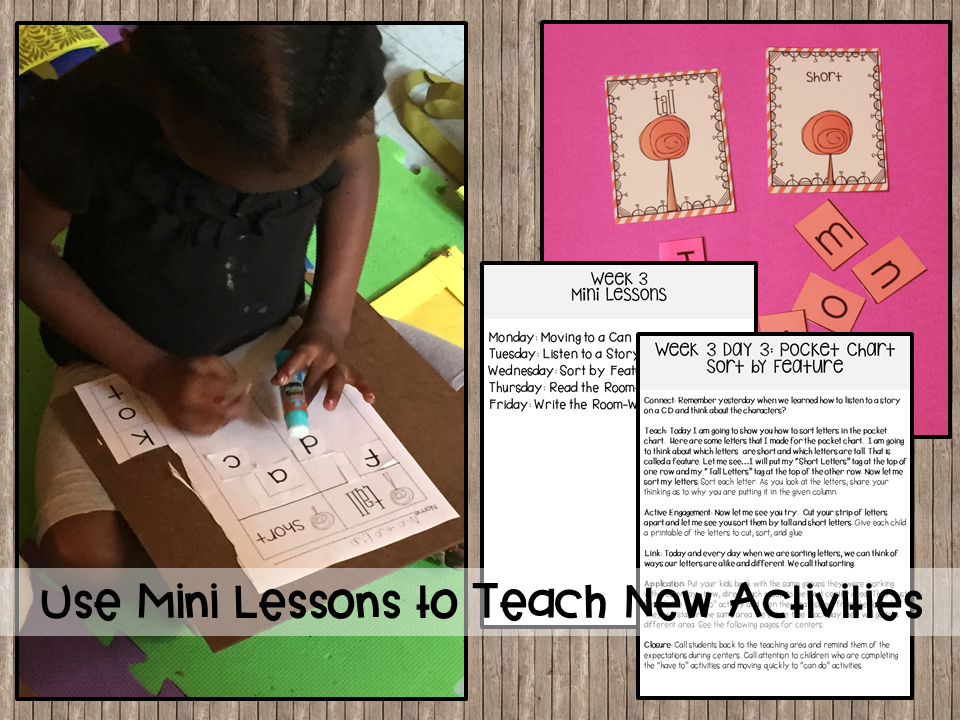
1. Use Mini Lesson to Set Expectations and Teach New Activities.

So often we just expect our kids to know our routines and procedures after the first day. But, having strong routines and procedures requires a lot of practice...and patience! The first thing we did was to sit down and decided what were our expectations for centers. What were our procedures going to be? How would kids moves to centers? What would be in centers? What should they do with their work?
After coming up with our list of questions, we broke each one down into a series of mini lessons. We spend 10 minutes each day, prior to going to centers, to do our mini lessons.
We also use our mini lessons to teach what will be in centers. We especially want to spend time teaching those can do centers. This will ensure that when the children move to these centers, time is productive and behavior is appropriate.
2. Designate Literacy Center Zones.

We divide our rooms into 5 zones. There are several ways you can do this, but in our units we decided to divide them by Alphabet, Phonemic Awareness, Writing, Reading, and Word Work. We made a sign for each area. My friend Amanda decided to make matching number signs for each of the 5 zones. The color of the numeral matches the boarder on the center sign from our unit.
3. Develop a Storage System.

Once your have your zones set up, you will want a storage tub for each zone. These tubs can be stored on a shelf in any area of your room. When center time begins, the children can quickly move the tub to the areas by matching the signs. Amanda put numbers on hers, but I think it might be easier if you put the matching label. The children can quickly match the pictures and colors.
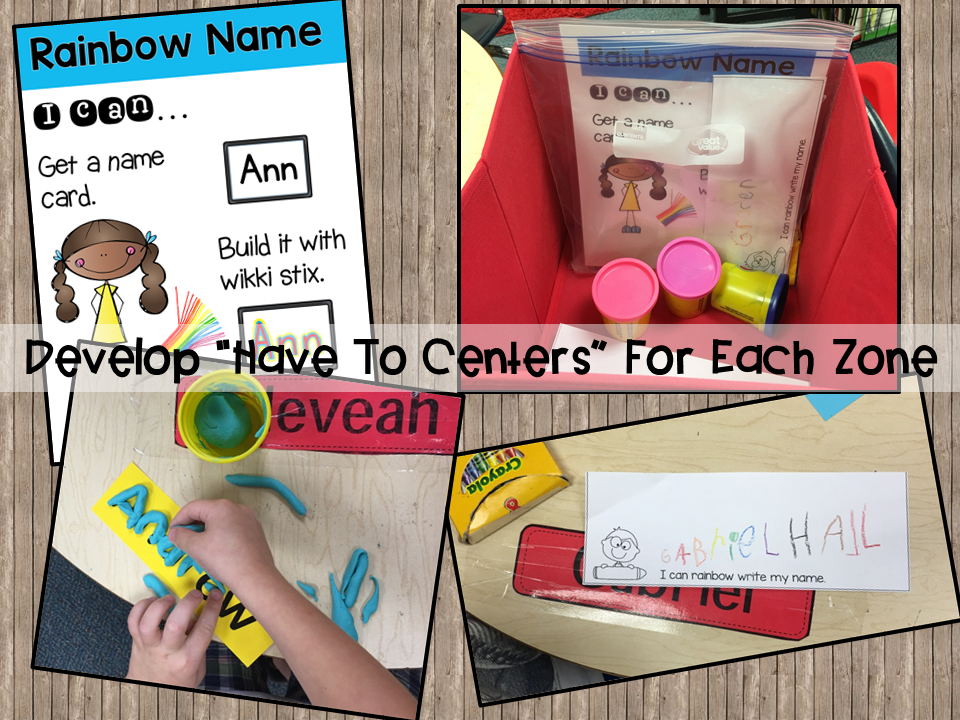
4. Develop Have to Centers for Each Zone.


5. Develop a Management System.

You might be wondering how do the children know which center they are going to. Have you ever tried ringing a bell and having children rotate to a different activity? I know I did. I found that it was pretty much a nightmare. Some children wouldn't be done, some have been done for a while. We were wasting time cleaning up and physically moving to another area. We developed a system that would allow the children to know exactly where they needed to go each day.
- The children are placed into groups. This group has all abilities, all personalities. These are children that get along--they work together but don't play together. They stay with the same group all year.
- Each day they will visit a different area.
- They will do the "have to" activity in that area.
- Once they are finished, they will move to the "can do" centers.
6. Develop Can Do Centers for Early Finishers.
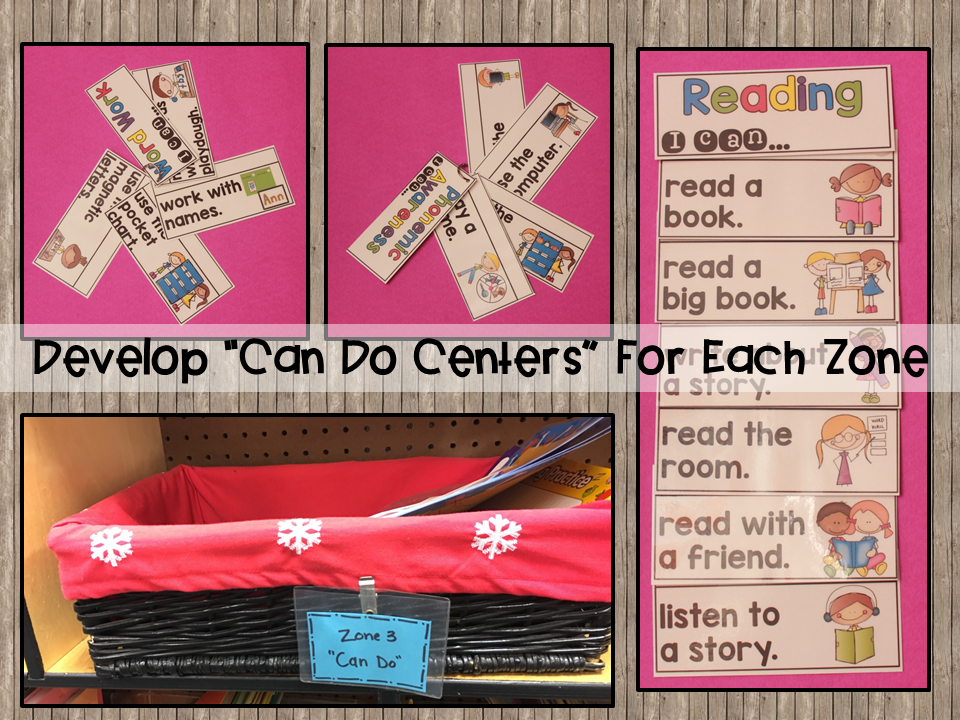
During our mini lessons we are demonstrating, modeling, and practicing can do centers. As we do we can use the tags (see above) to build a choice board. This will take time. Be patient and teach each activity slowly and clearly. You can display these boards in each of the zones. Once the children finish their "have to" center, they can look at the choice board to select a can do center.

Here is the link to Centers Made Easy Unit . It is in Deanna's store.


No comments:
Post a Comment