KinderGals: 2017

Search This Blog

Tuesday, November 14, 2017

I Know An Old Lady Who Swallowed a Pie

Do you have a list of "must have" picture books? If so, get your pen ready, because here is one that you need to add to your list!  My favorite Thanksgiving book is "I Know an Old Lady Who Swallowed a Pie." Here is our fun retelling activity. Be sure and read to the bottom to grab your FREE Thanksgiving activity!
Here is the book you NEED to get! I just did a search on Amazon, and it is still in print!
To begin the lesson, we talked about what our families eat for Thanksgiving.  Here's what we did.
  • I placed these food picture cards into a bag.
  • I pulled each item from the bag as we added it to our chart. 
  • Then, we pulled the word cards from the bag.
  • I asked the children to look at pictures one more time. Then, I told them to look at the beginning letter on the label to help them think about which of the food pictures might begin with that letter.
  • I try to always think, "What strategy am I teaching?" This is a perfect time to remind children that good readers use pictures and look at the first letter to help them think about the word.
You can grab the picture cards and the labels in the FREE file at the bottom of this blog post.
To get started with the story portion of the lesson, I made this fun apron of the old lady. I cut the pieces from fabric and used "wonderunder" to adhere them to the apron. You can grab that at any craft store.  I cut out her mouth and made a pocket in the back to hold the pieces.
Before reading, I told the children that our story today was about a lady who ate ALL of the Thanksgiving food. We talked about what we thought would happen to someone who ate too much Thanksgiving food. Now, as I read the story, I fed the pieces into her mouth.  (I find it helpful to number the pieces. I turn them facedown and sequence them by number before I begin.  This makes it really easy to find the next piece as you are reading.) 
There is no benefit in "passing out" the pieces to the children and inviting them to bring the pieces up as you read the story. In fact, that can be a distraction.  They become more interested in who has what piece, and who doesn't have a piece, than the story. Comprehension goes out the window! YOU maintain control of the pieces! As you are telling/reading the story, the pieces provide a visual interest to keep the children's attention on the events occurring in the text.
You can also use this simpler version. Just use clip art of an "old lady" head's, cut out the mouth, and glue to the front of a paper bag.  As you read the story, slip the cards inside her mouth.
After reading, it is time to check for comprehension! An easy way to do that is through retelling! Here are a few things that I think about during this part of the lesson:
  • It is always strategy over story! This means that I am not teaching the book, I am teaching how to comprehend a story..."Good readers sequence events, characters, or settings to help them retell." THAT is my teaching point!
  • Good readers go back to the book.  I need to teach the children to go back and use the text and pictures to help them sequence the clip art pictures.
  • Invite groups of children to come up and hold the food cards to represent the events in the story. Using the text, sequence the pictures.
  • As the children feed the pictures into the bag or apron, retell the story!
  • Repeat multiple times, inviting various groups of children to help. Each time go back to the text to sequence the pictures.
  • Another teaching point, "good readers reread text many times", can also be addressed.  After retelling several times, invite a group of children to sequence the pictures without going back to the text. Once they are in the order they select, invite the children to go back to the text to check for accuracy.  ALWAYS go back to the text to show evidence of your answer!
  • See all of this "big kid stuff" we are learning!!!!
Now, it's their turn. Provide the children with a copy of the clip art in the story to color.
Next, cut out the pictures.
Then, using the text, invite the children to sequence the pictures to show the order of the events in the story. Keep reminding them that good readers sequence events, characters, and settings to help them retell the story. We made a fun pie bag to hold the pieces. Simply cut the top off of a paper bag and make a pie crust top out of paper.
Finally, as the children retell the story, they place the pieces inside of the paper bag pie. OR, use an old lady face similar to the one on the bag you made. Glue the face to the front of a paper lunch bag. As the children are retelling, they feed the pieces into the mouth.
Instead of putting the work in their cubbies, consider inviting them to place the retelling activity in their "bag of books" used during independent reading time.  They can retell the story over and over again!
https://www.teacherspayteachers.com/Product/Retelling-Comprehension-Strategy-By-Kim-Adsit-and-Kimberly-Jordano-2886651?aref=vtezltgf
All of the pieces for this activity (except for the Old Lady Apron), are from this Retelling unit that I wrote with Kim Jordano.


Pin It!

Thursday, October 26, 2017

Activities for Apples and Pumpkins

Hey Guys! I recently  updated my Apples and Pumpkins Math and Literacy Unit.  Here are the few of those ideas. You can see a video of more activities in the product preview on teachers pay teachers.
Here's a fun way to teach the Life Cycle of the Pumpkin. To make the flow map, I used 12 x 18 construction paper and cut 7 pumpkins. We sequenced the pictures of the life cycle. Then, on each pumpkin we used interactive writing to write each stage.
The kids then made their own pumpkin life cycle accordion fold book.
After reading about the parts of the pumpkin, we made a brace map.  The children each made their own paper plate pumpkin to show the parts. (The Pumpkins book is from our November Guided Reading Unit. It is not in the Apples and Pumpkins Unit.) Our unit also has a brace map for the parts of an apple.
What a fun cooking activity for our Fun Fridays. The children made pumpkin pizzas using an English muffin. After baking our pumpkins, we made a pumpkin book to sequence the steps. The children cut apart the scrambled sentences for each step.
On our apples Fun Friday, the kids made pattern apple kabobs using the different colors of apples. We tasted each color to decide which was our favorite. Then we made a "pie" graph to show our data.
We also had some fun apples and pumpkin activities in our centers.
At my small group table, we segmented phonemes as we pushed the pumpkin seeds onto the pumpkins in the wagon.
Then, the kids made their own pumpkin cvc books. They selected clip art to glue on their wagons. Then, they stretched the word and wrote the letters to represent the sounds.
This pumpkin seed dice game was a huge hit at my small group table during math. The children roll a dice and put that many seeds on their pumpkin. Then, they roll again. They ask themselves, "What do I need to do with the seeds on my pumpkins so I have the number of seeds as the dots on the dice?" They must decided it they need to take some off (subtract) or put some on (add). The children can record their number sentences on the recording page. (We have this for apples in our unit as well.)
https://www.teacherspayteachers.com/Product/Apples-and-Pumpkins-Literacy-and-Math-Activities-155329
If you already own the Apples and Pumpkins unit, be sure and go to your "my purchases" section on tpt to download the latest version. If you don't have it, you can grab it here.
Want to see more? Check out the product preview.
Pin It!

Sunday, October 22, 2017

Geoboards: Activities for EVERY Standard

Are your geoboards collecting dust in the cabinet? Are you a new teacher and have been wondering what are those boards with rows of nails?  In this post I am going to share some of our favorite ways to use geoboards to teach EVERY math standard!
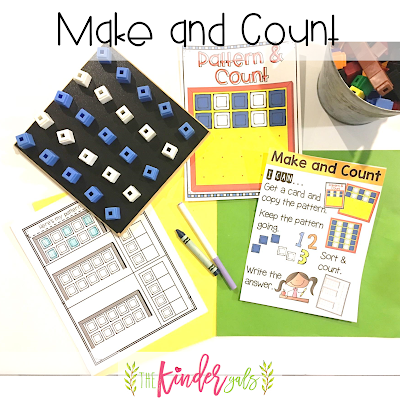
Counting: Make and Count
To play Make and Count:
  • Invite the children to select a pattern card.
  • Using linking cubes, copy and extend the pattern on the geoboards. 
  • Color the pattern on the recording sheet.
  • Once the pattern is complete, sort the cubes by their color.
  • Count how many of each color and record the numeral on the recording page.
When I am introducing this activity to my class here are the steps I follow:
  1. Introduce the game during a large group setting. Model and allow time for the children to practice making the pattern, sorting and counting.
  2. Next, play the game in small groups. Group your children based on your observations during the large group instruction. Introduce the recording page.
  3. After a few weeks, move the activity to a center. If it is going to be a "have to" activity, included the recording sheet. But, if it is a "can do" activity for early finishers, I do not use a recording page.
Data: Stretch and Graph
Stretch and Graph is a fun activity to teach analysis of data. Here is how you play:
  • Invite the children to select a numeral card.
  • Stretch a rubber band on the first column to cover that many nails.
  • Return the numeral card to the stack.
  • Select a second card and stretch a rubber band on the second column that many spaces.
  • Repeat for all 5 columns.
  • Invite the children to write an analysis of their data.
Geometry: Build a Shape
Build a Shape is a great activity to introduce the concept of how many sides are on a shape. Here's how to play:
  • Invite the children to spin the spinner.
  • Count rubber bands to match the numeral on the spinner.
  • Select a shape card with that many sides.
  • Use the rubber bands to build the shape.
  • Record the shape on the recording page.
Measurement: Make and Outline
Make and Outline is a fun way to teach children to measure a shape.  Here's how to play:
  • Invite the children to select a "make a shape" card.
  • Using rubber bands, make the shape on the geoboard.
  • Place a linking cube on each of the nails along the outline of the shape.
  • On the recording page, draw the shape and the cubes along the outline.
  • Count the cubes and record the numeral on the recording page.
Addition/Subtraction: Build It
Build It is a fun way to teach the concepts of combining sets (addition). Here's how to play:
  • Invite the children to spin the spinner and count out bands to match the numeral where the paper clip lands. (Use all one color of bands.)
  • Spin again. Count bands to match the numeral using a different color of bands.
  • Using the bands, create something.
  • Draw the design on the recording page. Write the addition sentence to match the bands.
 
Composing/Decomposing Number: How Many More
Here is a fun activity for teaching children to decompose a number.
  • Invite the children to put 10 cubes on the geoboard.
  • Turn over a card. (Cards have numerals 11-19.)
  • The children decide how many more cubes they need to make that number.
  • Then, they count the cubes and add them to the geoboard.
  • Draw the cubes on the recording page.
  • Write the number sentence to show how to decompose the number.
You can grab the How Many More? lesson plan, I can Card, game pieces, and recording page below.  It's Free!  Michele has done a fabulous job writing a detailed lesson plan on the 3 components of the lesson: I do, We do, and You do. 
 She also adds suggestions for how to differentiate this lesson for all of your little learners.
 
These are just a few of the 19 activities included in the Geoboard Manipulative Unit. 
You can see a video with all of the activities in the product preview.
 
 
Pin It!

Monday, October 16, 2017

Learning All About The Family

Family Fun! This post shares some of our favorite math and literacy activities for celebrating Families!
What fun is this? The kids follow the recipe to make a shape house cookie. After making the cookie, we sequenced the sentences to show the steps. Then, the children drew a picture of the shape house cookie and labeled the shapes.
For this math center, the children glued 8 houses of different colors on a strip of paper. Once they were glued down, the children sequenced the ordinal number house cards. Then, they completed the recording page by labeling the ordinal position of each house. 
After teaching the children the nursery rhyme, The Old Lady who Lived in a Shoe, we played this math activity.  The children rolled a dice to add boys and girls to their shoes. Then, they decided how many children altogether. We played several times before the children glued them down.
We love the book, The Doorbell Rang.  After reading the story, we completed this math story problem.  We played several times before using the recording page.
We learned the Shel Silverstein poem, Tree House/Free House. Then, the children surveyed their friends to see if they want to live in a tree house or a "street house". They converted their data to a graph and wrote their analysis.
Love using things that are FREE! I have a stash of magazines. I made a step book for each child. On each page, I wrote a letter or a word that each child needed to practice. Then, the children look through the magazine to find that letter/word. They cut them out and glue them on the page.
This is a fun way to work on descriptive vocabulary.  The children selected a clip art picture that represented someone in their family. Then, invite theme to write or dictate a description of that person.
We used this chart and interactive writing to make a list of things in a baby bag.  I have a baby bag with these things inside.  As I pull them out, we wrote the word beside the correct picture.  Then, the children made a baby. We used a paper plate to make a diaper book. Inside of the book, the children glued the pictures and wrote the labels for each.
 Over the course of the week, we completed this tree map, doing one section each day.  Tree maps are a GREAT way to introduce nonfiction writing.  Once the tree map is completed, the children can use the sentences to make a family book.
If you want to see more fun family activities, watch the video in the "preview" on the Family Fun Unit.
https://www.teacherspayteachers.com/Product/Family-Fun-Math-and-Literacy-Activities-by-Kim-Adsit-152600
Pin It!

Wednesday, October 11, 2017

Numeral Interventions: What You Do When They Still Don't Get It!

Do you have some children in your room that know all of the numerals while others know some, but not all, and yet others know very few? This blog post shares our strategy to tackle just that!
Storage and Management
First, we purchased a hanging file folder box. We created a folder for each numeral by placing tabs at the top.
Then, we labeled a 2 pocket folder and a supply bag for each child. We placed both of them inside a 2 gallon Ziploc bag. Make one for each child.
We collected all of the supplies for each child. These are stored inside the supply bag.
Once we had collected all of the needed items, we assessed each of the children to determine which numerals/numbers needed an intervention.
Using that information, we collected the activities for each child and placed them inside of the 2 pocket folder. We labeled one side with a green dot and one with a red dot.  The children start with all of the activities on the green dot side. As they complete each activity, they move it to the red dot side.
Numeral/Number Activities

We made 10 different activities.  First we use the assessments to decide which numerals (usually 3-5 numerals at a time) we are going to put in the folder. Then, we select which of the 10 activities we are going to use.  We may use 3-4 for each numeral. Here are the 10 activities that we choose from.
Race It! is a favorite of all of your car enthusiasts. The children remove the car from the supply bag. They roll the car along the numeral as they name it.
What children don't like playdough?  For the Roll It! activity, the children roll the playdough into snakes as they form each numeral.
For Bend It! the children use pipe cleaners to  form each numeral. As they are forming the numeral, they repeat the number name.
Pom Pom It! uses the same numeral cards as Roll It! and Bend It!. The children use the pom poms to place on the numeral outline. For extra fun, add a pair of tweezers to manipulate the pom poms!
Find It! (Numerals) helps the children identify the numeral by visually discriminating it from the other numerals.  Invite the children to place a button, or other small object, on the numeral indicated in the large box.  As the children place the buttons on the card, invite them to say the numeral. If they can't remember the name of the numeral, they can count the dots in the tens frames.
If the child can identify the numeral, they may need to practice recognizing the number. Number refers to the quantity while numeral refers to the symbol that represents that quantity. To practice number, the children follow the same rules by placing a button on each number configuration.
Clip It! provides additional practice with number. The children clip the clothes pin on each configuration that matches the numeral on the card.  Clip It! 1 uses dominoes, dice, number bonds and fingers.
Clip It 2! also provides practice with identifying number configurations. It has tens frames, tally marks, linking cubes and rekenreks.
For Trace It! The children use their finger or a pointer to trace the numeral. Repeated practice develops brain memory of the stroke.
One of the last strategies to use is Write It! After laminating the card, the children use the dry erase marker to trace the numeral and then to practice forming the numeral on the lines provided.
All of these activities can be found in our Numeral Intervention Unit.


Pin It!
 
Pin It button on image hover

Receive All Free Updates Via Facebook.