KinderGals: November 2016

Search This Blog

Tuesday, November 15, 2016

Making the Most of Your Magnetic Letters

Who doesn't have magnetic letters? They are pretty much a staple in everyone's classroom. Yet, do your kids really ever choose that center? This blog post has a plethora of ideas to scaffold your kids in using magnetic letters!
Letter Sorts
I am always looking for cheap magnetic letters. One good thing about buying a variety of sets is that I have a collection of many fonts! Magnetic letters are great for sorting.  Invite the children to sort the magnetic letters according to a given category such as straight or curvy, capital or lower case, OR in my name or not in my name. To add an extra challenge, encourage the kids to develop their own categories for a sort! Invite the children to sort the magnetic letters. Don’t add any headings. Then, they can challenge their friends to see if they are able to determine their categories just by looking at the letters.
abc Order
We also use magnetic letters for abc order. I made three sets of cards putting the empty box at the beginning, in the middle and at the end. Of course, the ones with the empty box at the beginning are the most challenging.  Invite the children to find the magnetic letters that belong in each box. Consider adding an abc chart for the children to use as a resource.
Beginning Sound
To make a set of beginning sound cards, I simply went through my clip art looking for a picture for each letter of the alphabet. When I made the cards, I put the empty box at the beginning of the card to remind the children we were looking for the beginning sound.
Ending Sound
To make a set of ending sound cards, I simply went through my clip art looking for a picture for each letter of the alphabet. When I made the cards, I put the empty box at the end of the card to remind the children we were looking for the ending sound. I didn’t stress about there not being a card for every letter. Many letters do not appear at the end of words where they produce their own sound!
Word Families
When working with word families consider working with the word families that contain the short “a” first.  Save “i” and “e” for last…especially if you live in the south! J Invite the children to select a card. Then, they select the 4 cards that belong in that word family. You can either simply bag the letters with each game board, or have the children search through the pictures to find the ones ending with “at”.
 
After placing the picture cards on the game board, invite the children to find the beginning letter for each picture.
Cvc Words
Select one of the cvc game boards. The pictures all contain the same medial vowel. Invite the children to stretch the sounds to spell each word. 
If you want to make it a little more challenging, cut each game board into separate cards. Now, the children will select an individual card to stretch the sounds to spell the word. Then, they choose another card to spell. It may or may not have the same medial vowel sound.
Word Ladders
Word Ladders are a lot of fun. To play the game invite the children to select a card. On each card, the first word is already made. To make the second word, the children will change only one letter in the first word. For example, they started with cat and changed the “t” to a “p” to make cap.  As the children work down the card, they will change the letter in all 3 positions of the word.
Magnify It!
Give each child a magnifying glass and one of the sight word cards.  The children use the magnifying glass to look at the tiny word on the card.  They lay the card down and use magnetic letters to make the word.
When children are learning a new word here are the steps to follow.
  1. Show the child the word. 
  2. Discuss.
  3. Mix-up, or cover up, the word.
  4. Have the child use magnetic letters to make the word…without looking at your word.
  5. Show the child your word and compare their word to yours.
  6. Try again from the beginning!
These steps train the brain to look at the word as a unit and not at each individual letter.
https://www.teacherspayteachers.com/Product/Magnet-Letters-Literacy-Fun-with-Magnetic-Letters-by-Kim-Adsit-2873251
All of these activities are in this unit. (There is a black and white version for each game, too!)
Pin It!

Sunday, November 13, 2016

Thanksgiving Activities

Thanksgiving is one of my favorite holidays....good food, family, and shopping! This post has some of my favorite ways to celebrate Thanksgiving with my kinders.
Indian Corn
We made Indian Corn by making a pattern of squares on the corn shaped pattern. Then, we trimmed off the edges. We talked about Squanto teaching the Pilgrims many things. I asked them what they could teach someone. Inside  the corn, the kids wrote steps for a procedural piece.
Pilgrim Trunks
When the Pilgrims began their voyage on the Mayflower, each family was given one trunk to pack their belongings. We used a paper bag to make trunks. To make the trunk, cut the four side seams of a paper bag. Put the two side flaps and the front flap inside of the trunk. Fold the back flap down to make the lid. Add a pipe cleaner handle.
This is a great activity to teach the difference between needs and wants. We also worked on sorting pictures by food, clothing, and toys.  They put all of the pictures inside of their trunk and made a sorting book. We stapled the book in the lid of the trunk.
Five Pilgrims
We used our cabin/tree game board to make combinations of 5 with our pilgrims. I used the color version, but made a black and white version for my kids. Each child had 5 pilgrims they could manipulate as we made the combinations. I used 2 different recording sheets--one pictorial and one abstract--for my kids.
Number Line Mystery
My kids love this game! To make the game, select 4 different clip art pictures and put them each on a card. Then, using the same pictures, make cards for each set with the numerals 1-10. Lay the picture cards face up. Shuffle the remaining cards and lay them in 4 rows of 10. Invite a child to turn over a card.
Then, they move the card to the correct row and column to make the number line. They pick up the card that in is that place and move it to its correct place. Continue  until all 4 number lines are in the correct order.
Pattern Bead Necklaces
Simple is good! This is a super simple book for the children to color the beads in various colors!
Defining Thanksgiving
While working in large group, I filled out the large circle map using a shared writing. The kids helped me think of words that defined Thanksgiving. As I write them on the large circle map, the kids are filling in their paper maps. Later, in a center, the kids created the pilgrim girl or boy to hold their circle map.
Paper Bag Native American
To make the paper bag vest, simply cut off the bottom of a paper bag. Then, cut a slit in the front. Then, we used paper squares to make a pattern on the vest. The kids then added their heads and arms and legs.
Inside the bag the children put their All About Native Americans book. Each child wrote a nonfiction piece about the things we learned about Native Americans.
Mayflower Compound Words Book
Using the color clip art pictures, we matched pictures to make compound words. The children found the black and white clip art to glue into their books. Then, they drew the new compound word. Finally, we created a Mayflower to hold our compound word book.
Wishbone: Whose is Longer?
The pulling of the Wishbone is a tradition in many families.  Two people hold the ends of the wishbone and break. The one with the longest piece is going to have good luck. To play this wishbone game, invite two children to each get 10 unifix cubes and snap them together.  Say, "1,2,3 break." The two children each break their cubes in half. They lay half of their cubes on the ground and compare it to their partners cubes for longer and shorter. Then, they spin the spinner to see who wins! Longer isn't always the winner in this game!
Thanksgiving Brace Map
During a shared writing, we thought of all of the parts of Thanksgiving. You can draw or list the items on the brace map. As you are making the large brace map, invite the children to record the information on their brace maps.
Spin an _at Word
To make this simple game, I cut a hole in the pilgrim's hat. Then, I made a circle with letters around the edge. I attached the circle to the back of the pilgrim game board with a brad. Each of the letters will appear in the box as you turn the circle. The children record the _at family words on their recording page.
The Compact
The Pilgrims made a compact. The Compact were the rules they agreed to live by. We made our own compact by writing rules for our classroom.
Traveling Preference Graph
The kids love these survey graphs. We do one every week! Invite the children to walk around and survey their friends by asking the question. They tally the results. Then, they use the tally marks to make a graph. Finally, the children analyze their data.
https://www.teacherspayteachers.com/Product/Thanksgiving-Literacy-and-Math-Activities-164610
All of the above activities came from this unit.
Turkey Phoneme Segmentation
Give each child a barn game board and 3 turkeys. Pick one of the picture cards, they are all 3 phoneme words. As the children segment the phonemes, they push one of their turkeys onto the game board.  You can also turn this into a phonics activity. Invite the children to glue down a picture. In each box, they write the letters to represent each of the phonemes. 
Eating Corn Story Problem
When doing story problems with your kids consider using manipulatives instead of having children draw their thinking. Allowing the children to "manipulate" pieces, such as these ears of corn, is working at the conceptual level. This helps the children develop a deeper understanding of the process. Once they are able to consistently explain their thinking at the conceptual level, move to drawing their responses. This is working at the pictorial level of understanding.
Drum Beat Teepee Syllable Sort
Collect a variety of Thanksgiving related clip art.  Make a step book and cut it into the shape of a teepee.  Give the children a little drum. Invite the children to select a picture.  The children hit the drum to segment the syllables. After determining how many syllables, they glue the picture on the correct page in the book. 
https://www.teacherspayteachers.com/Product/Thanksgiving-Turkey-Activities-for-Math-and-Literacy-103517
The above activities came from this unit.
Turkeys
Pin It!

Wednesday, November 9, 2016

Let's Talk Turkey...Turkey Activites for Little Kids

Let's Talk Turkey....Gobble, Gobble!  This post is full of ideas to celebrate turkeys and have a little fun while doing it! It's a perfect time of year to do just that!  I usually like to post pictures of kids "doing" the activities, but these updated activities are hot off the press and we haven't used the updated versions with our kids!
The first activity is Turkey Soup! We use the recipe, clip art pictures and a soup pot to make our soup. The book is a great way to introduce procedural text to your kids, and it provides opportunity for art, math, and writing!  You can either use a real pot or reproduce one. I attach my clip art pot to the front of a large brown paper bag. As we read the recipe, we add the clip art vegetables into the pot.  We also use our pot during math for counting, comparing and adding the sets.
After experiencing the Turkey Soup recipe as a class, each child makes their own soup and writes a recipe to match. You can use clip art vegetables like I did, or simply give your kids scrap paper and invite them to make their own vegetables. On another day, use the turkey soup addition for the children to add up the vegetables in their own soup pot!
 Another fun book is our "Where is Mr. Turkey?".  In this book, Mr. Turkey can be seen hiding on each page. The children love looking for clues in the pictures. In the end of the story the pilgrim finds the turkey and they are ready to eat! I made a black and white version for my kids. Each child can add it to their bag of books.
 This is a fun game that we have "reinvented" to match almost all of our studies.  To play the game, spread the turkeys on the floor. Give two children each a fly swatter. Call out a word. The children with the flyswatters, must find and catch the turkey with that word. You could play this same game with letters, numerals, shapes, etc.
 This is a fun little art/writing activity.  After making the turkey, the kids write the steps for how to catch a turkey. This is a brand new activity, and I can't wait to try it out! (Patterns are included in the unit.)
 I love these simple cut a sentence books.  Give the kids a strip of paper that contains a sentence, mixed up.  Invite them to cut between the words. Now, put the words in the correct order to make a sentence. Finally find the picture to match the sentence. This "See the Turkey" book, names each part of the turkey. It is a great way to practice getting your mouth ready. Invite the children to look at the first letter in the "unknown word".  Now look over at the pictures, which picture starts with that letter?
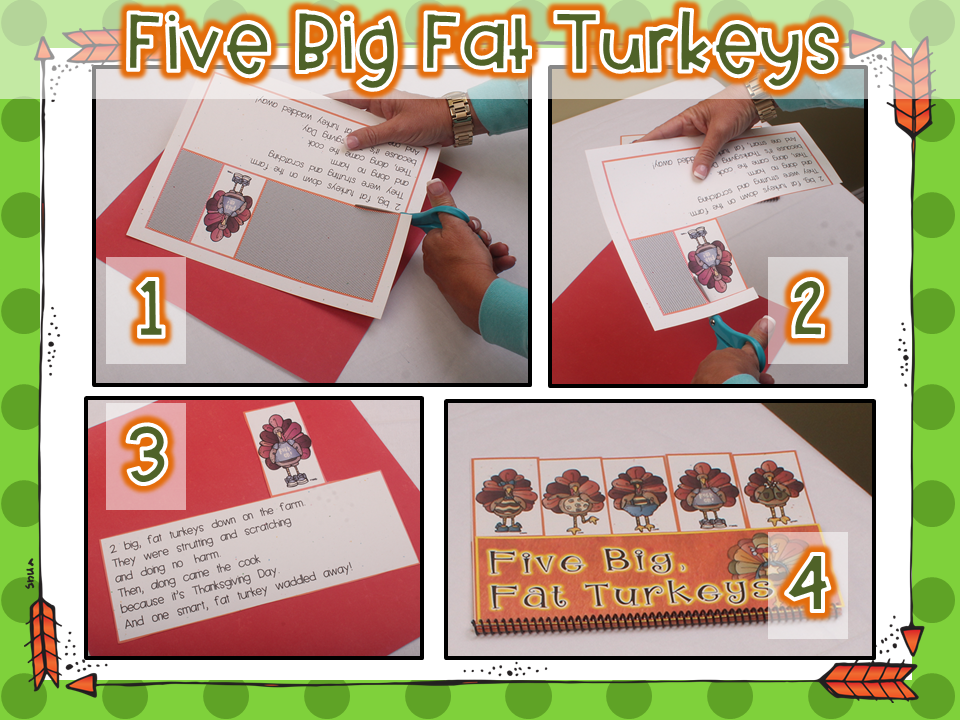
 I love to sing with kids. Singing is good for the soul! Not only that, but it is a dendrite producing activity! Singing makes you smarter! I made a little step/flap book to go along with the "Five, Big Fat Turkeys" song. After photocopying the pages, cut out any of the parts that are shaded in black, like in images 1 and 2 below.  You will have the cover, and 5 pages like in image 3. Stake the pages and bind at the bottom, like image 4. You can grab this book as a FREE download at the bottom of this blog post.
After learning the song, we are ready to use it to learn all about the number 5.  I made a color game board and turkeys for myself, but just made a black and white one for the kids and copied it on red paper.  I also reproduced the recording page for each child.  They cut the turkeys off of the top of the recording page. As we sing the song, we manipulate the turkeys between the barn and the stack of hay.  Then, the children can record their answers on either of the recording pages, depending on your children.  It is important to allow them to manipulate the turkeys to formulate their answer. This manipulation allows them to develop deeper understanding as they are working at the conceptual level of understanding.
 All of the above activities are from our "Turkeys" unit. This is an OLD unit that just got a total redo! So, if you already own it, go to your My Purchases section on tpt and downloaded it again. It also has a few new activities that were not included in the original unit.
https://www.teacherspayteachers.com/Product/Thanksgiving-Turkey-Activities-for-Math-and-Literacy-103517
 This is a fun way to teach ordinal number. Reproduce turkey clip art on various colors of paper. You will want to use 10 different colors. Invite the children to line up their turkeys in a parade. Now, match the ordinal numbers by placing them in the correct order 1-10. Each child will have their turkeys in a different order. This means when they complete the recording sheet, each child will have different answers!
 To make this super cute turkey, invite the children to cut out the various sizes of circles. Sequence the circles by size. Cut out the head. Use a square to make the beak and rectangles to make the legs. We made the feet by cutting one rectangle into 4 parts. Once the turkey is complete, attach it to a paper towel roll.  Now, give the children a strip of paper. The one we are using the children make a list of Thanksgiving food. But you can really store any kind of writing in your turkey...an informational piece, a procedural piece, or a narrative!
To make this simple pattern block turkey, the kids read the "What am I?" book and follow the directions.  The book is simply print and go! So much easier than the first time I made it! After making the turkey, give each child the shape turkey recording page. They will count and add the shapes together to complete the page.
The 3  activities above are from our "Thanksgiving" unit. This is an OLD unit that just got a total redo! So, if you already own it, go to your My Purchases section on tpt and downloaded it again.
 All of the above activities are from our "Turkeys" unit. This is an OLD unit that just got a total redo! So, if you already own it, go to your My Purchases section on tpt and downloaded it again. It also has a few new activities that were not included in the original unit.
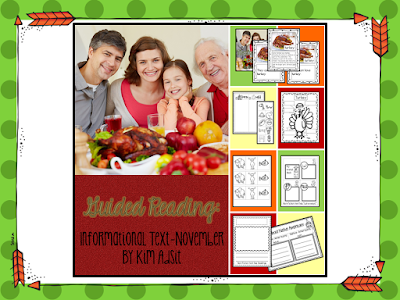
To just do a turkey unit without learning about turkeys just doesn't seem right! After doing quite a bit of research, I wrote a nonfiction book about turkeys.  When I started writing these monthly theme nonfiction books, my goal was to teach my kids the nonfiction features throughout the year and not wait and try to cover them all in one unit.  Let me brag a bit! They rocked it! After using the books each week, the kids knew all of the nonfiction features by the end of the year...by name! Each book cover previous taught features and introduces something new. The "Turkeys" book covers cut a ways, labels, headings, bold text, and a glossary.
 But, I wanted to use these books for guided reading, not a read aloud. I wanted each child to interactive with the text at an individual level.  I decided to write the text at three different levels. Each level has the same photographs, same nonfiction features, just different levels of text. Now, these aren't always a PERFECT match as far as reading level.  Remember, my goal was to teach the nonfiction features. I just make sure the book is not too hard. It is better to give them the level that is below their reading level, than to give them the one that is above their reading level. The hardest level is a great for me! I can use it to help me guide the learning as I add in vocabulary during our discussions.  It is also great for a read aloud.
I did include other elements of guided reading for each title. There is a word work page for each level. Each level focuses on different sight words.
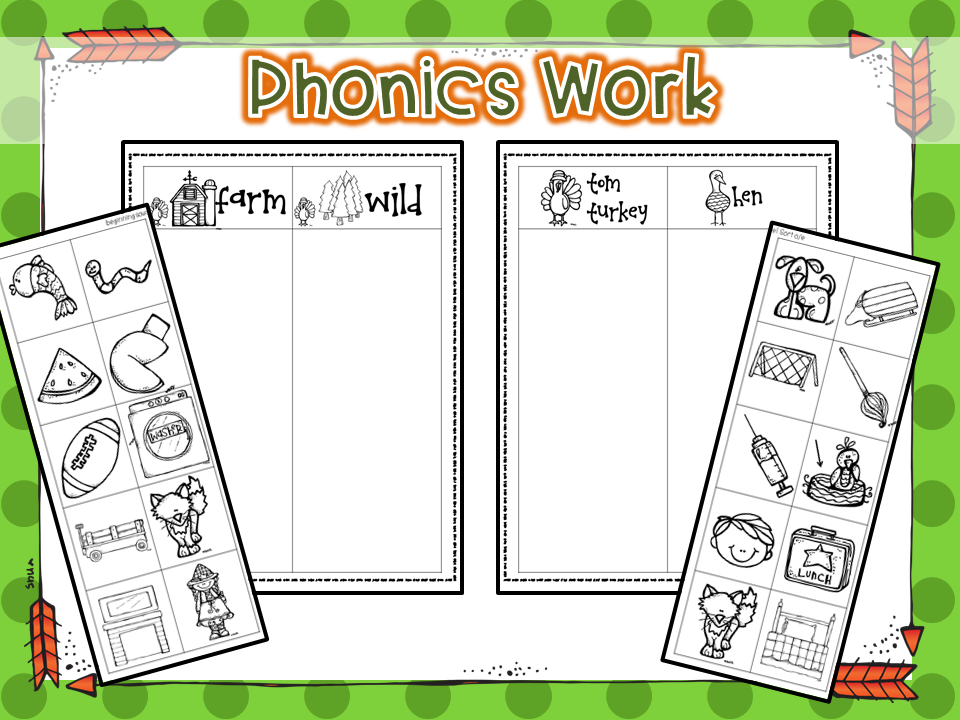
There is a choice between two different phonics practice pages. This book has a page for practicing sorting pictures by beginning sounds and another page for practicing sorting by short vowel. Pick the one that works best for your kids.  Be sure and connect this phonics practice to the actual text.
 We also practice a nonfiction feature. I usually have 2-3 choices to choose from. For our "Turkeys" book, we can label a turkey. We can also make the little Turkey book and create a glossary to match our book.  Again, you can choose which one works best with each group!
 And finally we have the writing connection. After reading the book, the children create a tree map to show their learning through either pictures or text. Then, they use their tree map to create a piece of writing about turkeys.  After writing their piece, they create a heading to match their text.
The "Turkeys" book is included in the November Guided Reading Unit.  
https://www.teacherspayteachers.com/Product/Guided-Reading-Informational-Text-November-by-Kim-Adsit-1508056
 You might want to check out these other November resources for more turkey fun!
https://www.teacherspayteachers.com/Product/Thanksgiving-Turkey-Glyph-103414
https://www.teacherspayteachers.com/Product/Thanksgiving-Turkey-Math-Game-Pack-167915
https://www.teacherspayteachers.com/Product/Thanksgiving-Turkey-Literacy-Game-Pack-167124

Pin It!
 
Pin It button on image hover

Receive All Free Updates Via Facebook.