KinderGals: September 2016

Search This Blog

Thursday, September 29, 2016

Are You Busy? No Prep Math Activities

A few days ago I asked this question: Ever find yourself needing just one more activity? Or, ever have to call a sub.at.the.last.minute? Or, how about do you lack the energy to prep one more activity? I'm sure we have all been there. Here's the solution...we need a few "go to" print and go activities that our kids will know how to do independently and require very little prep.
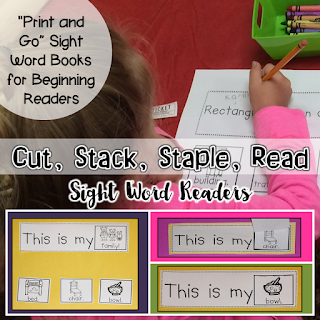
I then shared 4 easy, print and go, activities that I use in literacy. You can read about them here. So, what about math? What are my favorite "go to, print and go, meaningful activities"? Here are 4 of them.

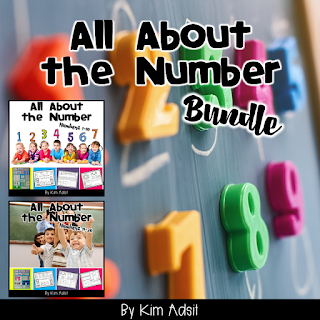
1. All About the Number

This is a great way to develop a deeper level of understanding for each number 1-20.  Over the course of 20 weeks we look closely at each number. It's more than just learning that this is the numeral 2. It about learning everything we know about that number. What does it look like? How can we make it? How about a domino, a tens frame, tally marks, fingers? All of these help the children to develop a deeper level of understanding about that number. They develop a mental image, they can subitize, they know the combinations, and on and on! I make a large anchor chart similar to their recording pages. This is what the chart looks like. (This picture was shared with me by  another teacher who uses this unit in her class.)
There are a few choices here:
1. The kids can fill their chart in as you do it with the class. This is a great way to develop engagement.
2. The kids can do this as a follow up center to record their learning.
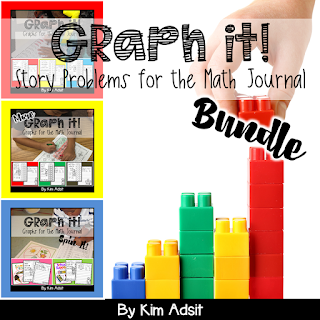
2. Graph It!

I wanted to develop  a variety of graphs that I can use ALL YEAR LONG! These make for an easy center because the kids are very familiar with the process.
Here's what they do:
  • Read the question at the top of the page.
  • Move around the room asking your friend's to answer the question.
  • Record their results.
  • Make a graph using their results.
  • Analyze the data.
One thing you might notice in the picture is the graph, there are pictures in the graph. In order for children to be able to answer deeper level questions, we need to work at the appropriate level of instruction. 
  • At the beginning of the year when you are teaching the graphing process, start with "real" graphs.  These are conceptual graphs where we use real objects. If we are graphing our favorite apples, instead of using red, green, and yellow paper apples, use REAL apples. 
  • The graphs in this unit are "pictorial" graphs.  This is the next level of instruction. 
  • If I left the graph empty, and the children colored in empty boxes, that would be an abstract graph.
Let's say we are making this same apple graph at the abstract level. The children color the boxes red, yellow, or green. Perfect. Then, we ask "Who can tell me something about this graph?" A child answers, "There are more red squares." Does that analyze the data? No, the graph was constructed to determine which type of apples we liked. You might want to follow up with, "What does that tell us?" If they give you a blank stare, maybe an abstract graph is not the right level of instruction.
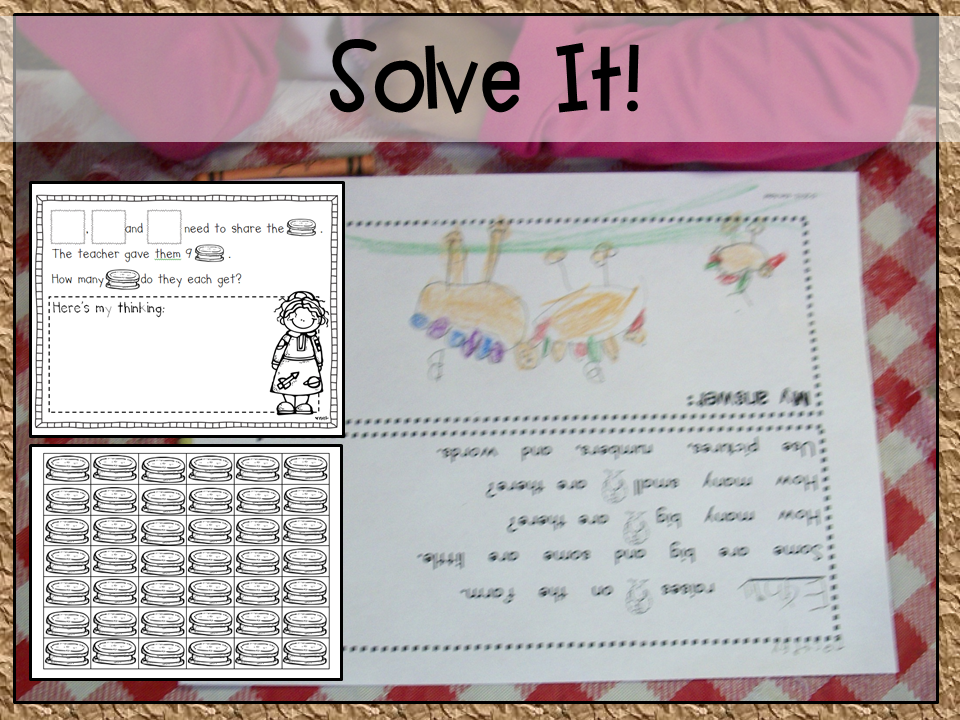
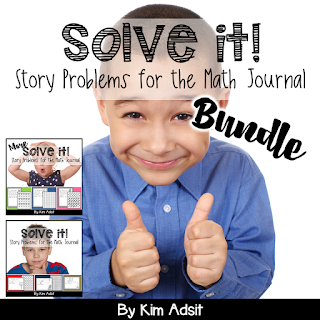
3 . Solve It!

I wanted to develop a variety of story problems using various operations and math standards. When I am doing story problems, I again want to think about "CPA", conceptual, pictorial and abstract.
So often when we are having children solve story problems we ask them to show their understanding by drawing a picture--some are successful and some struggle.  You might want to try this:
  • If the children are learning a new concept, a new standard, a new process, start with the conceptual level.  Conceptual means "manipulate". If children can move the objects, this is the conceptual level.  It might be the real thing, like the apples above, but it can also be toys of the real objects like rubber apple erasers, cut outs of apples, or clip art the is cut apart and placed in a pile.  The children then use these items to solve the problem. 
  • Once, they are successful with understanding using the conceptual level, move the children to the pictorial level. This is where we ask the children to draw a picture to show their understanding.
  • The last way is abstract. Here the children would solve the problem mentally and simply supply the equation or answer.  BUT, children can SOLVE the problem conceptually or pictorially and STILL represent their final answer abstractly.
    https://www.teacherspayteachers.com/Product/Measurement-for-the-Math-Journal-Measure-it-100855

4 . Measure It!

I wanted to develop a variety of measurement activities that I can use throughout the year. While we do a unit on measurement with direct instruction in large and small groups, I also want centers that reinforce prior learning. I want them to maintain their learning.  The prior three ideas, each were a set of reproducibles that follow the same format. While these activities all develop measurement, there is a bigger variety of activities. 
Here are a few that I included:
  • I wanted to have some story problems that dealt with  measurement.
  • I made some easy sequencing activities for various measurement attributes--size, weight, thickness, etc
  • I made some activities that used nonstandard measurement like this one where they are measuring their foot. These have more of a craft, art connection in an easy to reproduce fashion.
Here is a link to each of the 4 units that I use with my kids.
https://www.teacherspayteachers.com/Product/Graphs-Graphs-and-More-Graphs-Bundle-by-Kim-Adsit-1367080
https://www.teacherspayteachers.com/Product/Math-Journal-Story-Problems-Solve-This-Bundle-638907
https://www.teacherspayteachers.com/Product/All-About-Numbers-Pages-Bundle-Numbers-1-20-636038


Pin It!

Tuesday, September 27, 2016

Are You Busy? No Prep Literacy Activities

Ever find yourself needing just one more activity? Or, ever have to call a sub.at.the.last.minute? Or, how about do you lack the energy to prep one more activity? I'm sure we have all been there. Here's the solution...we need a few "go to" print and go activities that our kids will know how to do independently and require very little prep. This post shares four of my favorites.

 1. Cut, Stack, Staple, Read

I love these easy little readers. Here's all the kids do.
  • Cut out the large rectangle and the 3 small rectangles.
  • Stack the 3 small rectangles on top of the large rectangle.
  • Staple.
  • As you life each of the small rectangles...read the book.
These are great for predictable text. They allow for repeated reading to develop prosody! Invite the children to add them to their book box for reader's workshop time.

 2. Cut a Sentence

Here is another idea for kids to make easy readers. There is a little prep with this one. You will need to make a booklet with a cover and 4 blank pages. If you find you don't have time for that, invite the children to divide the paper into 1/4's and put a sentence in each section.
Here's all the kids do.
  • Cut off the first sentence.
  • Cut between the words.
  • Put the word with the capital letter first.
  • Put the word with the period last.
  • Manipulate the other words until the sentence makes sense.
These are also great for predictable text and developing prosody! Invite the children to add them to their book box for reader's workshop time.

 3. Maze Mania

Here's a great print and go activity to practice beginning sound.
Here's all the kids do..
  • Put your pencil where you see the arrow.
  • Name each of the two pictures blocking the path.
  • Decide which one begins with the letter at the top of the page.
  • Draw your line through that picture and move on to the next two pictures.
  • Repeat the process until you get to the end.
These are great for predictable text. They allow for repeated reading to develop prosody! Invite the children to add them to their book box for reader's workshop time.

 4. Sound Off

These are easy "odd man out" sound sorts. You can use this with beginning sound, ending sound, and medial vowel sound.
Here's what the kids do.
  • Cut out the ten pictures.
  • Name each picture.
  • If it begins like the picture at the top of the page, glue it down.
  • Repeat with all 10 cards.
  • Only 8 cards will be glued down.
There is no need to do this with every sound. Once the children understand how to segment off the beginning sound, move on to ending sounds, and then vowels.
Here is a link to each of these four units.
https://www.teacherspayteachers.com/Product/Phonemic-Awareness-Sound-Sorts-Sound-Off-by-Kim-Adsit-and-Megan-Merrell-1055587
https://www.teacherspayteachers.com/Product/Beginning-Sound-Mazes-by-Kim-Adsit-2194999
https://www.teacherspayteachers.com/Product/Sight-Word-Readers-Cut-A-Sentence-Bundle-by-Kim-Adsit-and-Megan-Merrell-1877613
https://www.teacherspayteachers.com/Product/Sight-Word-Readers-Cut-Stack-Staple-and-Read-299406
 
 
Pin It!

Sunday, September 18, 2016

6 Easy Steps to Develop Independent Literacy Centers

Have you tried a million different systems to set up literacy centers in your room and you still can't seem to get it just right? If you said yes, you are not alone.  As teachers we are constantly tweaking things, trying to find that system that works perfectly for us and our kids.
Or, does your dining room table no longer look like a dining room table?  I haven't seen the top of my table since Easter! We all struggle with finding that perfect system.  But, sometimes if we work with another teacher, all of a sudden things seem much clearer. There is great power in planning with another teacher.
Last year I teamed up with my friend Deanna Jump to create a series of units that would make center time planning simple!

Here are the 5 Simple Steps for Successful INDEPENDENT Literacy Centers

1. Use Mini Lesson to Set Expectations and Teach New Activities.

So often we just expect our kids to know our routines and procedures after the first day. But, having strong routines and procedures requires a lot of practice...and patience! The first thing we did was to sit down and decided what were our expectations for centers. What were our procedures going to be? How would kids moves to centers? What would be in centers? What should they do with their work?
After coming up with our list of questions, we broke each one down into a series of mini lessons. We spend 10 minutes each day, prior to going to centers, to do our mini lessons. 
We also use our mini lessons to teach what will be in centers. We especially want to spend time teaching those can do centers. This will ensure that when the children move to these centers, time is productive and behavior is appropriate.

2. Designate Literacy Center Zones.

We divide our rooms into 5 zones. There are several ways you can do this, but in our units we decided to divide them by Alphabet, Phonemic Awareness, Writing, Reading, and Word Work. We made a sign for each area. My friend Amanda decided to make matching number signs for each of the 5 zones. The color of the numeral matches the boarder on the center sign from our unit.

3. Develop a Storage System.

Once your have your zones set up, you will want a storage tub for each zone.  These tubs can be stored on a shelf in any area of your room. When center time begins, the children can quickly move the tub to the areas by matching the signs.  Amanda put numbers on hers, but I think it might be easier if you put the matching label.  The children can quickly match the pictures and colors.

4. Develop Have to Centers for Each Zone.

For each of the 5 zones, you will want to plan a "have to" activity. This is something that each child will do. This is where we want to be careful. Be sure that the activities are ones that your kids can do independently.  Keep them very simple. You can slowly build a collection of activities in your mini lessons that can become "have to" centers. Remember, these are not a new teach. Centers are used to practice and maintain standards already learned.
My friend Deanna is so smart! It was her idea to color code the "I Can" cards to match the center signs.  This makes it so easy for you to be sure you know which standard each activity is designed for. The "I Can" cards provide the children will simple picture directions. This helps foster that independence we want.

5. Develop a Management System.

 You might be wondering how do the children know which center they are going to. Have you ever tried ringing a bell and having children rotate to a different activity? I know I did. I found that it was pretty much a nightmare.  Some children wouldn't be done, some have been done for a while. We were wasting time cleaning up and physically moving to another area. We developed a system that would allow the children to know exactly where they needed to go each day. 
  • The children are placed into groups. This group has all abilities, all personalities. These are children that get along--they work together but don't play together. They stay with the same group all year.
  • Each day they will visit a different area.
  • They will do the "have to" activity in that area.
  • Once they are finished, they will move to the "can do" centers.

6. Develop Can Do Centers for Early Finishers.

At the beginning of the year, the can dos are very basic. You are simply using items from your room that the children can free explore and manipulate.  Some teachers have a shelf in each area to store these can do centers. In Amanda's room that is where we are moving. But, for right now, we have the can do activities stored in a basket for each zone. 
During our mini lessons we are demonstrating, modeling, and practicing can do centers. As we do we can use the tags (see above) to build a choice board. This will take time. Be patient and teach each activity slowly and clearly.  You can display these boards in each of the zones. Once the children finish their "have to" center, they can look at the choice board to select a can do center.
I hope this helps explain how we set up our centers. Do you still have questions? Leave them in the comments section and we can plan a follow up blog post to answer them!
Here is the link to Centers Made Easy Unit . It is in Deanna's store.
https://www.teacherspayteachers.com/Product/Kindergarten-Literacy-Centers-Made-Easy-Unit-1-2002273
And here is a link to the bundle. There is a different unit each month (9 units), or you can get the bundle and have all of the units together.
https://www.teacherspayteachers.com/Product/Kindergarten-Centers-YEAR-LONG-BUNDLE-2006443


Pin It!

Wednesday, September 14, 2016

Am I Done Yet? Teaching Children to Finish A Piece of Writing

I taught a little girl named Arleigh. Her mom Amanda is a teacher, a friend of mine. Amanda shared this precious story with me...
One day, after school Arleigh said, "Mom, it was the best day ever in kindergarten!" Wondering what we had done that day, Amanda ask, "What did you do today that was so great?"  Arleigh said, "Mom did you know that good writers are never done? Do you know what that means? That means that I get to write all of those stories in my heart...all of them! Isn't that great?!" (Arleigh is now in high school and works with the school publication!) We want to build that sense of excitement in all of our writers.
How do we do that. Well, here's what we know:
  • Writer's pick their own topic.
  • Writer's build stamia.
  • Children work at different rates, some taking longer to finish a piece.
  • Some children start many pieces, but rarely finish any.
Here's what we can do.
  • Teach children to ask themselves three questions, "Do I need to add to the picture?, Do I need to add to the words?, and Do I need to start a new piece?"
  • Tackle each question in a mini lesson, meaning that it will take 3 days to cover all of the questions.
For the mini lesson, we will follow the same format as other lessons:
Link: Say, "Remember yesterday when we..." and remind the children what you taught them yesterday.
Teach: Say, "Today, I am going to show you how good writers ask themselves questions when they think they are done with a piece of writing. One question they might ask themselves is, "Do I need to add to the pictures?"
Using a writing that you finished in a previous mini lesson, model adding to your picture.  It is important that children understand WHY you are adding to your picture...we want to help our readers. We add to our picture so that the reader will know more about our piece of writing. We want to make it clear for our reader.
Active Engagement: "Now let me see you try." Invite the children to select a piece of writing from their folder and bring it to the carpet when they come. This way, they will be ready for the lesson! While still on the rug, the children add to the picture in their piece of writing. They will use this same piece of writing tomorrow to add to the words.
Link: "So remember boys and girls, today and everyday, good writers ask themselves questions when they think they are done with their writing. One question they might ask themselves is, "Do I need to add to the picture?"
Once we send them off to write independently some children will apply this lesson and others may not.  The mini lesson is based on the scope and sequence. This means that the mini lesson will be something that some children are already doing naturally, others will apply what they learned easily to their own writing, and yet others will not be quite ready.
While the kids are working independently, you can conference with children. At this time you will be able to determine where the children are in their ability to apply this lesson.
Does conferencing with kids stress you out? Are you never sure what to say? Next week, I will share a post on conducting a conference and give you a little cheat sheet to make it easy, peasy! Until then...happy writing.
The Am I Done Yet? anchor chart is from this unit.
https://www.teacherspayteachers.com/Product/Writers-Workshop-Units-1-3-I-Can-Write-by-Kim-Adsit-aligned-with-Common-Core-865250
Or in this bundle
https://www.teacherspayteachers.com/Product/Writers-Workshop-Building-Writers-by-Kim-Adsit-aligned-with-Common-Core-1306556


Pin It!

Sunday, September 11, 2016

Developing Number Sense

I love watching my grandsons learn. I *might* be just a little proud to be their Gammy! Brody is learning to count by rote and Matthew has one to one counting down pat! It's so fun to watch! The fact that I don't have to worry about their everyday routines, and the fact that I know more about how children develop number sense than when my kids were little, makes this a new experience.  One day Matthew and I were playing with a bucket of plastic animals and we were having a conversation. Here's how it went:
      Me: "Matthew, how many fish do you have?"
      He counts, "1,2,3,4,5."
      Me, with excitement, "That's right, buddy! How many fish do you have?"
      With great confidence Matthew says, "Three!"
It's three---EVERYTIME!!! It's exciting to watch your grandchildren develop number sense and to see them move through the various stages. As we work with our school children, we use a variety of tools to help them develop number sense. 
You might use dot plates, tens frames, fives frames, dominoes, cards, dice, or rekenreks, to name just a few. Here are a few games that we play using some of these tools.

Dot Plates

Dot plates or cards are just another way to helps students learn number conservation, basic addition facts, basic subtraction facts and multiplication.
 Here's a game that we play:
  • Invite the children to turn over two dot plates.
  • Record the dot plates on the recording page.
  • Add the dots together to make the sum.
But, here's the cool part! Once I teach that game in small group, I can now simply change the tool to rekenreks, dominoes, tens frames, or fives frames. Then, the children are practicing the same exact skill but, no time is lost teaching a new game!

Tens Frames

A tens frame is used to build numeracy skills such as counting, comparing, odd & even, sets, mental math, 1:1 correspondence, fact families, etc.
 Here's a game that we can play:
  • Invite the children to spin the spinner.
  • Now, put that many horseshoes onto the tens frame.
  • On the recording page, write the numeral to show how many you placed on the tens frame.
  • How many more do you need to make a ten? Record that number.
  • You can play this same game with a fives frame.

Dot Plates

Here's another game that we can play with dot plates:
  • Hide a dot plate under the cowboy's bandana.
  • Lift the bandana to see the set.
  • Write clues on the recording sheet to describe that number.
  • You can play this same game with any of the tools, rekenreks, dominoes, and fives & tens frames.

Fives Frames

A fives frame is used to build numeracy skills such as counting, comparing, odd & even, sets, mental math, 1:1 correspondence, fact families, etc.
Here's a game that we can play:
  • Invite the children to roll the dice.
  • Cross off that many numerals on the number chart.
  • Roll again, using a different color of pen, cross of that many.
  • Continue until al of the numerals are crossed out.

Dominoes

While dominoes is a popular game played by many, we can use them to develop number sense.  Dominoes can be used to build numeracy skills such as counting, comparing, odd & even, sets, mental math, 1:1 correspondence, fact families, etc.
Here's a game that we can play:
  • Invite the children to roll the dice.
  • Cross off that many numerals on the number chart.
  • Roll again, using a different color of pen, cross of that many.
  • Continue until al of the numerals are crossed out.

Rekenreks

The Rekenrek helps young children develop powerful understandings of numbers -- their meanings, their relationships to one another, and how we operate with them. They can be used to encourage informal strategies for addition and subtraction, for example, using doubling and halving strategies, counting-on from known quantities to solve addition and subtraction problems, etc.
 Here's a game that we can play:
  • Invite the children to turn over two numerals and place them on the boot addition game board.
  • Add dots to the rekenreks for each numeral.
  • Draw the circles on the recording page and add the two sets together.
  • Record the sum.
  • You can play this same game with any of the math tools.
    These games and recording pages can be found in this unit.
https://www.teacherspayteachers.com/Product/Number-Yee-Haw-Wild-About-Numbers-by-Kim-Adsit-and-Megan-Merrell-292016
You might already have this unit and not recognize the cover. I recently updated the unit with new graphics and fonts to give it an updated, new look! If you already have it, you can go to your "my purchases" section on tpt and download the updated version.

Pin It!
 
Pin It button on image hover

Receive All Free Updates Via Facebook.