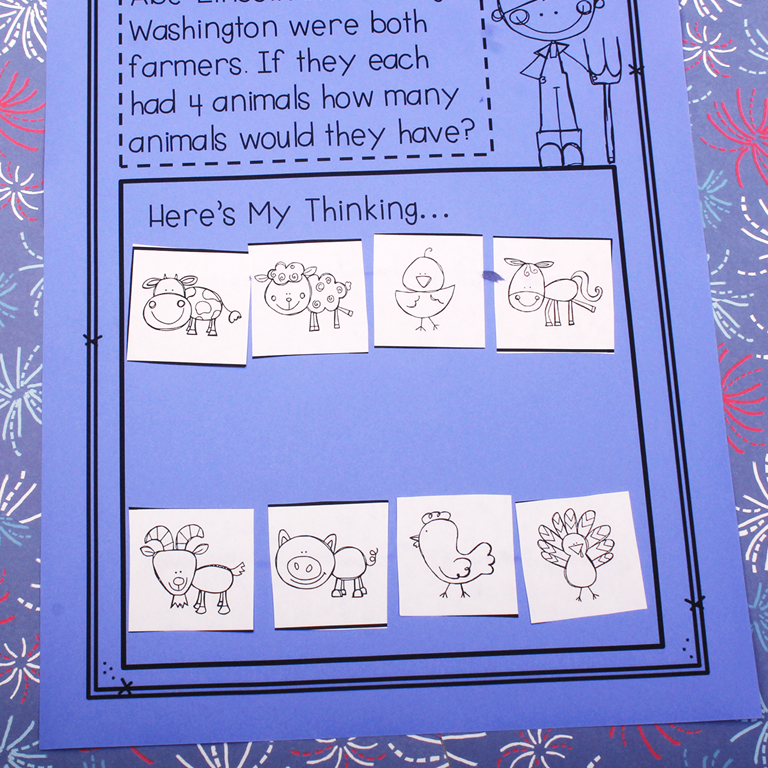
KinderGals

Search This Blog

Wednesday, March 29, 2017

Spring-Writing, Reading, and Math Activities

It's finally here! Flip flops, pollen, and day light savings time! That means it's time to start planning all those fun activities for spring--both in and out of the classroom! Here are some of the fun things we will be doing in the next few weeks.
 Parts of a Plant
This is a fun craftivity to teach labeling and the parts of a plant--at the same time.  The kids use scrapbooking paper to create a flower. We use the brown shredded crinkle paper, that is used in gift bags, to make the roots! I picked it up at the Dollar Tree.  Once the kids make the plant, I give them each several squares of paper to make their labels.
 Parts of a Plant Book
Once the kids finish their craftivity, they also make this "Parts of a Plant" book.  The children cut and paste the parts of the plant, one on each page. Using their labels, the kids write facts about each plant part.
 Adding Up Flowers
This is a fun spring activity to teach addition story problems. Each child needs two flower pots. Label one with their own name, and one with a friend's name.  Invite the children to roll 2 dice and record the addition sentence on the recording page. Draw flowers in each pot to match the addition sentence. Write a story problem to match the addition sentence.
 Labeling Seeds
To make this fun flower craftivity, start with a piece of paper folded in half. Cut the top fold of the paper to make 4 sections. This will make the stem.  Pick up some flower seeds at the Dollar Tree or use old seeds from last year! Invite the children to tape a seed under each of the 4 flaps.  Give each child 4 pieces of paper to label each of the seeds. Keep the seed packages on the table so the children can use the packets to find the labels. 
On another day, invite the kids to use the stem to create a flower. Provide a text box for the flower center. Encourage the kids to write factual information about seeds. We will want to read many books about seeds.  Make those books available for the children to use as reference during this writing. The kids don't need to be able to read the words...they will READ the pictures and recall the information you read to them.
 Spring Sort
Clip art makes a great sorting activity. I went through all of my clip art, and selected things that are associated with spring.  Children don't need TONS of pictures, really 10-15 are plenty! It is more important to think of MANY different ways to sort, than to sort MANY different pictures only a few ways. Encourage children to work together to create categories. Record the categories on the recording page after each sort. Invite the children to select one of the sorts to record using a nonlinguistic method (pictures.)
 How Tall Are You?
This is a fun way to teach children to compare height. Make a flower that is the height of your average child. Invite each child to go and stand by the flower. The other children determine if he is taller, shorter, or the same height as the flower. (He sure is getting big!!!!)
 Flower Story Problems
Make a set of flower headbands by using several different flower clip art images. (We made 5.) Invite the 5 children to stand in a line. Tell a subtraction story problem. As you tell the story problem, remove some of the "kid flowers." Provide each child with a dry erase board to record the subtraction equation.
 Describing Plants
This is a great graphic organizer to help children brainstorm words that describe plants.  Invite the children to record words in each of the circles that describe plants. Children can use this resource to write factual information about plants that will include these describing words.
 Plants Tree Map
Another great resource for writing is a tree map.  Encourage children to think of ways to finish each sentence, "Plants have..., Plants need..., and Plants are..." As I write them on each flower in the flower pots, the children record the information on their recording sheet.  Now, the children are ready to write a piece of non-fiction text. Staple a book with 3 pages and a title page.  On the first page, the children write "Plants have..." and finish the sentence using their tree maps. Encourage children to add more detailed information. Illustrate the text. Repeat this process with all 3 pages in the booklet. This is a great way to teach children to write over pages!
 Measuring Thumbprint Flowers
In an art center, kids create these cute thumbprint flowers.  Put some paint on a sponge. Invite children to press their thumb into the paint. Place their thumbprint around the circle to create 3 different color flowers.  Once the flowers are dry, use linking cubes to measure the flowers. Use the recording page to compare the length.
 Ordinal Number Flowers
To make these fun ordinal number flowers, reproduce flower clip art on 8 different colors of paper. Invite the children to glue their flowers in a line on a strip of paper.  Each child can put their flowers in any order they wish. Sequence the ordinal number flower cards. Use the recording page to indicate the ordinal position of each flower. Every child's answer page will be different since it matches his/her flowers!
 Spin a Graph
Spin graphs are a super easy, independent center.  Invite the children to spin the spinner. Record tally marks to indicate where the spinner lands. After spinning 10 times, use the tally marks to create a graph. Once the graph is made, the children analyze their data.
 Making Words with Beanstalk
We've all played the game where you take the big word and see how many little words you can make. This is a standard game at many baby and wedding showers. But, playing it with kids takes on a new meaning. I found that usually ONE kid in the group GOT IT.  The others....they simply copied that kid!  Here's a way we can play the game and scaffold our kids for success.  Give the children the letters in the big word, in this case "beanstalk."  Now, give the kids a list of words--some that can be made with the letters in beanstalk and some that can't.  Invite the children to use their letters to see if they can make the words in the list. Indicate on the recording page yes or no depending on whether they could make the word or not.
 Bingo Dotter Flower Addition
I love bingo dotters. I pick them up at the Dollar Tree all the time! To make this accordion folded book, invite the children to glue a circle in each section.  Roll two dice and record the number sentence on the circle.  Use bingo dotters to make dots to match the equation. Record the sum. Repeat with all three flowers. Once the paint is dry, fold the book together and staple along the edge to make a book.
 Roll a CVC Word
This is "go to" game for our centers. Here's how you play.  Give each child a game board, three cubes, and a dice.  The children roll the dice. Move one of the cubes up the first column that many spaces. Repeat with columns 2 and 3. Record the 3 letters on the recording page. Read the new word. Repeat until the recording page is full.

These ideas are from this unit.
https://www.teacherspayteachers.com/Product/Spring-Is-Here-Fun-Flower-Activities-for-Math-and-Literacy-v30-121291
Pin It!

Thursday, March 9, 2017

Leprechauns, Gold and Shamrocks: St. Patrick's Day Fun

St. Patrick's Day brings us Leprechauns, gold, and shamrocks. Here are some of the fun activities we are doing to celebrate this magical day.
Do You Believe in Leprechauns?
The kids absolutely love doing survey graphs. Why? Because they get to talk to their friends!
Here's how we did our survey graph:
  • First, the children move around the room asking their friends if they believe in Leprechauns.
  • They put tally marks in either the yes or no column.
  • Then, they create a graph to show the results.
  • Last, the analyze their data.
Finding Gold Sight Word Game
I love games that can be used over and over again. Swat is one of those games. You can put anything on the cards and anything on the fly swatters and you have a new game. All you have to do is change the standard and change the clip art and the kids think it is a new game.
To play the game:
  • Spread the cards on the flower.
  • Give several children each a fly swatter.
  • Tell them the target word.
  • They seek for the word.
  • When they find the word, the leprechaun gathers the gold.
Cut a Sentence--Do You Have Gold?
Cut a sentence books are great for teaching sentence structure. The kids learns that the word with the capital letter goes first, the word with the period goes last. They also learn to use the reading strategy, "Does it make sense?" Invite the kids to move the remaining words until the sentence makes sense. Then, they find the picture to match the sentence.
Sharing Gold
This is a fun way to teach fair share:
  • Invite the children to roll a dice and count out that many pieces of gold.
  • Gather the Leprechaun's Pots of Gold game board.
  • The children share the gold so that each pot gets an equal amount of gold.
  • Last, the kids record their results on the recording page.
How to Catch a Leprechaun?
Here's how we made our paper plate leprechauns:
  • First, the kids paint the paper plate. Allow to dry.
  • Using pompoms, wiggly eyes, and paper, create a face.
  • Add hair. We used the crinkle paper you can find in the gift wrapping section of the dollar store.
  • Add the hat to the top.
  • Staple the paper plate leprechaun to several sheets of paper.
  • Invite the children to write the steps for how to catch a leprechaun.
Can We Make Green?
St. Patrick's Day is a great day to explore color mixing.  Here's what we did:
  • Give each child a Ziploc bag.
  • Put shaving cream in each bag.
  • In 1/3 of the bag put red and yellow food coloring, in 1/3 put red and blue food coloring and in the final 1/3 put blue and yellow food coloring.
  • Zip the top of the bag closed.
  • Invite the children to mix their colors together.
  • Which colors made green?
  • The children record the results on the recording page.
Shamrock Shakes
The highlight of the day is making Shamrock Shakes!
To make the shakes:
  • Give each child a scoop of vanilla ice cream.
  • Add "green" sprite-leprechaun juice.
  • Invite the kids to mix them together.
  • Add rainbow sprinkles to the top.
  • Now it's time to drink our Shakes!
  • As a follow up, we invited the children to sequence the pictures of how we made the shakes.
  • Now, they wrote the steps to match each picture.
  • Or, you could do a guided writing lesson where you and the children work together to record the steps.
  • Or the children could sequence the pictures in a booklet.
  • On each page, they cut apart a sentence and put the words in order.
St. Patrick's Day Parade
To create a St. Patrick's Day parade here is what we did:
  • Invite the children to spin the spinner.
  • Whichever picture it lands on, the children locate that clip art and add it to the parade.
  • Keep spinning until all of the squares are filled. (They can land on the same thing more than once.)
  • Sequence the ordinal number cards.
  • Find black and white clip art to match the parade.
  • Invite the children to glue the clip are to match their parade.
  • Label each with the ordinal position.
These ideas are from this unit.
https://www.teacherspayteachers.com/Product/St-Patricks-Day-v40-117689
This unit was recently updated. If you already own this unit, go to your my purchases section and you can download the updated version.


Pin It!

Monday, March 6, 2017

Using Assessments to Form Small Groups

Is Data Driven Instruction a phrase that makes you twitch? Does it make you think of hours of standardized testing used to rate the effectiveness of your school?  If so, I have some good news for you!  Data Driven Instruction is your friend!  This post shares how to use easy assessments to help you determine what to teach, and to whom!
Small Group Instruction is a part of most classrooms. I use small groups during reader's and writer's workshop and during math and literacy centers.  Anytime my kids are engaged in self directed work that allows them to apply the things that THEY know, I can pull small group. The biggest question I hear is, "how do you determine who is in the small group?" Since I base all of my small groups on assessment, these groups are constantly changing.  The kids are unaware of these groups. I move around the room, while they are working, and collect the kids I want to meet with at my table. 
Recently, while working on number combinations, I made each of my children a necklace.  These necklaces are worn so that the children each know which number combination they are practicing. (And so do I!)
To determine which number combination each child needed to practice, I did this simple assessment, right on my ipad using ESGI.   Here's what I did:
  • Starting with three buttons, some of the buttons are in the open hand and some are hidden in the closed hand.
  • I said, I have ___ buttons in this hand. How many buttons are hidden in the other hand?
  • Repeat with several combinations for the number 3.
  • I want the kids to be accurate (get it right) and automatic (get it quickly).
  • If they are accurate and automatic for 3 buttons, move on to 4 buttons.
  • The great thing about ESGI, is that it will easily move to 4, as you continue the assessment.
  • Once the child is no longer accurate OR automatic, stop the assessment....that is their number.
  • On the child's necklace, use a hole punch to punch out all of the numerals where they were both accurate and automatic with the combinations.
  • The number they will use to build combinations will be the first number NOT punched out on their necklace.
Here's what's cool...if the children are making number towers using unifix cubes, they are doing the SAME activity, but they are each using their own number! This means that some children are using unifix cubes to make towers of  3 while others can be making towers of 4, 5, 6, etc. depending on the number on their necklace!
While the necklaces work well for an easy reference while the kids are working, ESGI will make my small groups for me! The easy bar graph will show me who needs to be in each group! The "green" section tells me who already has mastered the standard, and the "gray" section tells me who has not mastered the standard and who has not been assessed on the standard. Now, I can group all of the kids who need to practice 3 (or any other number) together for my small group activity!
Parents can help us, but who has the time to send weekly parent letters of the things we would like for them to practice at home? ESGI can do that for me, too! Each week, I can easily print out a letter for each child with the things they are still needing to master. This will let the parent know exactly which number their child is working.
But, most parents aren't also teachers. When we send home that parent letter, do the parents really know what it all means or how to help their child?  Again, ESGI to the rescue! I can easily print flash cards for each of the items on the parent letter. This puts something in the parents hand they can use to help their child. 
BUT, my favorite feature of ESGI is that it gives us a baseline of where the child started on each standard.  This allows me to see the growth that each child is making not just where they are! Want to try it for free? You can! Go HERE to get your free trial.  Use to code ADSIT to get 2 months free. This will also save you $40 if you should decide to purchase.


Pin It!

Tuesday, February 14, 2017

President's Day: Crafts and Activities

President's Day is just around the corner. We are getting ready to celebrate in patriotic fashion.  Here are some of the activities we are doing.
George Washington Cut a Sentence Craftivity
This is a fun twist on the traditional step book. Here's how you make it:
  • Stair step 3 pieces of paper. Fold in half and staple at the top.
  • Round of the edges to make the shoulders.
  • We used patterns to make the face and hat.
  • For the eyes, we rounded off squares.
  • The hair is polyfill.
After making the books, the children added the sentences.
  • Cut off one sentence.
  • Cut between the words.
  • Put the word with the capital letter first and the word with the period last.
  • Manipulate the other words until the sentence makes sense.
  • Find the picture to match the sentence.
Abe Lincoln's Cabin Craftivity
Sharing Cherries
There is a tale about George Washington cutting down a cherry tree. The kids love this fun activity to learn fair share.
  • Roll the dice and count that many cherries.
  • Share the cherries between the trees.
  • Record the answer on the recording sheet.
President Day Numbers
This is a fun way to remember the numbers associated with president's day while learning to compose and decompose numbers.
  • Give the children a number associated with president's day.
  • Invite them to build the number on the 10's frames using Abe Lincoln and George Washington heads.
  • Color the tens frames to match what they built.
  • Write the numerals to represent the number. 
This is a great way to move from the conceptual level (building the tens frames), to the pictorial (coloring the tens frames), to the abstract (writing the numerals.
George Washington and
Abe Lincoln Story Problem
Here is another example of children developing understanding at the conceptual level.
  • Reproduce a set of clip art animals.
  • Invite the children to manipulate the animals to solve the equation.
  • Once children are able to do this and explain the process, then they are ready to move to the pictorial level.
  • However, it is okay for children to use numerals and symbols to REPRESENT their answer AFTER solving conceptually.
Making Washington Words
Ever give your children a "big" word and invite them to make little words? What happens? I know in my class one child would understand, and the rest just copied whatever he wrote. I knew there had to be a better way. Here's what I did:
  • Give the children the letters in the big word.
  • Give them a list of words.
  • Invite the children to try and make the words.
  • Mark on the recording page if they can make the word or not make the word.
Making President Words
OR... give them the letters to make the big word. Invite them to make words in a word family.
  • Find the "e" and "t".
  • Then, invite them to place each letter in from of "et". Does it make a new word? If so, write it on the recording page.
  • Do this with several word families.
These activities are from the Hooray for President's Day unit.
https://www.teacherspayteachers.com/Product/Presidents-Day-v30-199840
Pin It!

Monday, February 6, 2017

Teaching Words with the Show and Tell Apron

As teachers we are constantly looking for a way to have engaging activities. The brain learns by pattern but seeks novelty! That means that we have to constantly change what we are doing so that their ever growing brains sit up and pays attention. I *might* just have a new novelty for you to add to your teaching tricks!

Ever met someone who made you smile all.the.time!?  I have...her name is Sandy.  She is the nicest, funniest person, EVER.  I met her in Vegas at the I Teach K conference when she gave me one of her precious Show and Tell Aprons. She also gave me some cards to build sight words in the pockets. I was doing a session on words so this was perfect. I wore the apron during my presentation and modeled making the words. Those teacher didn't walk, they ran, to her booth! They bought her out! She sold every single one!
What ways can you use the apron? Here are a few of my favorite ways.  Make a sight word in your apron. After discussing the word, cover each letter with a blank card. Invite the children to write the word on a dry erase board, in sand or with shaving cream.  Reveal your word one letter at a time. Invite the children to check their word to see if it matches the word in the pocket. IF not, discuss and cover the word again. Now, the children try the word again. Keep repeating the process until the children can write the entire word. This process trains the brain to look all the way through the word and not at just the first letter. 
Little did I know that there was so much you can do with the Show and Tell Apron. How fun at the beginning of the year to use the apron to make their names. Put the name of one of your kids in the pocket. Cover with blank cards. Reveal one card at a time to see if they can guess whose name is in the pocket! OR Mix the letters up. See if they can get them in the right order in the pockets.
Another way to use the Show and Tell Apron is to use the sight words and picture cards to build rebus sentences. Build a sentence like the one above. Invite the children to read the sentence. Now, place another picture card in front of the one in the pocket. Read the sentence again. Repeat, pattern reading builds prosody. Prosody is the natural rhythm that comes with good reading. It is essential for children to develop prosody if they are going to become fluent readers.
Want to read more about these aprons and how you can use them in your classroom? Hop over to my friend Deedee's blog and see how other teachers are using them.
http://mrswillskindergarten.com/learning-with-novelty/
 
Pin It!
 
Pin It button on image hover

Receive All Free Updates Via Facebook.