KinderGals: 2011

Search This Blog

Monday, December 19, 2011

5 Easy Ways to Make Christmas Memorable for Young Children

December is going to be crazy! It can be crazy good, or crazy bad, depending on how we react to the craziness! Here are a few of the ideas that we do in December to make is a special time! If you can't beat them....join them! There are a few necessary supplies for any successful holiday--glitter, glue, and patience!!!!
Slide1
1. Make Special Crafts With Parents
I love making these class t-shirts. At the beginning of the year, we have a 3 pack of tshirts on our supply list. While not everyone brings them, I only have to purchase a few instead of a class set! I invited a few parent volunteers to come and help me make the shirts. Megan did the writing with puffy paint!
Slide2
2. Make Gifts for the Kids
These are the best Christmas presents....ever! We purchased a piece of shower board from Lowes. Andy cut it into equal parts to make the dry erase boards. I bought ribbon at Hobby Lobby, 50% off. I used a paint pen to write their names and decorate it up a bit. Then, I hot glued the ribbon around the edge. Finally, I added a Velcro dot to attach the pen! They LOVED them!
Slide5
3. Create ornaments they can hang on their trees at home...for many years.
When Megan and Tyler were at home, each year we would pull their ornaments from the box and remember that teacher, those friends, etc. When they married, I wrapped up all of their ornaments and gave them to them. Now, Tyler probably could care less, but I think Megan cried.  Those ornaments.  Melts my heart! Here are some of my favorite ornaments.
Pasta Tree: Cut a tree from poster board. Cut a hole in the middle to make the tree a picture frame. Invite the children to cover the tree with pasta...the more the better. After it dries, spray paint with green and add glitter. Megan made this ornament in her 3 year old Sunday School Class and we still have it!
Pasta Wreath: Dye pasta with red and green food coloring. Once dry, thread onto a pipe cleaner, making a pattern. Add a ribbon bow. Not sure of the name of this pasta, but it looks like a flower.
Rudolph: Paint the hand brown and print onto a piece of paper. Once dry, cut it out and add eyes and nose. Add pipe cleaner antlers.
Snowman Fingers: Purchase PLASTIC ornaments. You can use blue or clear.  Paint the three middle fingers with white paint.  Put the ornament in their palm and invite them to "hold" the ornament. This will print their fingers onto the ornament. When dry, use a  paint pen to add eyes, nose, etc.
Pasta Picture Frame: Make these just like the pasta trees.

Slide3
4. Plan centers that are both seasonal and standards based.
Who says learning can't be related to a holiday?  It isn't like we have to pick one or the other.  Each year, I send home a letter to parents before we head home for the holidays. I ask them to save me the stamps from their Christmas Cards. After about 10 years, I had quite a collection. The children love to sort, pattern, count, graph, etc with the stamps.Slide4
  5. Watch for great finds.
The Dollar Tree, The Target Dollar Spot, Walmart, etc. all load their shelves with Christmas and Holiday goodies.  I usually don't purchase too much in December. But, when January arrives, I grab all of those goodies for my Winter Unit or to put up for next year.
Pin It!

Thursday, December 15, 2011

How Tall Are You? Comparing Our Height to the Gingerbread Man

Gingerbread Men are a part of the holiday season. I love this math idea for comparing heights from my friend Kim.
To get ready, she cut out a gingerbread man the height of an average 5 year old. She made a graph and selected some gingerbread man clip art..
Hang the gingerbread man so that his feet are touching the ground. Invite each child to come and stand in front of or beside the gingerbread man. The children decide if they are shorter, taller, or the same height as the gingerbread man. Add a gingerbread man cut out to the correct column on the graph.


Pin It!

Thursday, December 8, 2011

Gingerbread Man Cookie Graph

What a fun way to teach graphing! We invited each of our children to enjoy a little gingerbread snack and here is what happened!
 We gave each of our kids a gingerbread cookie. Pepperidge Farms has these around the holidays! After giving them each of cookie, we said, “One, two, three bite.” They each took one bite and put the cookie back on their plate.
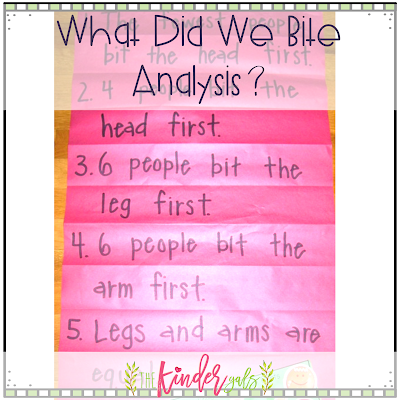
We gave each child a paper cut out of a gingerbread man and a pair of scissors. Using the scissors, they cut off the part the ate during their first bite. After eating the rest of their cookie, we made a graph to show which part we ate first.  One at a time, each child placed their paper cut out on the graph.
Once all of them were there, we wrote our analysis. 
Isn't this fun? We saved all of the cut out parts!
Pin It!

Tuesday, December 6, 2011

Five Christmas Writing Activities

December is a great time of year for writing. By this time of the year, many of our kids are able to put complete thoughts in text. Some are still labeling and a few are still drawing. But, they are ALL feeling like writers. You are starting to feel the reward of the hard work by both you and them! Here are a few writing activities that we did in December to make the holidays a little more fun!
1. A Visit With Santa
Slide2
I remember when we went to see Santa at the Mall on a field trip! When I first started teaching, we went on a field trip every single month! But, over the years that slowly become one field trip a year.  I wanted my children to write about going to visit Santa, but "had all of my children been to see Santa?" I decided to set up a visit with Santa right in my room. I purchased this large Santa from Oriental Trading Co.  I put him in my chair and sat on the floor behind him. Then, I called the kids up one at a time. They sat on Santa's lap and talked to "him".  It was hilarious! They actually look him in the face even though I am sitting right there!
Slide3
Now, they are ready to write. I had some stickers of Santa's head. They placed the sticker on their paper and drew a picture using the sticker as Santa's head.  I took a piece of construction paper and folded it down 1/3. Then, I cut the flap into three sections.  Under each section the kids could write what happened first, next, and last.
2. Memoirs of Christmas
Slide4

Save some of the pictures taken during your holiday festivities for the end of the year. Our last unit in writer's workshop is Memoirs. It is a way for us to revisit personal narratives now that they are able to produce text to convey their meaning.  I put the pictures in a basket and let each child select a special picture that reminds them of something from the holiday. Then, they write their memory.
3. A Book Of Lists
Slide5

I picked up some Christmas Bags from Walmart.  See the picture to see how to fold, add paper and staple the bag to make the book. Each day, the children cut magazine pictures from a given category. Maybe one day the cut toys, another day family members, another day food, etc. After cutting the pictures, they use them to make a list. We make a new list each day or so. By the end of December, they have a book of about 10 different lists.
4. How Families Celebrate
Slide6

Be sure and watch for the holiday napkins AFTER the holiday when they are on clearance.  Napkins make great books. In this book, we talked about all of the ways different families celebrate. This is great since all children might celebrate different holidays in December. Then, the children recorded 4 different ways their own family celebrates.
5. Holiday Cooking
Slide7

Each Friday we do a cooking activity. This picture, a little blurry, is our Reindeer Sandwich Cookbook.  It is simply a peanut butter and jelly sandwich with raisin eyes, cherry nose, and pretzel antlers. 
Slide8

After cooking, we used guided writing to write our recipe.
Pin It!

Saturday, December 3, 2011

More Interactive Writing: Retelling the Gingerbread Man

I'm back with more ideas for Interactive Writing. Here's the post where I detailed how interactive writing is done. You might want to take a break here and read it first!
http://kindergals.blogspot.com/2011/12/here-comes-interactive-writing.html
We recently read the story, The Gingerbread Man. Here are some of the fun things we did to build comprehension. I made these fun bibs for the kids to wear while we role played the story. Children's ability to retell a story is one of the first indicators that the children comprehended the story. 
We also used our reader's theater. I assigned several kids each the same role, the sat together, and read it chorally. The reader's theater builds prosody. The repeated, rhythmic reading helps to develop fluency as the children "sound like" good readers. 
Now that we were VERY familiar with the story, we made a list of the characters. Be sure and go back to the text to find this! Children do not need to memorize! Good readers know to go back to the text. We can easily model this as we share our thinking about using the text to help us with the sequence. Next, the children got busy making the various characters from the story. Since we ended up with enough pieces to make multiple maps, I divided my kids into several groups. While one group was working with me, the others went off to centers. Using our text, we sequence the characters in the order they appear in the story. We glued them down to make the map.  I repeated this with the other groups.
The next day we were ready to get started with interactive writing. I again, selected one group while the others went to centers. Using their map, we used interactive writing and labeled each character. Then we worked together to create the repeated text from the story. Be sure and read the post mentioned above to know exactly the steps we took during our interactive writing.
Each group also created a child sized gingerbread man.  After the maps were made, each group gathered around their map. While one child was the gingerbread man, the other children selected characters from the story.  The child who was the gingerbread man, took the large gingerbread man and "traveled" him through the story. The other children sat near their character on the map. Each character was responsible for saying their part from the text as the gingerbread man traveled to that part of the story..


Pin It!

Thursday, December 1, 2011

Here Comes Interactive Writing

Interactive Writing is one part of a balanced writing program.  In this blog post, we will explore Interactive Writing and how it fits in your writing block.
Modeled Writing
There are several ways we can write with kids. In Modeled Writing, the teacher is doing all of the work. She is doing the thinking and the writing.  For example, when I was building my anchor chart for shapes, I introduced each shape and I labeled them on the chart.
Shared Writing
Another way to write with kids is shared writing. In shared writing, the teacher still has control of the pen, but the kids are helping to compose the text.  In this Patterns  Vocabulary Chart, I worked with the kids as the created a definition for the word. I recorded their thinking.
Interactive Writing
We will talk more about interactive writing below. In interactive writing the teacher and the kids are sharing the thinking and sharing the pen. More on this later...
Independent Writing
The last type of writing is Independent Writing. In independent writing, the child has total control. She is in charge of ALL the thinking and ALL the writing. After we created this apple/pumpkin graph, I gave each child a strip of paper. They analyzed the graph and recorded one observation on their strip of paper. They shared their thinking and we added it to the graph.
Interactive Writing
Ever done interactive writing only to say, "I won't do that again?" You are not alone. When I first tried interactive writing, it was a disaster. Here are some tricks I have used to make interactive writing a productive (and sane) activity.
  • First thing...In interactive writing you SHARE the pen! It doesn't mean you give them the pen, it means you can decide which parts you are going to write and which parts they are going to write. It doesn't have to be a "fair share". You can write as much or as little as you need to  keep the lesson moving along.
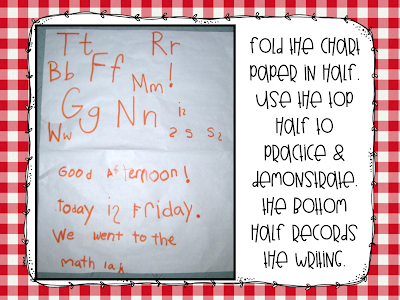
  • The next thing...the other kids need something to do while one child is writing on the chart. This doesn't include rolling around on the carpet! :/ All of our kids have a dry erase board. As the selected child is writing on the chart, the other children are attempting the same thing on their board. This holds everyone accountable for the learning.
  • Another thing....ask yourself, "What parts do I want them to write and what parts am I going to write?" Interactive writing is NOT a standard. It is a tool that we use to teach standards. Before we begin an interactive writing lesson, we decide on which standard we will focus.  For example, we might concentrate on words begin with a sound. Or, we might concentrate on some words we can write really fast (sight words).  Whatever you pick, that is the parts you will invite the children to write on the chart paper. Let's say you are working on beginning sounds. Then, you invite children to write the beginning sound on the chart paper and you fill in the remaining letters to spell the word.
  • In interactive writing, ALL words are spelled correctly. As you share the pen you are modeling standard spelling. Provide a place to practice or model. This is an easy trick that we use.
  • It is easy to differentiate during interactive writing by calling children to the chart depending on their need or level of understanding. I might call some children to write easy to produce sounds like b, s, or t. While I might call other children to write blends or diagraphs.
  • One final thought...a good place to start interactive writing is with a list. Lists only have to be two words! Once the kids have "had enough", you can stop! Don't keep the lesson going once they are "done".  Build stamina as they mature in the ability to focus and stay on task.
Lists
We also explore other genre's of writing with interactive writing. Here are a few samples:
Labels
 Persuasive Writing
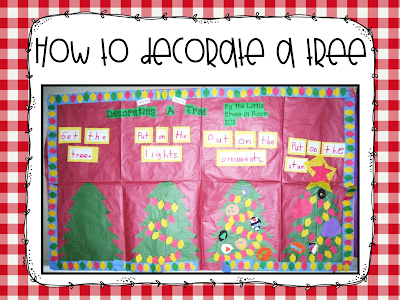
 Procedural Writing
 Informational Writing


Pin It!

Wednesday, November 23, 2011

Publix Turkey Craft Writing Activity


 This blog post shows you how to make this adorable pasta turkey. We made a little book from a paper bag to make a "Thankful Book." Read on to see how...
Slide1
We found this cute little pasta turkey craft in a publix ad.
Slide2
Then, we used a paper lunch bag and some raffia to make little books for each child.
Slide3
We cut apart the tiny "I am thankful for..." text boxes. The kids glued one on each page. Then, they used pictures, letters, and word to show things they were thankful for. Be sure and click on the slide above to get the text boxes.
Pin It!

Tuesday, November 22, 2011

Thanksgiving Ideas

Megan's room was fully engaged as we learned all about the First Thanksgiving, The Pilgrims, and Native Americans. Here are some of the things we did today.
Mayflower Compact
Slide2
We learned that there were 102 Pilgrims on the Mayflower. We made connections to having rules at school to having rules on the Mayflower.  The Pilgrims called it The Mayflower Compact. We wrote our Classroom Compact. First we used interactive writing to make a class list of rules.
Slide3
Then, the children worked to create their own list of rules. Some used pictures, some used labels, and some used sentences. While they are all in different places when it comes to their foundational skill acquisition, they all were successful in the Social Studies concept of why we have rules and laws.
Slide4
Slide5
All About Native Americans
We also learned about Native Americans today. After reading about Native Americans over the last several days, the kids were ready to demonstrate their learning through writing.
Slide6

First, we made this super cute Native Americans using a paper bag and construction paper.
Slide1
Then, I gave each child an "All About Native Americans" book. Here they recorded informational text they learned about Native Americans.
Slide8
Slide9
Here is an example of one child's book. She did a super job! Again, some children used pictures, some used labels, and others wrote sentences to convey their learning.
Slide10
Slide11
We displayed our Native Americans with the Pilgrim Circle Maps we made earlier in the week.
Slide12
Pin It!
 
Pin It button on image hover

Receive All Free Updates Via Facebook.