The pumpkin patch is open! We made these signs, "open" and "closed", so that the kids could let the customers know when the patch is open. Creating signs, environmental print, is a great way to teach print concepts to young kids. Many of the first words kids learn to read are "open", "exit", "McDonalds", etc! Why? Because they are all around!
Next, we set up the dress up area. Last month we had an apple orchard in the dramatic play area. We kept the flannel shirts from the apple orchard and added new aprons and bags with a "pumpkin patch" label. Both the bags and the aprons came from The Dollar Tree.
We also kept the wagon and wheelbarrow from the apple orchard. These are toys from home, that belong to my grandkids. Guilty as charged! How many of you bring your kids things to school?
Next, we made some name tags for all of the jobs for the pumpkin patch. We made tags for bakers, customers, pumpkin pickers, farmers, etc. I found the fall ribbon at The Dollar Tree. We added a label to attach to the container. This helps kids find what they need and it also helps them to clean up.
We also set up an office area. This areas has the order pads, price tags, pens, paper and other items needed to operate the pumpkin patch.
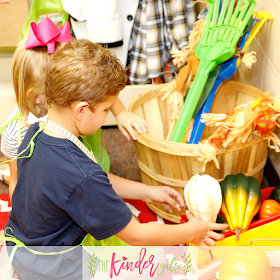
We picked up these scarecrows and rakes at The Dollar Tree. I already had the basket. We made a few labels to designate where the items would be stored.
We made a sign for designating the area of the dramatic play center dedicated to the pumpkin patch. We also included a sign with the price of the pumpkins.
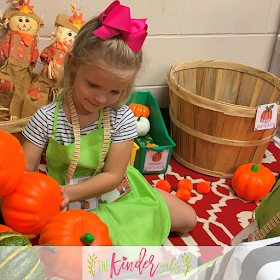
We picked up these pumpkins and gourds at The Dollar Tree. I wanted a few different sizes of pumpkins, so I made some from 2 inch pompoms. I used brown foam to cut stems. I attached them to the pompoms with hot glue.And here are the large pumpkins, also from the Dollar Tree. If you want to create your own pumpkins, go for it! The kids will love making paper bag pumpkins. Simply invite the kids to paint bags orange. Once they are dry, the kids can cut or tear newspaper to stuff the bags. Bunch the bag at the top and add a rubber band. Paint the stem brown!
Last area set up...the "pay here" station. As the kids are making purchases, they visit this area of the dramatic play center.
To begin play, the kids spread the pumpkins around on the floor to create a pumpkin patch. We plan to add some brown vines made from bulletin board paper, but we are currently out!
Now, it's time to visit the patch. The kids select the pumpkins they would like to purchase and add them to their wagon or wheelbarrow.
When it is clean up time, the kids sort the pumpkins by size and return them to the correct containers. What a great math skill!
Another activity in the pumpkin patch is for the kids to collect leaves and acorns. I picked up some leaves at the Dollar Tree. They come in a package with a pretty good number of leaves. I bought 3 different kinds.
The kids spread the leaves around the area.
Using the rakes, the kids can rake up the leaves. Consider having the kids count how many leaves they raked. Or, they could sort the leaves by their color and compare how many of each color they collected. So many possibilities!
Have fun creating a great learning environment for your kids! Create signs, labels, and collect items! You can get the labels, signs, and other resources in this Pumpkin Patch Dramatic Play unit! It also contains printables to create a pumpkin bakery and a hayride!


This comment has been removed by a blog administrator.
ReplyDeleteThis comment has been removed by a blog administrator.
ReplyDeleteThis comment has been removed by a blog administrator.
ReplyDelete