Wednesday, April 25, 2018

Spring Math Games for the Win

Spring...the time of year when the teacher's energy is down and the kid's energy is UP!  BUT...The busier we keep them, the easier it is for us.  Here are some of our favortie fun math center games that we use to channel that energy for the positive.
Racing Rabbits
Here's how you play:
  • Create a board game with 3 columns.
  • Make 3 game pieces. I made these rabbits by opening a paper clip to a 90 degree angle. Then, I taped it to the back of the card to make the rabbits stand up.
  • Give the child a dice.
  • Invite him to roll the dice.
  • The child moves the rabbits that many spaces.
  • He can move one rabbit ALL the spaces, OR he can split the roll between the various rabbits.
  • IF you want to take it to the abstract level...invite the child to record the equation to show how he split the roll. 

Measure Me
 Here's how you play:
  • Create a set a seasonal cards.
  • To pay this game, the children work with a partner.
  • One of the children lay down on the floor.
  • The other child uses the cards to measure the height of the partner.
  • On the recording page, the children draw a person to represent the height of the first partner.
  • Repeat with the other partner.
  • Finish the recording page.

Let's Take Turns
 Here's how you play:
  • Create a game strip with a different clip art image in the center square.
  • Make ONE game piece. I used the paper clip again to make the girl stand up.
  • To play this game, the children work with partners.
  • Invite one child to sit at each end of the strip.
  • The first child rolls the dice. Then, he moves the game piece that many squares TOWARDS himself.
  • Now, it is the other partners turn to roll the dice.  Then, she moves the SAME game piece that many squares TOWARDS herself.
  • The goal is to see who can get the game piece off of their end of the game board.
  • Want to change the standard? Just change what the children do with the dice.  You can give the children two dice. Roll the dice and add or subtract the dots. Move the number of squares indicated by the sum or difference.

Number Line Races
 Here's how you play:
  • Create a number line 1-20.
  • Collect tiny pieces to place on each numeral. I used clip art pictures.
  • Make a gardener game piece. I used the paper clip to make it stand up.
  • Invite the child to put the gardener at the beginning of the number line.
  • Then, he rolls the dice and moves that many spaces on the number line. He removes the clip art piece on that numeral.
  • The object of the game is to collect all of the clip art pieces.
  • Let's say the child rolled a 5. He moves 5 spaces and removes the clip art piece on the 5.
  • He rolsl again. Let's say he rolls a 3. Now, he must decide if he wants to move forward three (5 + 3) or backwards three (5 - 3). If he picks to move backwards, he would remove the clip art piece on the 2.
  • Invite the children to record the number sentences that match their moves.

Number Line Mystery
 Here's how you play:
  • Create a deck of cards.
  • The deck has 4 suits (pots, kites, birds, and umbrellas).
  • For each suit, make a card without a numeral, and cards with the numerals 1-10 (or 20).
  • Lay the 4 cards without a numeral in a column, face up.
  • Shuffle the remaining cards and lay them facedown, in an array by placing 10-20 cards in each row.
  • Invite the first child to turn over a card.
  • Then, the child looks at the card, finds the row with the same suit, and then looks at the numeral on the card to determine where it belongs in the row to make a number line. 
  • Remove the card that is in the space and lay down the child's card.
  • Take the new card and repeat the process.
  • If you want to see further picture directions, this blog post has detailed pictures!
http://kindergals.blogspot.com/2017/08/building-number-sense-with-number-line.html
All five of these games are from the Spring Math Game Pack.
https://www.teacherspayteachers.com/Product/Spring-Math-Game-Pack-121168
You can also grab a FREE number line game for back to school in this blog post.
http://kindergals.blogspot.com/2015/06/heres-what-is-happening-in-orlando-day.html

Thursday, April 12, 2018

3 Easy Steps for Effective Literacy Centers

 How many different ways have you tried literacy centers? Does the management of literacy centers cause you nightmares? Do you struggle with making activities meaningful AND independent?  If you answered yes to any of these questions, here's the good news---you are not alone! Literacy Centers provide us with the opportunity to call small groups while the children are engaged in independent activities.
Here are 3 Easy Steps to develop effective literacy centers!
Mini Lessons
Each segment of our day begins with a mini lesson. Literacy Centers aren't any different! Our literacy centers section of the day is 60 minutes. The first 10 minutes is a mini lesson. We have are 2 different kinds of mini lessons. The first type, procedural mini lessons, is essential. The first month of the year is full of procedural mini lessons. We cover topics such as: What do you do when you are finished? How do you work in a group? What do you do with your work?  Each of these are individual mini lessons as we build independence! When I first tried literacy centers, I covered too much in one lesson and the children weren't applying the procedures. Now, we learn something new each day, AND the kids practice!
The other type of mini lessons is when we are teaching a new standard/concept.  These activities introduce the NEW learning. New learning does not occur in centers...centers are intended to practice the things we have already learned! These mini lessons also introduce the types of literacy centers.
An important part of any mini lesson is active engagement. This is the time for the children to practice the new learning.  It is a great way to determine if the children have mastered the new learning as well as to determine if your lesson was effective! It will let you know if you need to spend an additional day on this concept, or if you need to pull a few children to your small group table for further instruction.
We spent some time scripting out our mini lessons. This ensures that we have spent time thinking through the best way to teach the new concept as well as what we expect from the children during active engagement.
Have to Center Areas
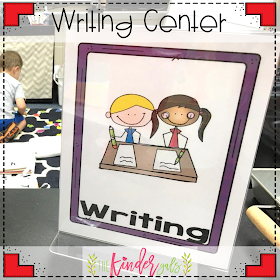
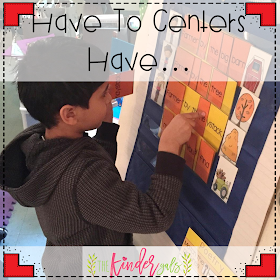
To get started with centers, we divided our classroom into 5 zones-writing, alphabet, phonemic awareness, word work, and reading. We created a sign for each of the areas. These signs match the images on the center assignment board.  Each day, the children visit ONE of the 5 zones. This means that by the end of the week, they will have visited all 5 areas.
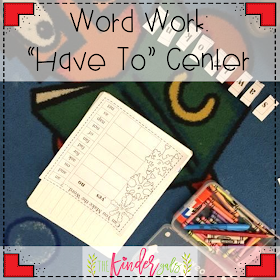
In each of the areas there is a "have to" center. These activities practice and maintain our prior learning.  They are NEVER a new teach! In order to ensure independence, MOST of our kids need to have mastered the standard AND participated in a similar activity during large or small group.
Each "have to" has a recording page.  This enables us the check their work.  It is also a way to hold them accountable. When the children finish their center, they place their recording page in a designated basket. Since I am conducting small groups, I can not check their work during centers! At a later time, I can quickly check the work in the basket. If a child has rushed through the work, they do it again! I tell them, "Do it nice, or do it twice!"
What about the children that never seem to know what to do?  You know you have explained it, so why don't they remember? We can't introduce 5 new centers on Monday and expect the kids to know what to do on Friday! That's why very similar activities have been used during large or small group time. The "I Can..." cards are a great visual reminder of what is expected in that "have to" activity.  We teach our kids to ask the others in their group how to complete the center. If none of them seem to remember, they can ask the kids who worked in that area the prior day.
Here are some other examples of "Have to" centers. In the writing center they labeled a fall picture.
In the word work center, the children used the letters in "snowflake" to make little words. Invite them to make each of the "little words" on the recording page. Ask yourself, "Could I make that word using the letters in snowflake?" On the recording page they mark either yes or no.
In the alphabet center they used a picture dictionary. Using the little book, the found the page in the dictionary to match the letter on each page. They selected a picture on each page to illustrate and label.
In the phonemic awareness center, the children sorted the pictures by one or two syllables. Then, on the recording page, they colored either one or two circles.
In the reading center the children made this fun turkey. It reminds us to get our mouth ready. Then, the children read their little book. On each page we marked the beginning letter for the noun. This reminds the children to get their mouth ready by making the sound for that letter.
Another fun craftivity for the reading center was making these cars. We used the cars to read our little book of cvc words as we looked all the way through the word.
Can Do Centers
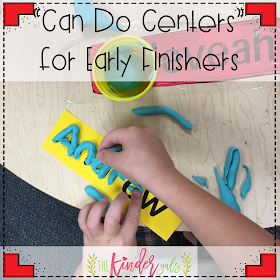
So far, all's good. The problem occurs when the children all finish at different times.  Ever tried ringing a bell and having kids move to the next center? We did and it was a nightmare! We were rushing our deliberate learners and stressing out our struggling learners.  If we truly believe in differentiation, we learned that we also had to look at the differences in their rates of learning! So.....for each area we developed some "can do" activities. These are centers that you "can do".  They do not have recording pages nor am I checking them! These are quality activities that keep the kids engaged!
As we introduced each of the "can do" activities, we added cards to remind the children of their choices in each of the 5 areas.
These cards are displayed in each area.
For each of the "can do" choices, we developed scaffolding charts. These charts are displayed by the resources to remind the children of the things we learned that we could do with the materials.
 We wanted to get some cards posted early, but soon replaced them with these cards that have MORE ideas of things to do with the resources. At the bottom of each chart it says, "think of your own idea."  We always encourage children to take charge. Children who create their own learning are working at the highest level on Bloom's taxonomy.
Developing and Introducing literacy centers is hard work! But, we found that using these 3 steps, we were the most effective.  Our biggest suggestion....slow down! Take the time to teach procedures and new activities. If you have any questions, just let me know by leaving a comment below!
All of the items in the post are from...Year Long Bundle of Literacy Centers.
https://www.teacherspayteachers.com/Product/Kindergarten-Centers-YEAR-LONG-BUNDLE-2006443

Wednesday, April 4, 2018

Academic Vocabulary..What is it, Why is it important, and How do we teach it!

Academic Vocabulary...what is it? Why is it important? How can we have a systematic approach to teaching it?  Ever ask any of these questions? We can take a few minutes to explore these questions.

What is it?

Academic Vocabulary words are the words that we use to engage in conversations about academic topics! Makes sense, right?  These include the words that we use while teaching reading and math.   Academic Vocabulary words are Tier 2 Vocabulary words. This means that these words are content specific and should be taught as needed for comprehension and fluency.  Research has shown that nearly 80% of comprehension in nonfiction depends on the child's ability to understand the vocabulary. 
Each week, we look carefully at the content we are teaching in literacy. We made word cards for each of these words.
Then, we created a "word wall" that would hold just the literacy vocabulary words.  Each week we add our new words.
 
We did the same thing for our math vocabulary. 
We created a separate word wall for the math words. 

What is it important?

Academic Vocabulary words are the words that children need in order to talk about their learning. If children are to engage in peer to peer conversations about their learning, knowing and understanding these words is essential. HOWEVER, some words are more important than other words. These are the words for which we want kids to develop a DEEP understanding. Not all words will be taken to this level.  We asked ourselves, which vocabulary words are used in standards that grow over time. For example, it is essential that children have a deep understanding of the word "add".  They need to have a mental image of combining sets! This means that it is important for teachers to create a streamlined list of words to focus our instructional efforts.

What is a systematic approach to teaching academic vocabulary?

1. First, pick a word. Once the WHOLE list of words have been identified, we want to narrow that list down to the MOST important words.  Then, we select one literacy word and one math word for each week.  These are words that the children already know. The vocabulary word has been used in instruction for a few weeks. Now, we want to take that word to a deeper level of understanding. 
2. Next, develop a linguistic representation of the word. According to the work of Marzano, children need to generate a linguistic representation of the word. This is often referred to a "definition". But, it is very different! Children are not remembering a definition given by the teacher. Instead, a discussion among the children develops this linguistic representation.
3. Last, the children draw a nonlinguistic representation of the word.  Marzano tells us it is important for the children to draw a picture that illustrates the word.  I think, the children draw on their mental image of the word. Their ability to draw a representation of the word is evidence of their mental image!
While these charts can be produced with no prep by just writing on a piece of chart paper, Megan created this reusable vocabulary chart. She laminated the chart. Then, each week we use post it notes and paper to show our learning. Here's an actual lesson...
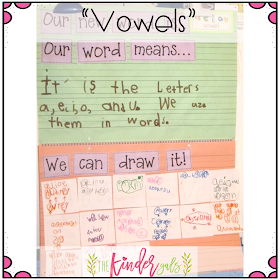
Megan posted the word "vowels". The children already know the word! It is time to develop that deeper understanding.  After the discussion about the word, we used interactive writing to record our linguistic representation of the word.
Then, we gave each child a piece of paper to draw their understanding of the word. This is the nonlinguistic representation.
Here's the completed chart.
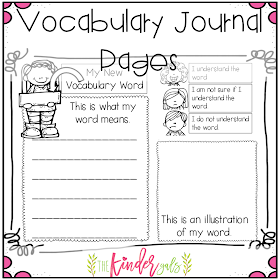
To extend the learning, each child has a Vocabulary Journal. Here they work independently to record their own linguistic and nonlinguistic representation of the word.
 
We made a cover for the vocabulary journal.
Then we made the vocabulary journal pages. We created a space for the children to record their linguistic and nonlinguistic representation. Marzano also tell us the importance of the children rating their understanding of the word.  While young children usually color the smiley face, this begins a practice that will be used in the other grades in our school.
At the end of the lesson, I asked the kids, "Do all words have vowels?" I invited the children to be on the lookout for words without vowels. During the day, as they found the words, they were to record the words on the chart. Did they find any? At first we might say no, but the children recorded all of the "y" words. What a fun way to introduce "y" as a vowel!
https://www.teacherspayteachers.com/Product/Academic-Vocabulary-Interactive-Journal-Bundle-by-Kim-Adsit-1082432
You can find all of the vocabulary word cards, the pieces to make the chart, and the student journal in this Academic Vocabulary unit.