KinderGals: September 2012

Search This Blog

Sunday, September 30, 2012

5 Easy Steps to Organize Your Reader's Workshop

We are getting ready to start our fifth unit in Reader's Workshop. In this unit we have 4 main goals:
  • We want to teach our kids the importance of getting ready to read a book before actually starting to read the words. We want them to warm up before they read by taking picture walks, telling a story through pictures, and thinking about words they may see as they are reading.
  • We also want them to start using letter sounds to figure out words. We want our kids to learn to use pictures and beginning letter sounds to read words. We also want them to know how to “switch it up” if a word they see does not match what they think it should be. And, we will show them how to look all the way through a word to confirm their word choice and how to stretch out and blend letter sounds to read words.
  • We want them to know the importance of rereading to figure out a word, to understand what they are reading, to sound like a good reader and to have fun.
  • And finally we wanted them to knw how partners work together as readers. We want them to know how to actually become like a teacher, helping their partners with picture walks, figuring out words and asking and answering questions.
Let's take a look at what makes a mini lesson effective:
Construct a Unit Overview
Take some time at the beginning of the unit to plan out the month. This is when you decide what are the key points you want to teach. Then, unpack the key points and think of the 4-5 topics for your mini lessons.  Here are the themes we are using each week to match these 4 main goals:
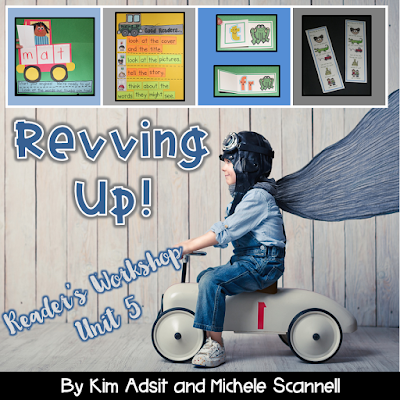
  • Week one- “Revving up to read"
  • Week two- “Letters help us read”
  • Week three- “Back up and reread”
  • Week four- “Partners can be teachers”
Scroll to the bottom of this post to grab our FREE monthly overview.
Develop Anchor Charts
Develop anchor chart to bullet your lessons. Anchor charts are used by you and the children as a reference throughout the unit.  You will be referring to the chart daily and as questions arise during work time. Here is the anchor chart we are using for Week 1. 
Script Your Mini Lessons
Look at the detail of this plan! For effective mini lessons, since they only last 10 minutes, it is important that we think through the lesson and script out our plan. Good scripting leads to effective lessons! Each of the bullets on the anchor chart will be a separate lesson. When we are scripting our lessons, we follow a pattern. Here is the pattern for effective mini lessons:
  • Connect: "Remember yesterday when we.." For this portion of the lesson you are quickly reminding the children what you did yesterday.
  • Teach: "Today I am going to show you..." For this portion of the lesson you are naming the standard. Then, you model. I always try to remember that modeling means you become the reader. You show the children what it looks like and you share your thinking out loud.
  • Active Engagement: "Now it's your turn." For this portion of the lesson the children practice the new learning. This is the most important portion. It is here that we can determine if children have mastered the teaching. It helps us plan where we need to go next, who we need to pull for small group, and the effectiveness of our lesson.
  • Link: "Remember boys and girls, today and everyday, good readers..." For this portion of the lesson, you are reminding children of the new learning.
  Use Engaging Resources
We want to use effective materials during out lessons. We know that our brain is stimulated by novelties. When we use games to teach a concept, the brain is more likely to learn the information while it is growing more brain power! We are using this fun game in week two when we are teaching our kids to "switch it up". First we will show them the frog with the "fr". The kids will call it a frog. Then, flap over the "t" to cover the "fr". Now the kids have to "switch it up" and say toad.
  Celebrate the Learning
At the end of each unit we celebrate. It is a way to wrap up a unit before introducing a new unit. For Unit 5 we made these cute truck. We stapled 3 stack of paper to the truck. The kids wrote the letters for each section. Then, they can flap the letters to make tons of real or nonsense words!
These ideas are from Unit 5 Revving Up.
https://www.teacherspayteachers.com/Product/Readers-Workshop-Unit-5-Revving-Up-by-Kim-Adsit-and-Michele-Scannell-340628
We have also bundled all of our Reader's Workshop units here.
https://www.teacherspayteachers.com/Product/Readers-Workshop-MEGA-BUNDLE-by-Kim-Adsit-and-Michele-Scannell-1013520
Pin It!

Wednesday, September 26, 2012

Columbus Day is Coming!

Teaching young children about Christopher Columbus can be fun and exciting. Not only can you teach children about Christopher Columbus, but you can also build in many science, social studies, language arts, and math standards. When you teach your kids about Christopher Columbus, there are two different ways you can approach the topic:
All in One Day
Or..A Little Each Day
All In One Day is a "blow out" day. We completely forgo our regular schedule and the whole day is about Christopher Columbus. It is a crazy day, but it is one my kids talk about all year. By doing it this way, it is something different and unique. The brain loves novelty!
Or...A Little Each Day. In this format, you could do a different activity each day stretched out over the week.
Here are some of the activities we use to celebrate Christopher Columbus.
Slide1
 Here are the float and sink activities that we did. The children made predictions, checked their predictions, and made their bottle books!
Slide2
For this game, the children rolled a dice and moved the boats toward the water. They can move one boat or divide the roll between two or three boats.Slide3
This is our earth! The kiddos painted “land” on the sphere and on the back made a circle map of things that are spheres.
Slide4
This was the highlight…to say the least! The kiddos had so much fun making the coke floats! This was a fun way to teach predictions, doing the experiment, and graphing the results of the experiment!
Slide5
Here is where we made an all about Christopher Columbus Book! They loved the toilet paper roll telescopes! The chart is one that I found on someone else’s blog that they used while making the book.
Slide6
Here is where we made a large Santa Maria and then each child made their own. We were working on labeling.
Slide7
Slide8
We talked about characteristics of Christopher Columbus and then the children drew and wrote about their connections. Then we shared them with our buddies.
Slide9
Here are some photos from where some other bloggers posted pictures from the packet! Love to see how people use things a little differently!Slide10
All of these activities are from the Hooray for Columbus Day Unit. What are you planning for Columbus Day? Do you have a blog post about Columbus Day? If so, leave a comment with a link to your post! Would love to see them as we will actually have time to do it now BEFORE Columbus Day!
Pin It!

Monday, September 24, 2012

How Do You Display Birthdays?

When I saw  Erica’s post for how to display birthdays, I started looking through my pictures to see what I had.
This watermelon display was the last display I used. I cut the watermelons from paper. The vine was made with  door knob pulls, buttons, and ribbon. The ants were the wooden cut outs. This was a picture that I took when I was setting up the room. After I found out the birthdays, I added their names to the seeds. Some months I had to add more seeds!
 Here’s how my friend Bert displays the birthdays in her strawberry themed room and below is Megan’s jungle themed display. As I was looking through these pictures, it was very clear to me how technology has changed the way we do things! Not only does the computer allow us to use various fonts and clip art, it also allows us to see how others are doing things. Whether we copy the idea, as is, or it inspires us to think “Oh, I could….”, the internet has allowed for this exchange of ideas.
Speaking of inspired by others, Pinterest has totally changed everything! When my sweet daughter in law, Ginny, asked me to help her get a few things ready, I was more than willing to help! She showed me a photo that she saw on pinterest for how she wanted to make her birthdays. Well, who knew that this was Erica’s original idea? I posted the picture in an earlier blog and never mentioned Erica’s name only that is was from pinterest. The picture Ginny showed me didn’t track the idea back to her. I guess in this day and age, we must be careful to give “credit where credit is due”! It’s so easy to snag a photo and never seek out who was so willing to share that idea! So….”Thanks and Sorry, Erica that I didn’t say your idea was super cute!” So what is Eria’s idea? Well, here’s Ginny’s picture. To read about it hop over to Erica’s blog and read all about it!
Pin It!

Saturday, September 22, 2012

Fire Truck Cookies Brace Map

As many of you know, in August Andy and I moved to Washington DC where he once again is a student. When, Andy told me he was going to take me away from my southern roots, I was less than thrilled! After some tears and looking at this more as an “extended vacation” I finally gave in to the idea. I have lived in my home town for over 40 years along with all my sisters, my mom, my nieces and nephews, and most importantly both of my kids and their spouses! Now, I am living right in the middle of downtown DC! We live just a few blocks from the National Mall with all the monuments and a few blocks from the White House. There is always somewhere to go, something to do, and another quaint little restaurant with outdoor dining for dinner—all within walking distance. So what is missing? Well, how about a Dollar Tree, a Hobby Lobby, a Michaels, a Walmart, a school supply store? Nope…none of them in DC. What’s a girl to do? One day while Andy was in class I did a little internet search to find a craft store and a school supply store. Let’s just say when he got home, he was greeted by one very excited teacher who had set the adventure for the evening! After over an hour of driving in traffic we arrived at the Michaels. I was like a crazy woman trying to decide what I needed to get! Then, off to the Lakeshore, just a quick 10 minutes away.Slide2
See all my purchases! I think I bought all the scarpbooking paper they had! Another issue with DC is the whole grocery shopping thing! We have a CVS right out the door of the apartment, so simple things are there. But when we need REAL groceries, it is quite an ordeal. We either have to drive, and then if you can find a place to park, pay $20. Or,take the metro! Either way, quite an ordeal. So while we were out, I wanted to make a grocery store run. I was looking for food items that could be the parts of a fire truck.Slide3
So here’s what I came up with! And here’s what it looked like when I got home and put it together!
Slide4
I wanted a concrete way to show the parts of a fire engine without doing an art activity!  I made a poster brace map and used the “craft/cooking” as the connection. The parts on the right side of the poster, are attached with velcro.  I did make a recording sheet where the children can then draw the parts of the fire engine to make their own brace map. BTW, I had them frost the fire trucks with either red or yellow frosting. Since not all fire trucks are red, I wanted to be able to turn this into a graphing activity. “Did you make a red or yellow fire engine?”
Slide5
The fire engine brace map is part of my new Fire Fighters Unit. I am putting the finishing touches on it and it should be ready by tomorrow! So I’m off to the National Mall. Target is sponsoring some reading event with lots of different authors! Can’t wait to see if I get to meet any of them.
**Update: The unit is ready! You can get it here.
https://www.teacherspayteachers.com/Product/Fire-Fighters-Literacy-and-Math-Activities-for-the-Common-Core-by-Kim-Adsit-332739
Pin It!

Thursday, September 20, 2012

4 Easy Tips for Effective Behavior Management

Do you have your kids marching right along? It takes me about 30 days to feel like I can breathe again.  Working on those transitions and routines can be exhausting! Here are some of my favorite behavior tips.
I don't think any of us know all of the answers when it comes to managing behavior. If we did, we would all be doing the same thing. Sometimes the things we do work for most of the children, but not for everyone. We are constantly changing and trying new things to have a classroom environment that is conducive to learning.  Here ae some of the ideas that I like the best. Feel free to leave a comment with your favorite classroom management strategies.
Clean Up Time!
When it is time for the kids to clean up, I play a song on my device.  I don't have a special clean up  song, the kids just know when the music comes on...clean up! If they clean up before the song is over, we add a piece to the Mr. Potato Head.
Every few months, change what they are building.  For example, in the fall you might build a scarecrow. In the winter, you might build a snowman. Or, in the spring you might build a flower pot.
Group Time
Whenever the kids are working in small groups, they have the opportunity to earn a piece for their team board. If they have worked well together...they earn a piece.  For example, they are earning the tools for their tool box!
Again, change it up during the year. Here are a few others that I have used.
Target Rule
Do you ever get tired of the kids breaking the same rule over and over again? Do you get tired of telling them over and over again not to do something? I know I did! You might want to try this! It worked super with our kids!
Collect 5 (or more) object to display in front of your kids. I am using clip art with magnets on a cookie sheet.  Select your target rule...mine was to raise your hand instead of yelling out the answer.  Anytime one of the children "break" the target rule, remove one of the displayed objects. DON'T say anything! This is a visual reminder! If it is a REAL problem, you will want to have more objects. You don't want to run out before the session is over.  Return all of the objects each time you begin a new carpet time.  Any that we have left at the end of the time, earn us happy rocks.
Happy Rocks
I made "Happy Rocks" with the smooth glass rocks from the Dollar Tree. They have one flat side and one curved side. On the flat side, I drew a face. 
 Happy rocks are "earned" either as a class or as individuals. Either way, they go into the same jar. We are working together to fill the jar. At the beginning of the year, reward frequently. Spotlight desirable behaviors as ones that are helping the class. It isn't about reward a child, it is about rewarding a behavior.
What's the Reward?
That's the question, right? What do they get when they build the potato head, or fill up their team board, or fill the happy rock jar? I once heard the saying,
"You can have a well managed class with crazy, fun activities OR you can have managed activities with a crazy class!" The desire is to build that intrinsic motivation to do the right thing. When we do the right thing, we have more fun with each other! BUT, even as teachers we like a reward. Let's hear it for a jeans day! The rewards don't consist of candy or dollar store treats! It's really simple. In kindergarten, we plan great activities--cooking, sidewalk chalk letter writing, shaving cream word writing, etc! These are the rewards! It sounds like this, "I am so proud of the team work I see in this room.  It is great when we work as a team, we all win. I have decided that we need to have a little fun, so today during writing time, we are going to go outside and write with chalk on the sidewalk! How fun will that be!?"
Classroom management is essential...it maximizes teaching time! Be sure and share your favorite tip in the comments!
The ideas in this post are from the Tackling Transitions Unit.
https://www.teacherspayteachers.com/Product/Transitions-Tackling-Transitions-by-Kim-Adsit-947178


Pin It!

Sunday, September 2, 2012

Building a Word Family Word Wall!

Here's a question for you? Do you start the year with your room decorated and all things hanging? Or do you  hang things after the year begins? This post shares how Megan changed her thinking about what should be on the walls from the beginning of the year!
Palm Tree Word Families
In the past Megan and I wanted to have everything hanging up in our rooms for the first day of school. But, this year, Megan is slowing that down a little. Her plan is to hang them as she introduces them! She made her word families on palm trees to match her jungle theme. Each week we introduce a different word family, and will hang the tree up as they are introduced. I think that will give the kids ownership to the items on the walls. We are hoping this means they will use these resources more for their writing. Good idea, Megan!
Here's what we did:
  • First, cover all of the onsets with one color of post it notes and the rime with another color of post it notes. We used orange for the onset and blue for the rime.
Word Family Journals
  • Then, give each child  a word family notebook. Invite them to  write “---at” at the top of their page.
  • Remove the orange post it note from the first onset and had the children write that in their book.
  • Then, remove the blue post it note from the rime.
  • As you do more of the words, talk about the pattern and encouraged the children to use that pattern to figure out what might be under the blue post it notes.
  • It was the first time, so they were a little slow getting started, but by the end of the lesson they were catching on.
Revealing Onset and Rime Under Post It Notes
Pin It!
 
Pin It button on image hover

Receive All Free Updates Via Facebook.